Calculator
 Level | 1 |
|---|---|
| Core? | Core |
 Duration | 5 minutes |
| Duration (minutes) | 5 |
 Learn | Custom FunctionDesigner ToolFieldsTables |
 Prerequisite |
Intro
Are you struggling with basic arithmetic? Digital-Clay can help! In this mini project, you'll learn how to create a simple calculator database solution, with the help of custom functions. With this solution, you'll be able to add, subtract, multiply, and divide two numbers together. So let's get started and learn how to build a basic calculator app with Digital-Clay!
What you will learn
- HOW to create a table
- HOW to create numeric fields
- HOW to create a custom function field
- WHAT a custom function field is
- HOW to do basic math (+, -, *, /) in Digital-Clay with custom functions
FAQs
- How do I create a table in Digital-Clay?
- To create a table in Digital-Clay, open Clay Studio and go to the “Designer Tool” tab. Then, click the “New Table” button and fill out the required information.
- What type of fields should I use for basic math operations?
- For basic math operations, use numeric fields.
- How do I create a custom function field?
- To create a custom function field, click on the “Custom Fields” option under “Tools” in the table. Then, click the “New...” button. Give the field a “Name” and choose the “Custom Function” data type.
- What is a custom function field?
- A custom function field is a field that performs a specific calculation on other fields.
- How do I do basic math (+, -, *, /) in Digital-Clay with custom functions?
- To do basic math operations in Digital-Clay with custom functions, first add two numeric fields to the table. Then add a custom function field and select the “Numeric” data type. Add the two fields to the custom function, and select the arithmetic operation (+, -, *, /) you want to perform.
- How do I create a new item for a newly created table?
- To create a new item for a newly created table, click on the “New Item” button and fill out the fields with the desired values. Then click “Save”.
Instructions
- To start building out basic calculator we are going to need a table to store the information. You might be thinking… What information do we need to store? We’ll a basic calculator will take in two values and preform arithmetic (+ , -, *, /) operations on those two values. The final result is calculated and stored as another value. So we will need a table, which we will call “Calculator” which will contain two separate input values which in Digital-Clay we call “Fields”. These “Fields” need to be number fields so that math can be preformed on them. In Digital-Clay you can easily specify the type of a field when adding a field to a table. Lastly we will need to preform the calculation which we can do with a custom function field. In this mini project we will create 4 separate custom function fields to display the calculated value, one for each type of arithmetic operations (+, - , *, /)
- We will start by opening Clay Studio on your computer and go to the “Designer Tool” tab
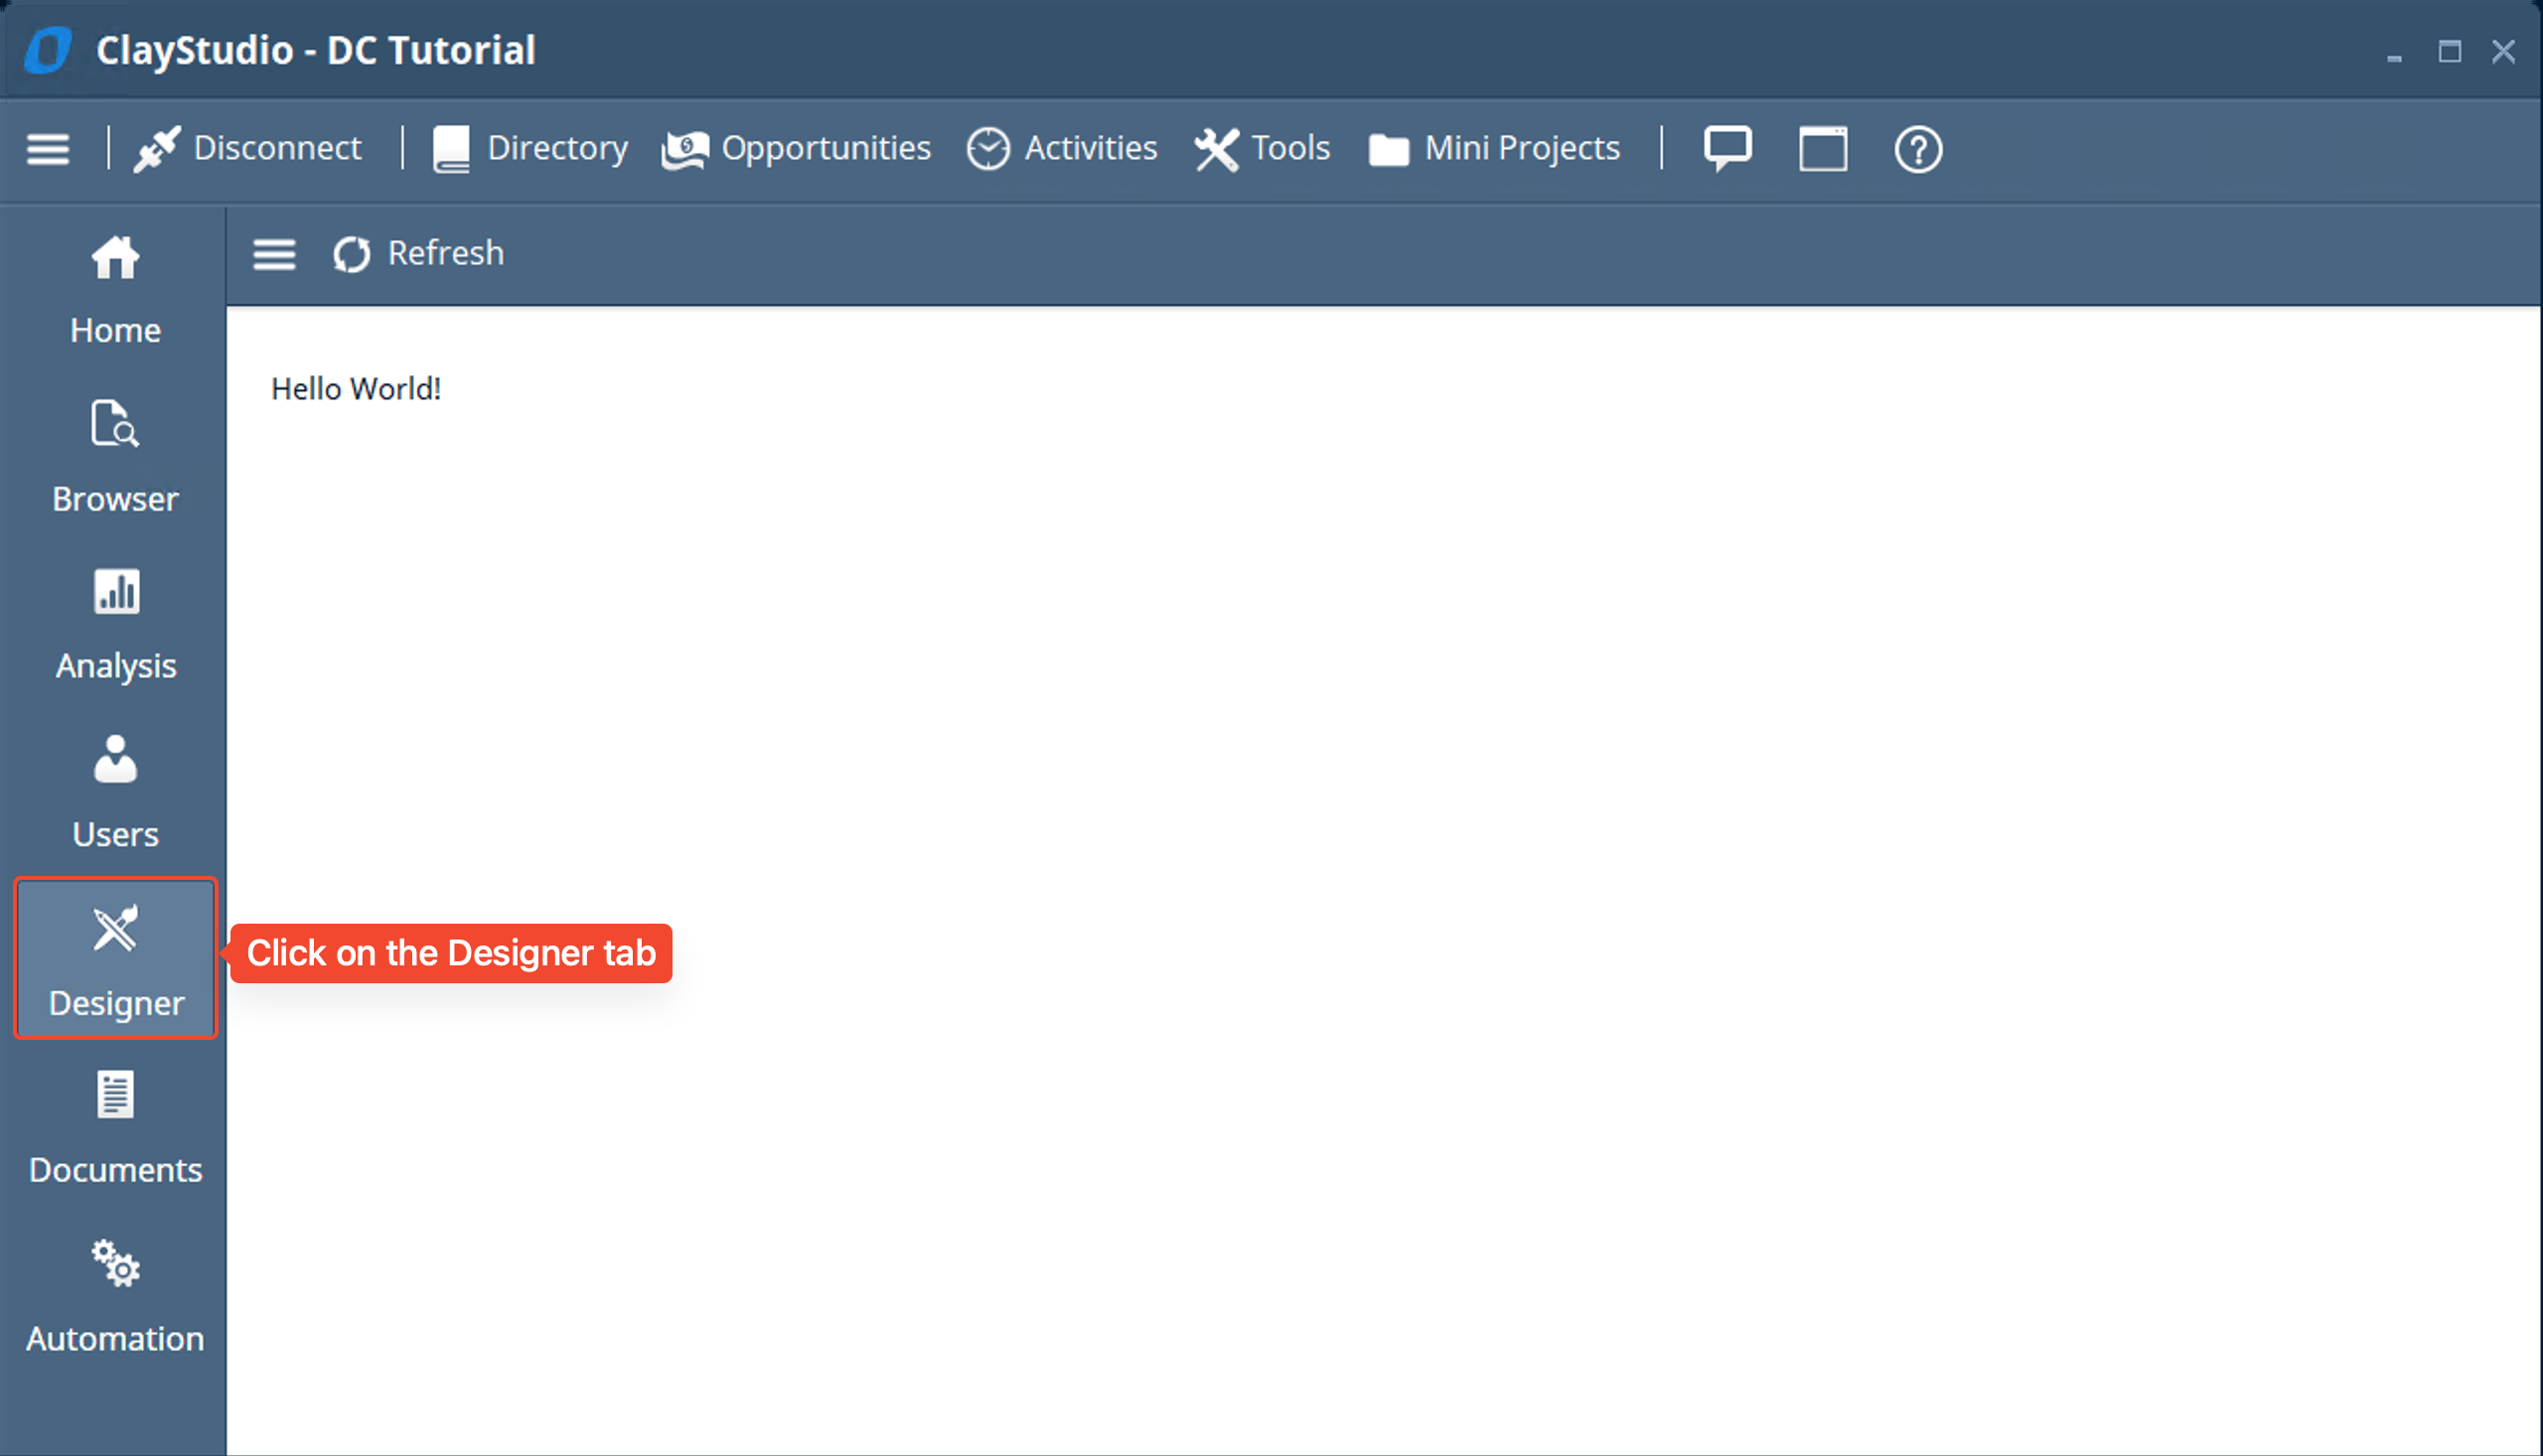
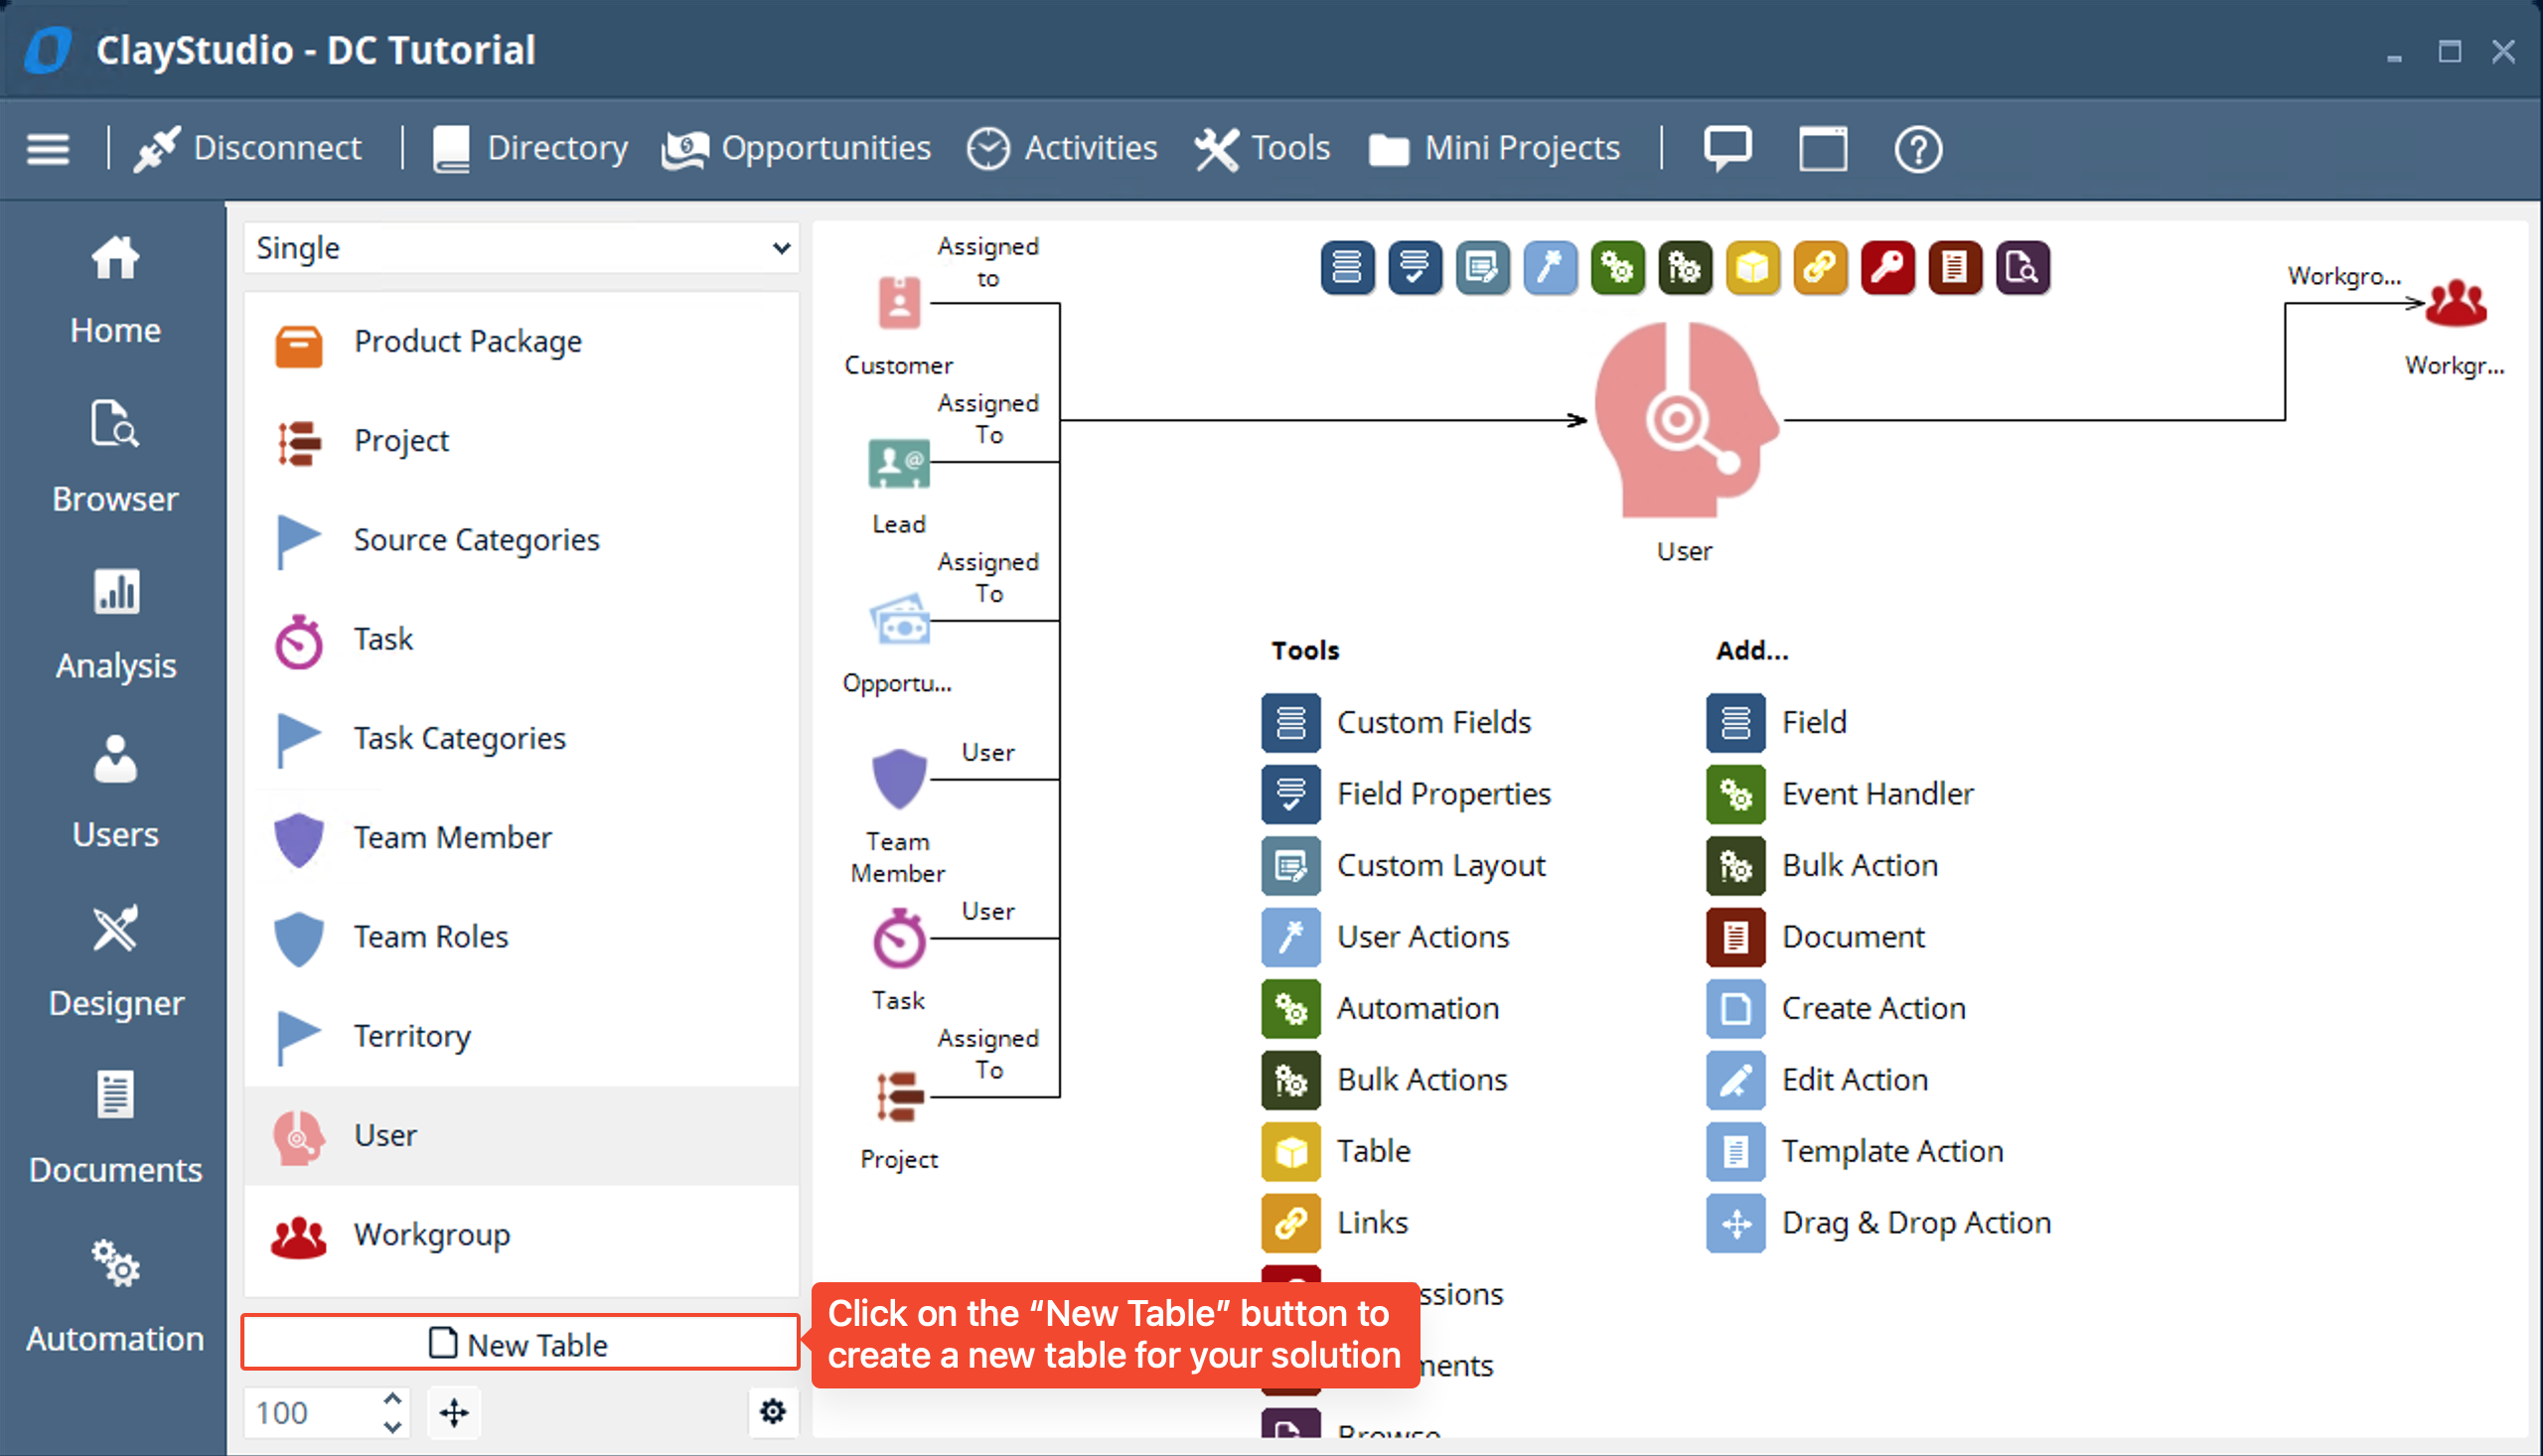
- We will see the “Designer Tool” where we will be able to create new tables as well as see many built in tables like: Users, Task, Workgroup, Lead, Team Member, opportunities, etc… We will click on the “New Table” button to start creating a new table
- For the purposes of learning in this (and future) mini projects we will be building most of our tables and structure our database solutions from scratch rather then using built in tables so you can learn as much as possible on the functionality of how Digital-Clay works.
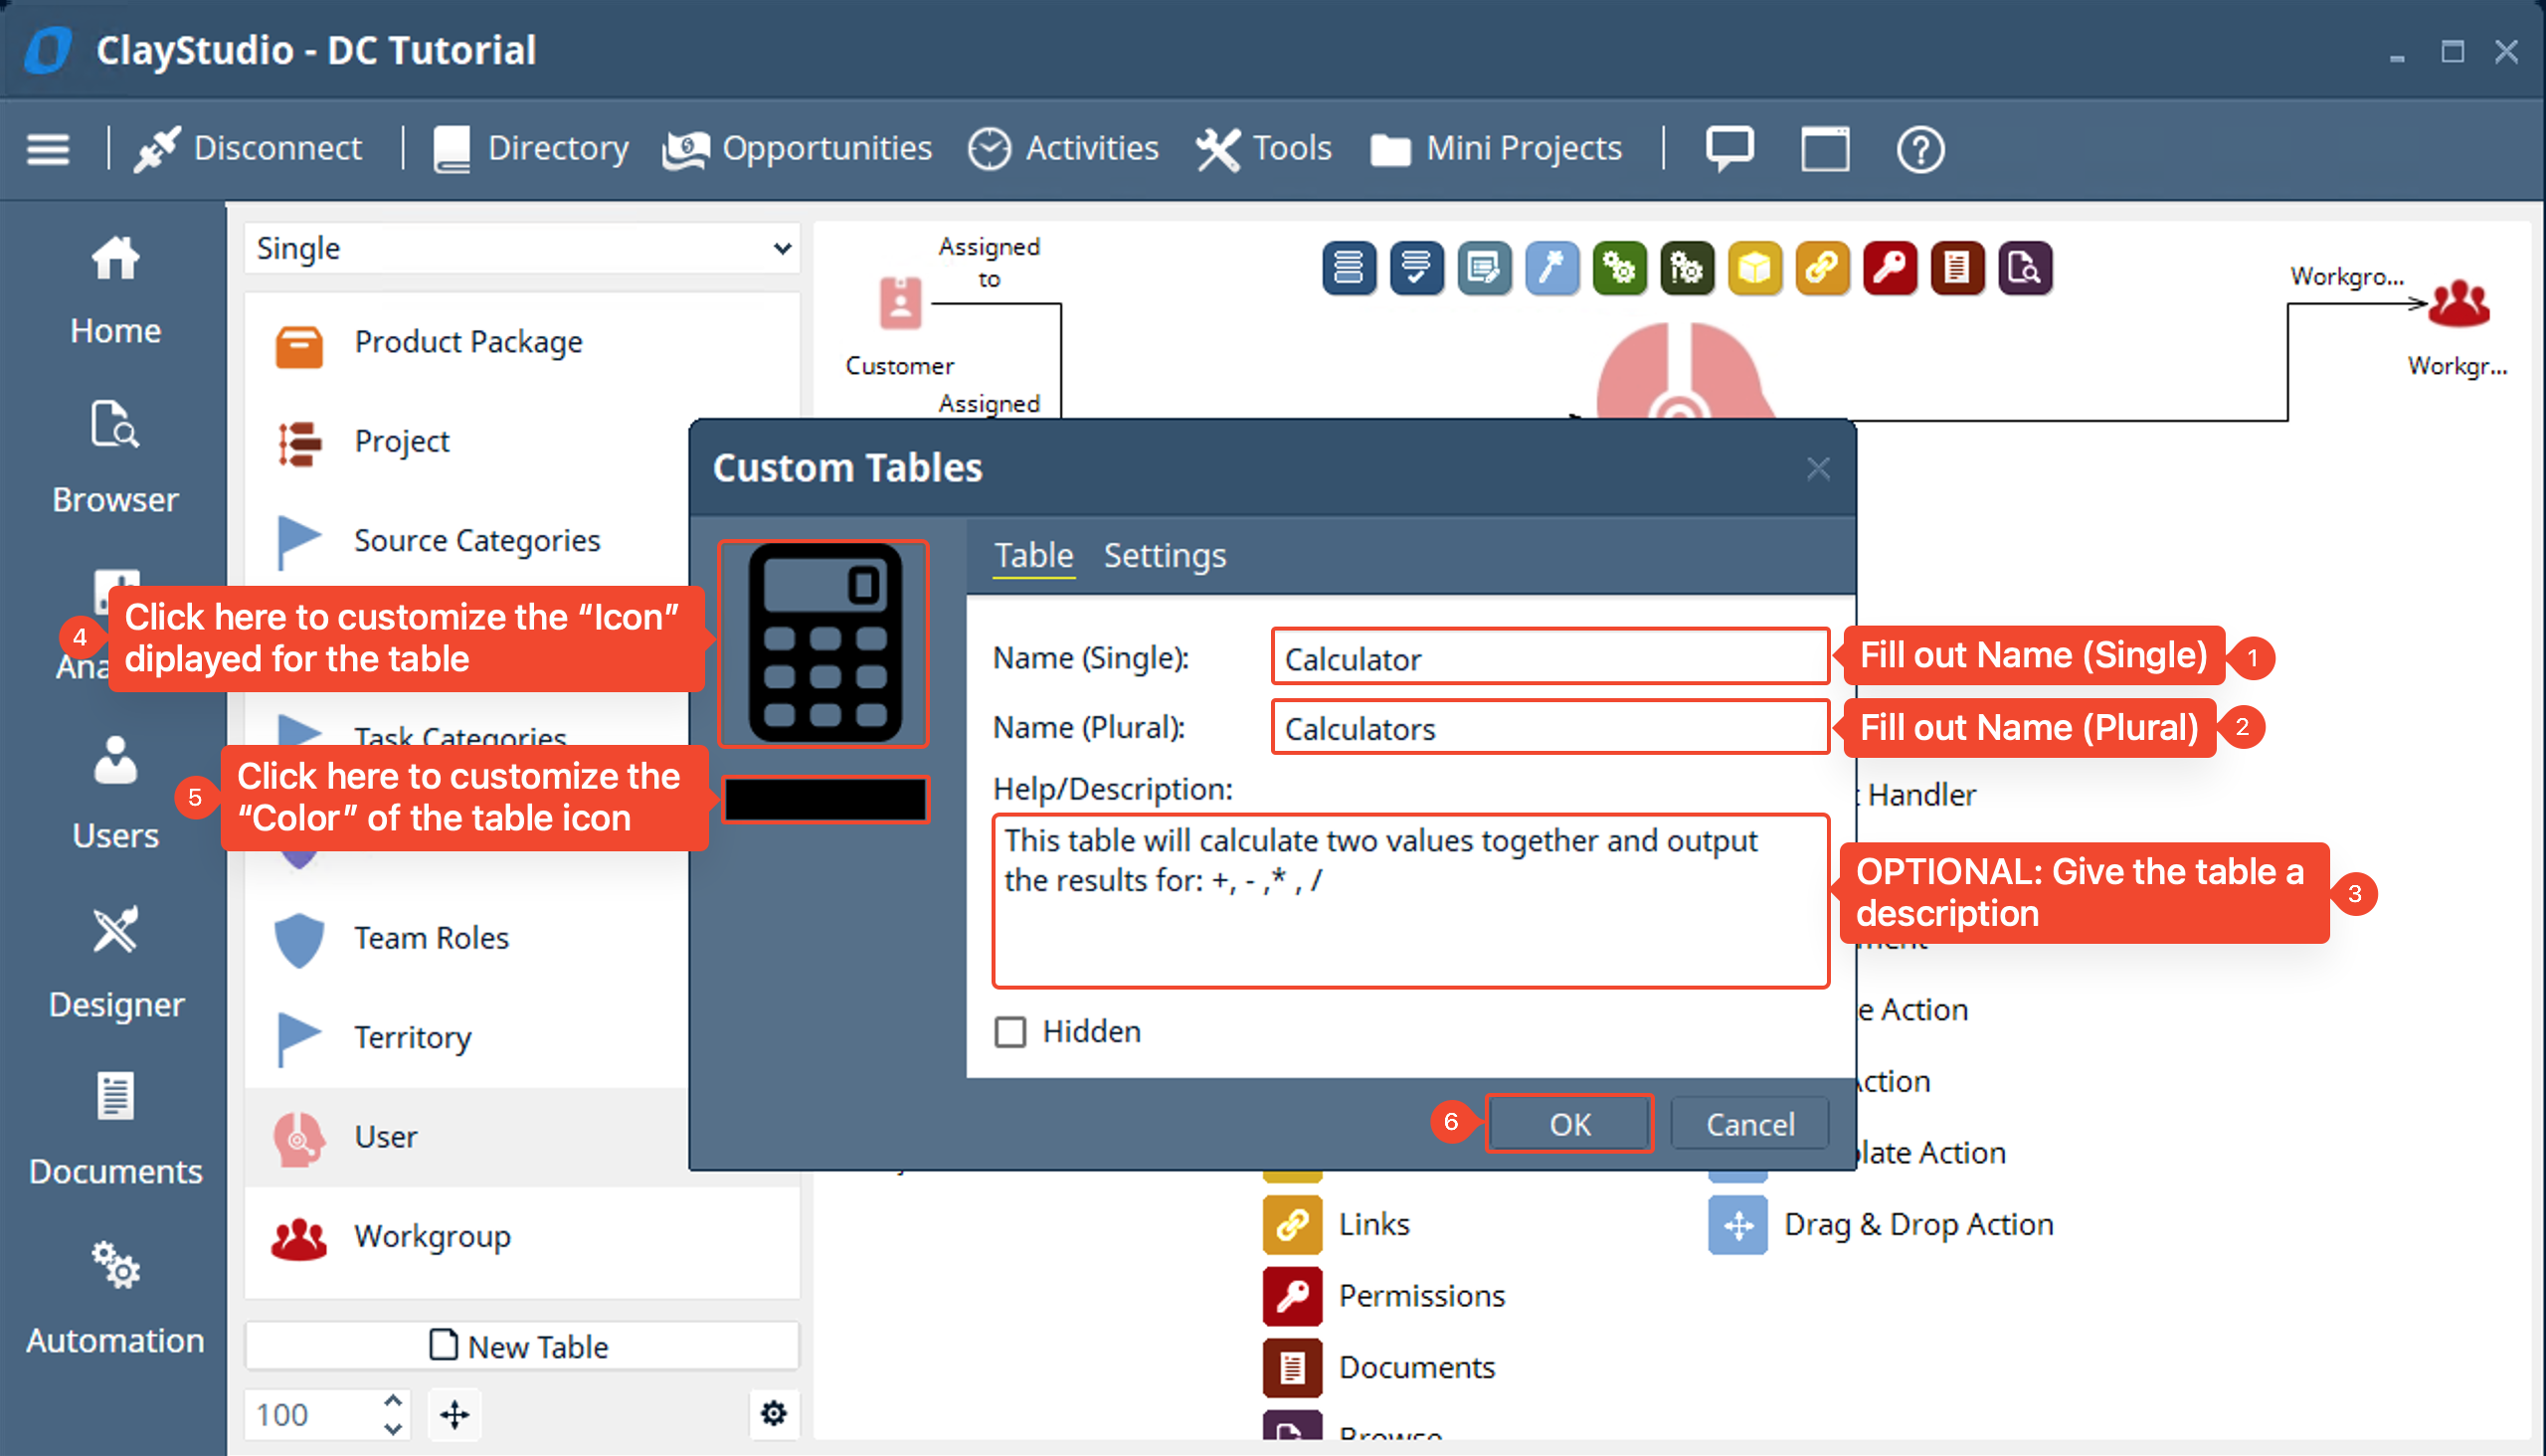
- A window will pop up allowing you to fill out information for the table you want to create. Fill out the the only required information you need to fill out are the “Name (Single)” field and the “Name (Plural) field” the rest are optional but is recommended and good practice. Fill out the information according to the screenshot.
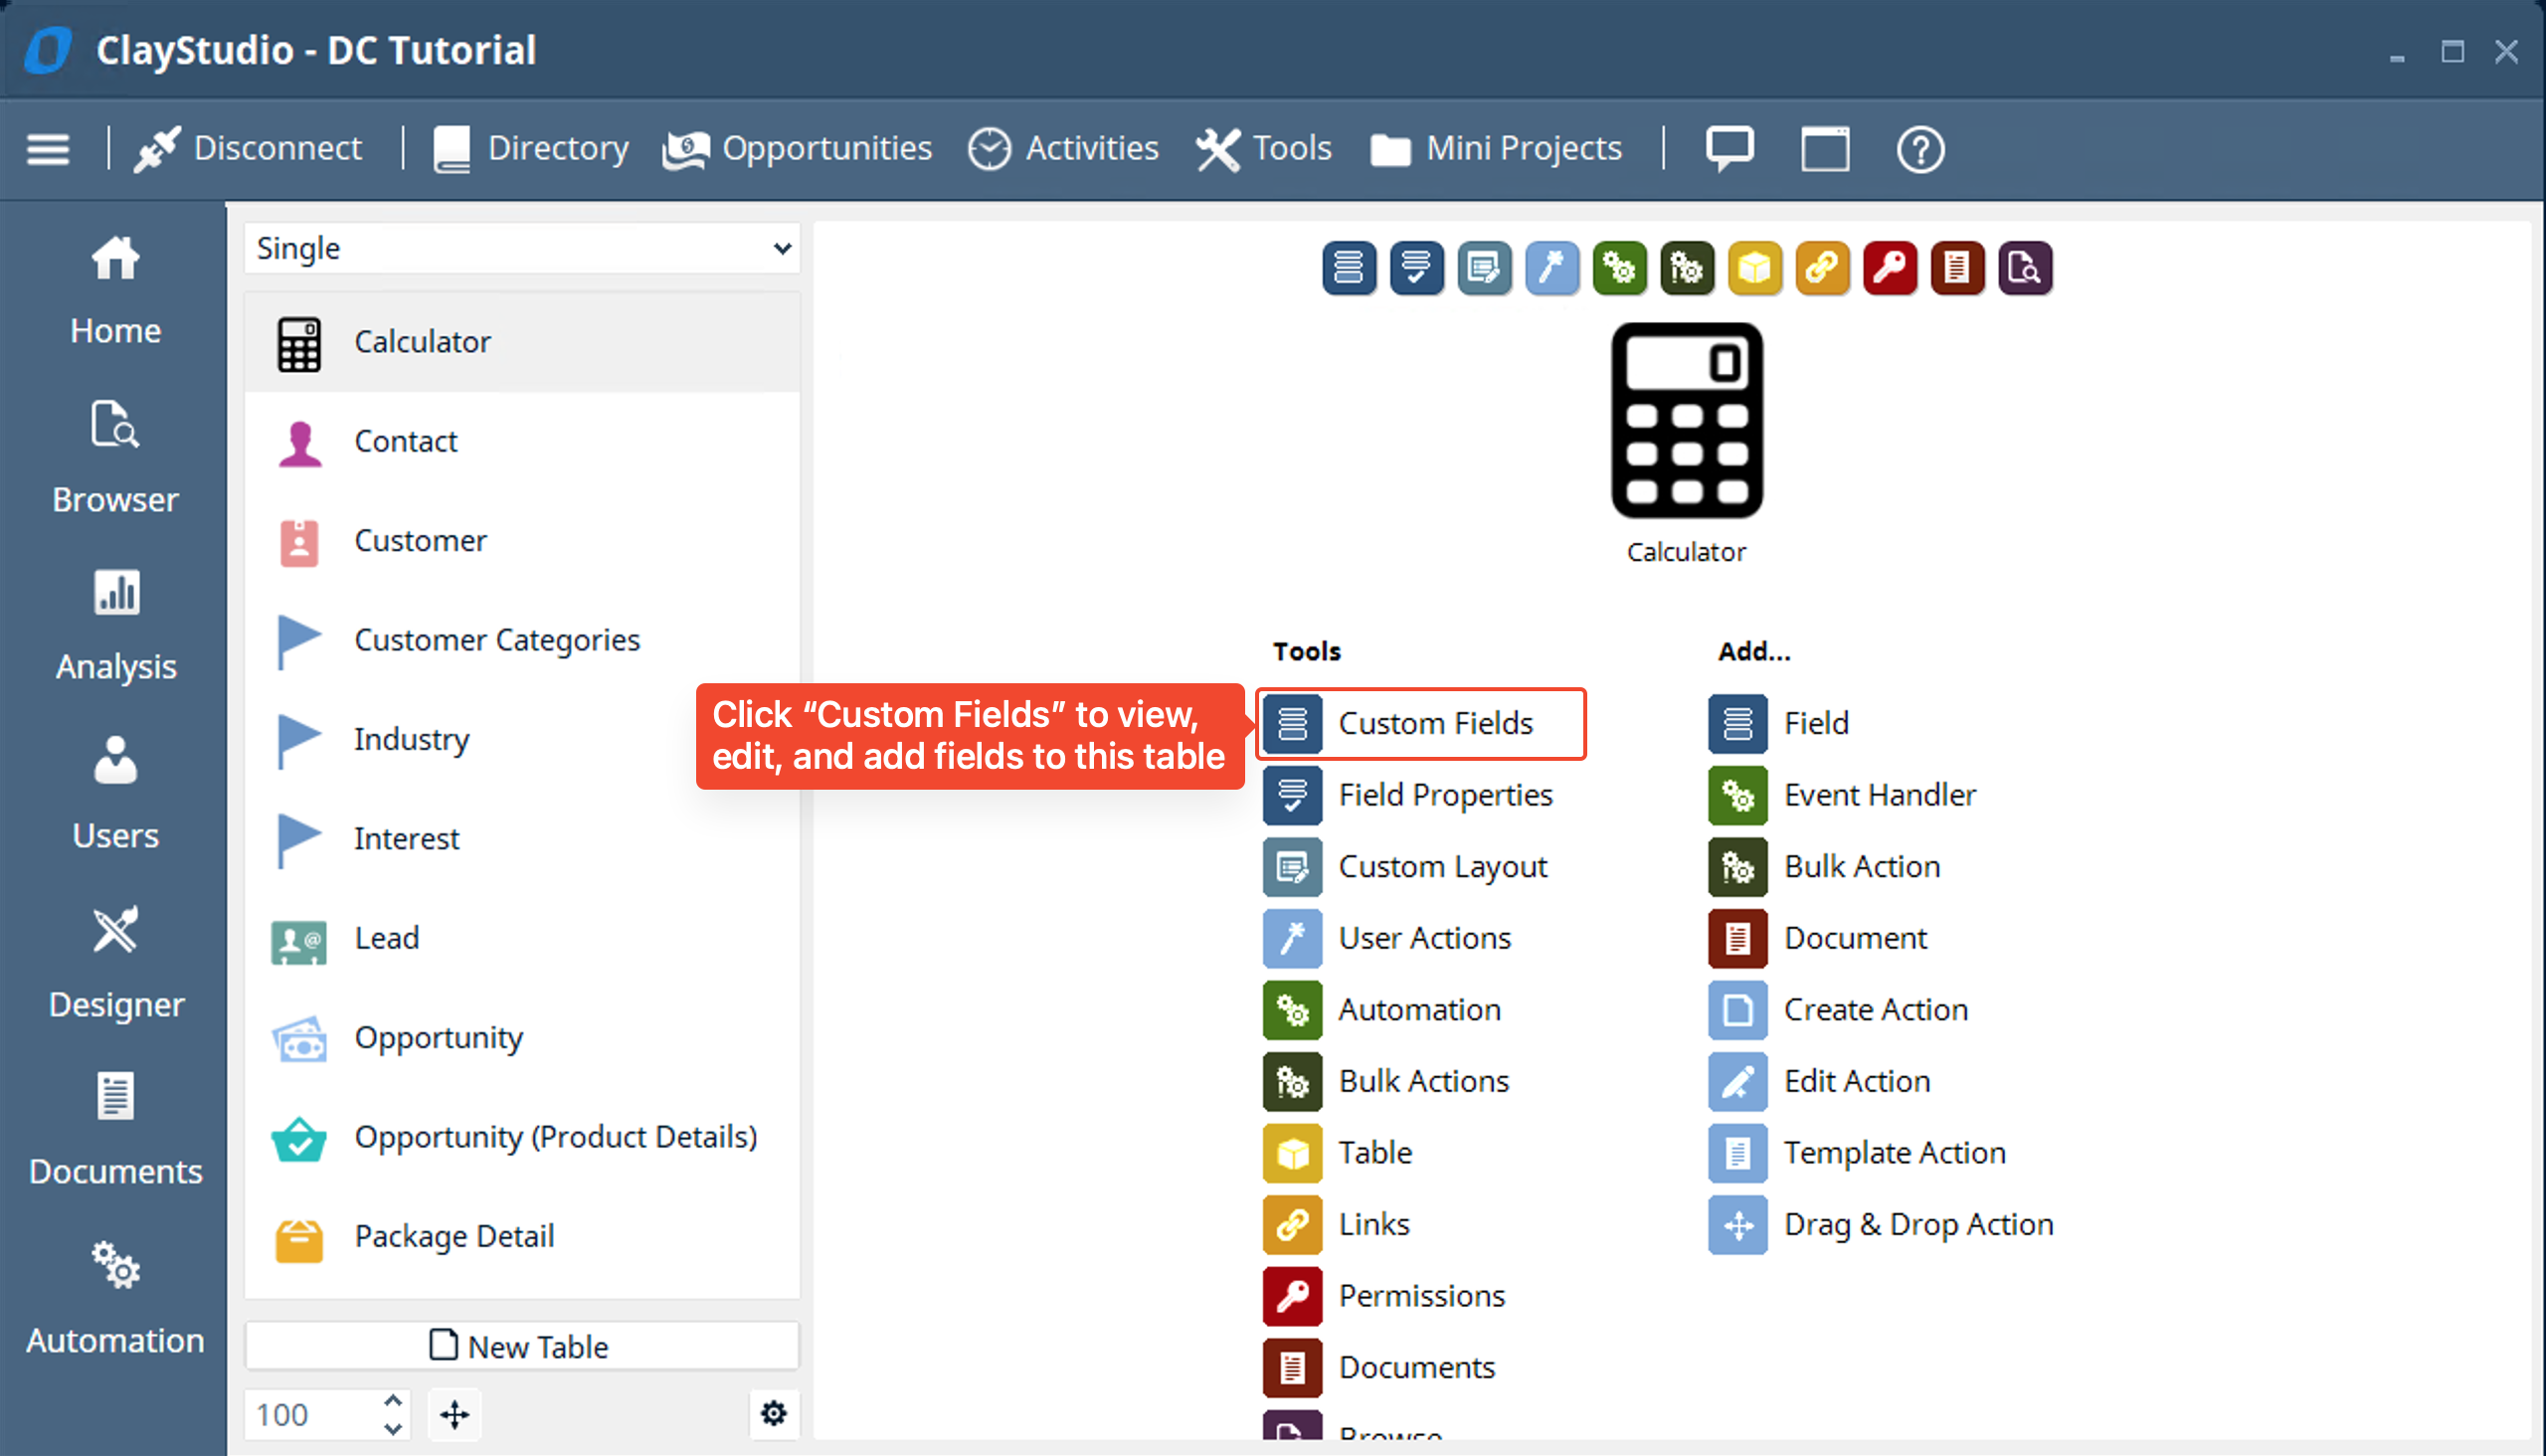
- You will see the table you just created come into view. To start adding fields to this table we need to go to the “Custom Fields” option under “Tools” in the Calculator table
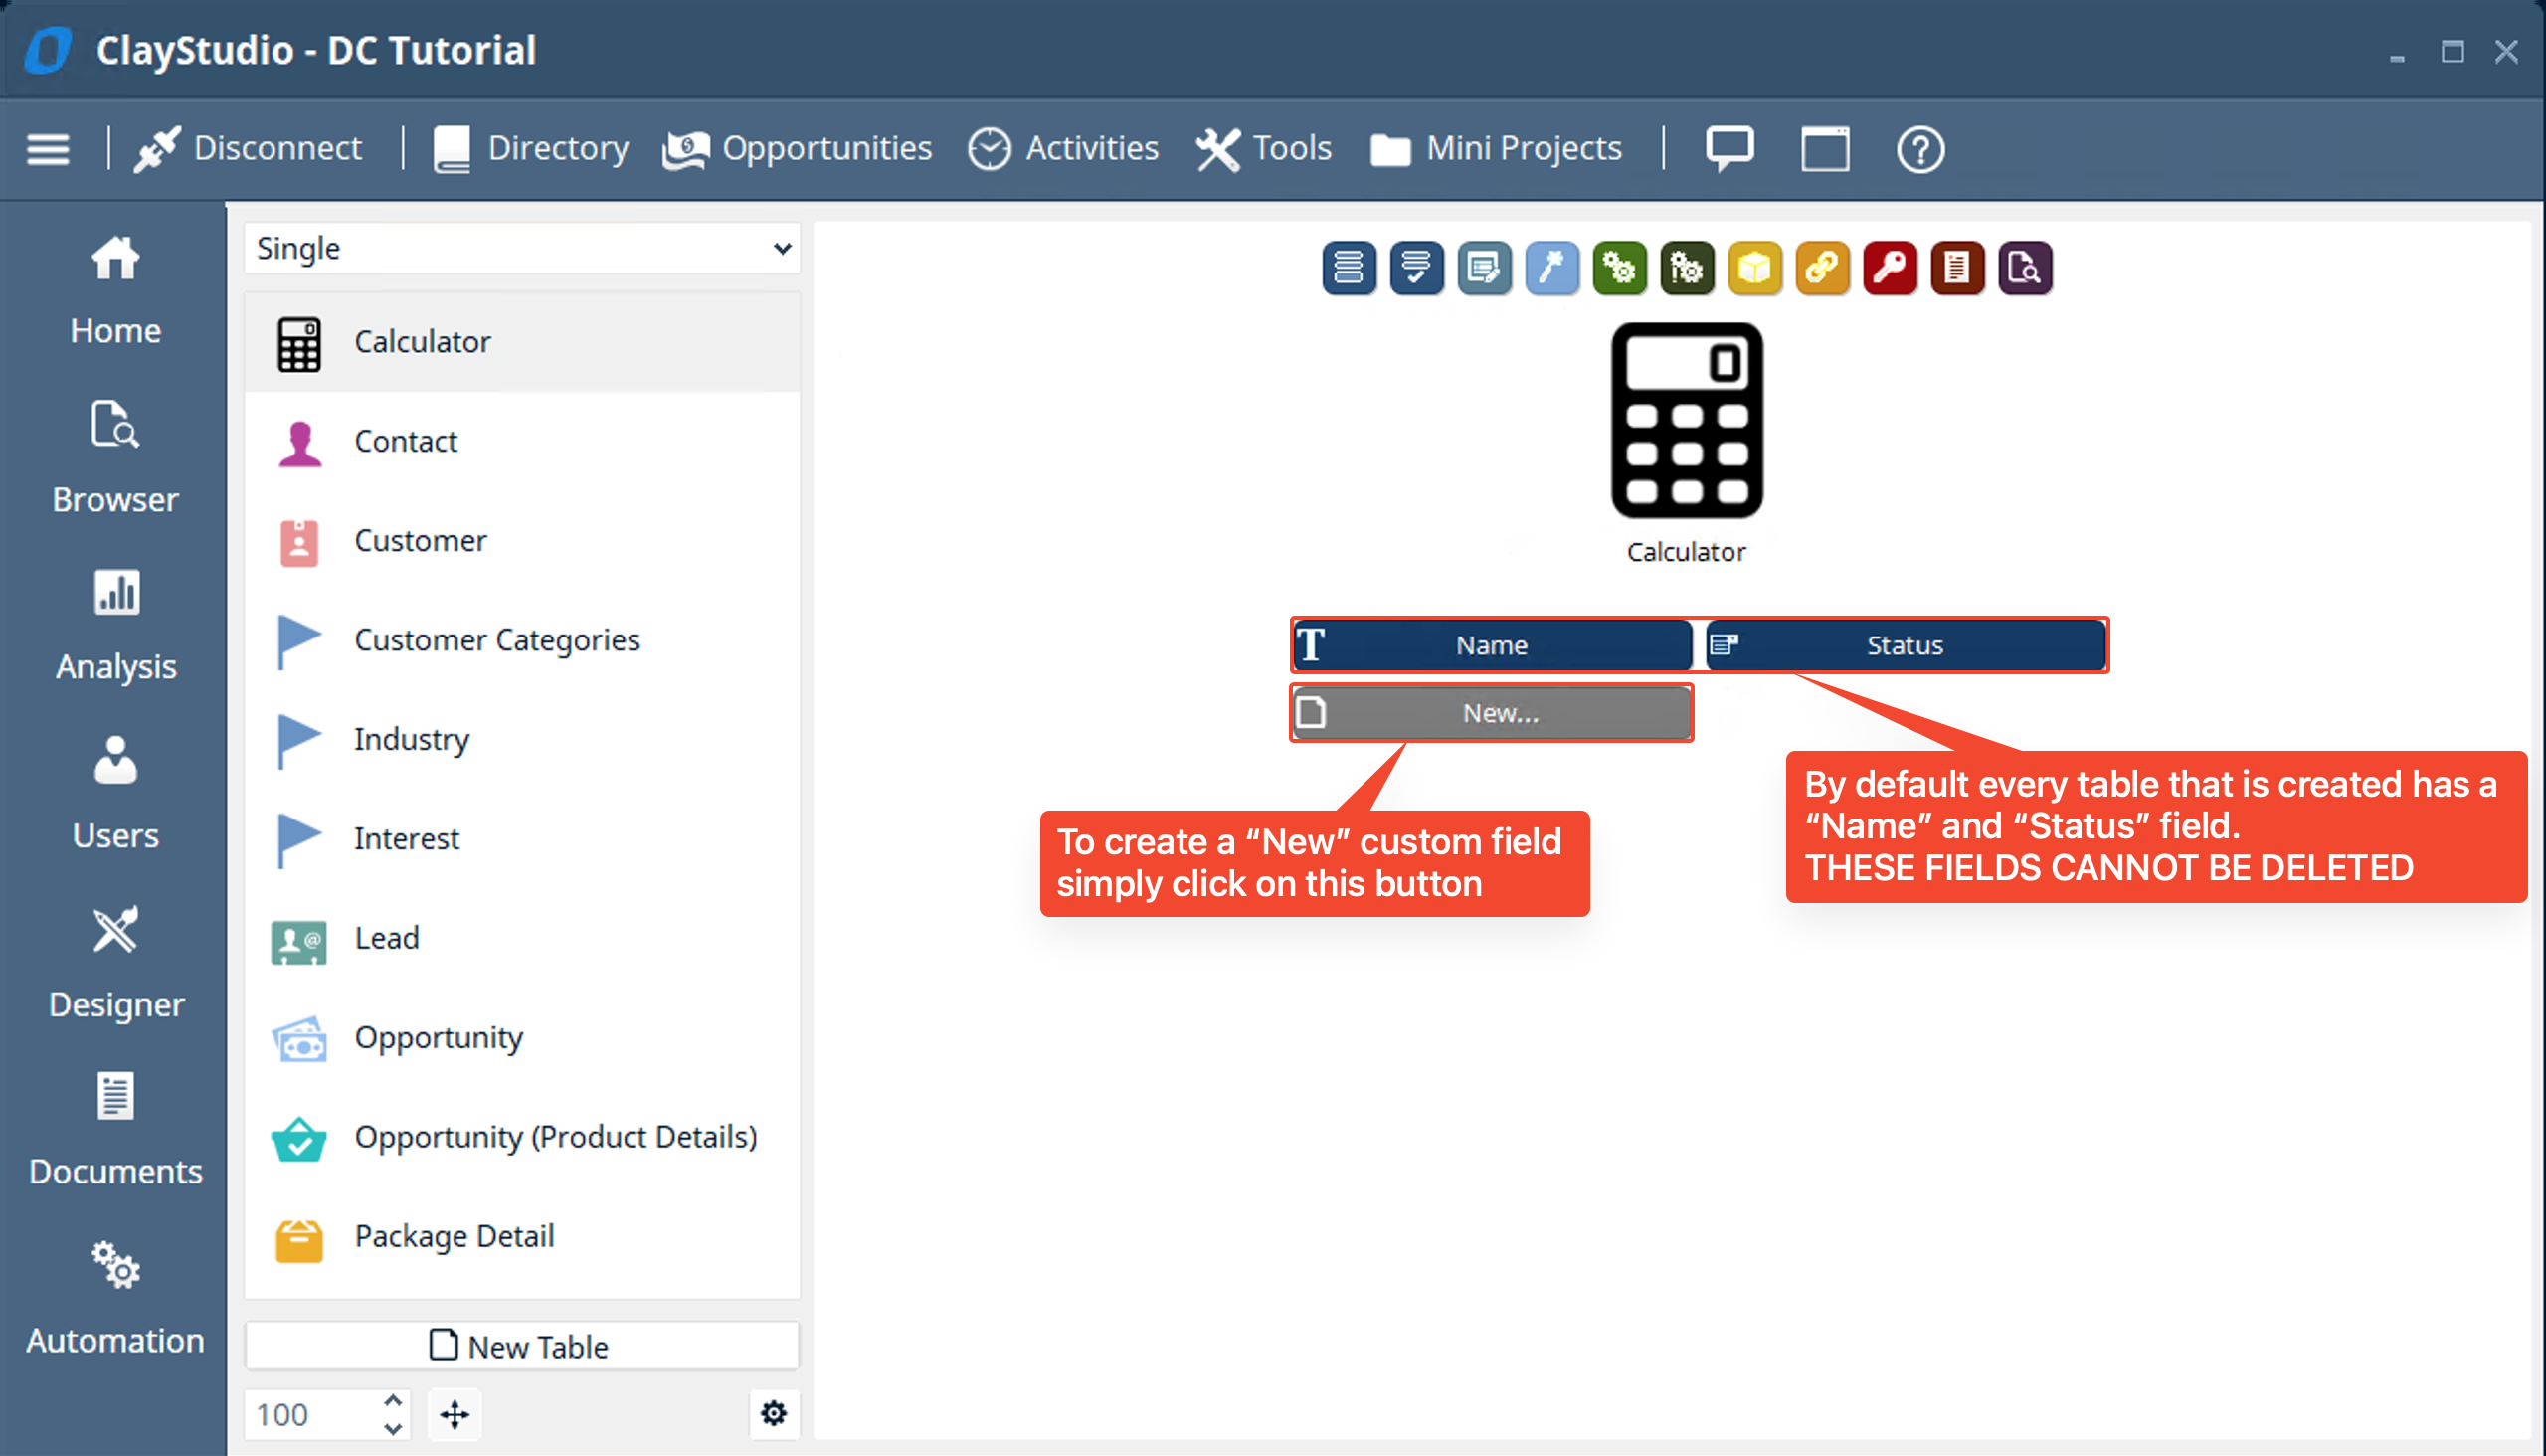
- You will notice the table already has a “Name” field and a “Status” field. These are fields that are created with the table. They cannot be deleted but they can be used for any purpose you want. For our purposes we will use it to name the calculator instance. To create a “New” field click on the “New…” button labeled in the screenshot below.
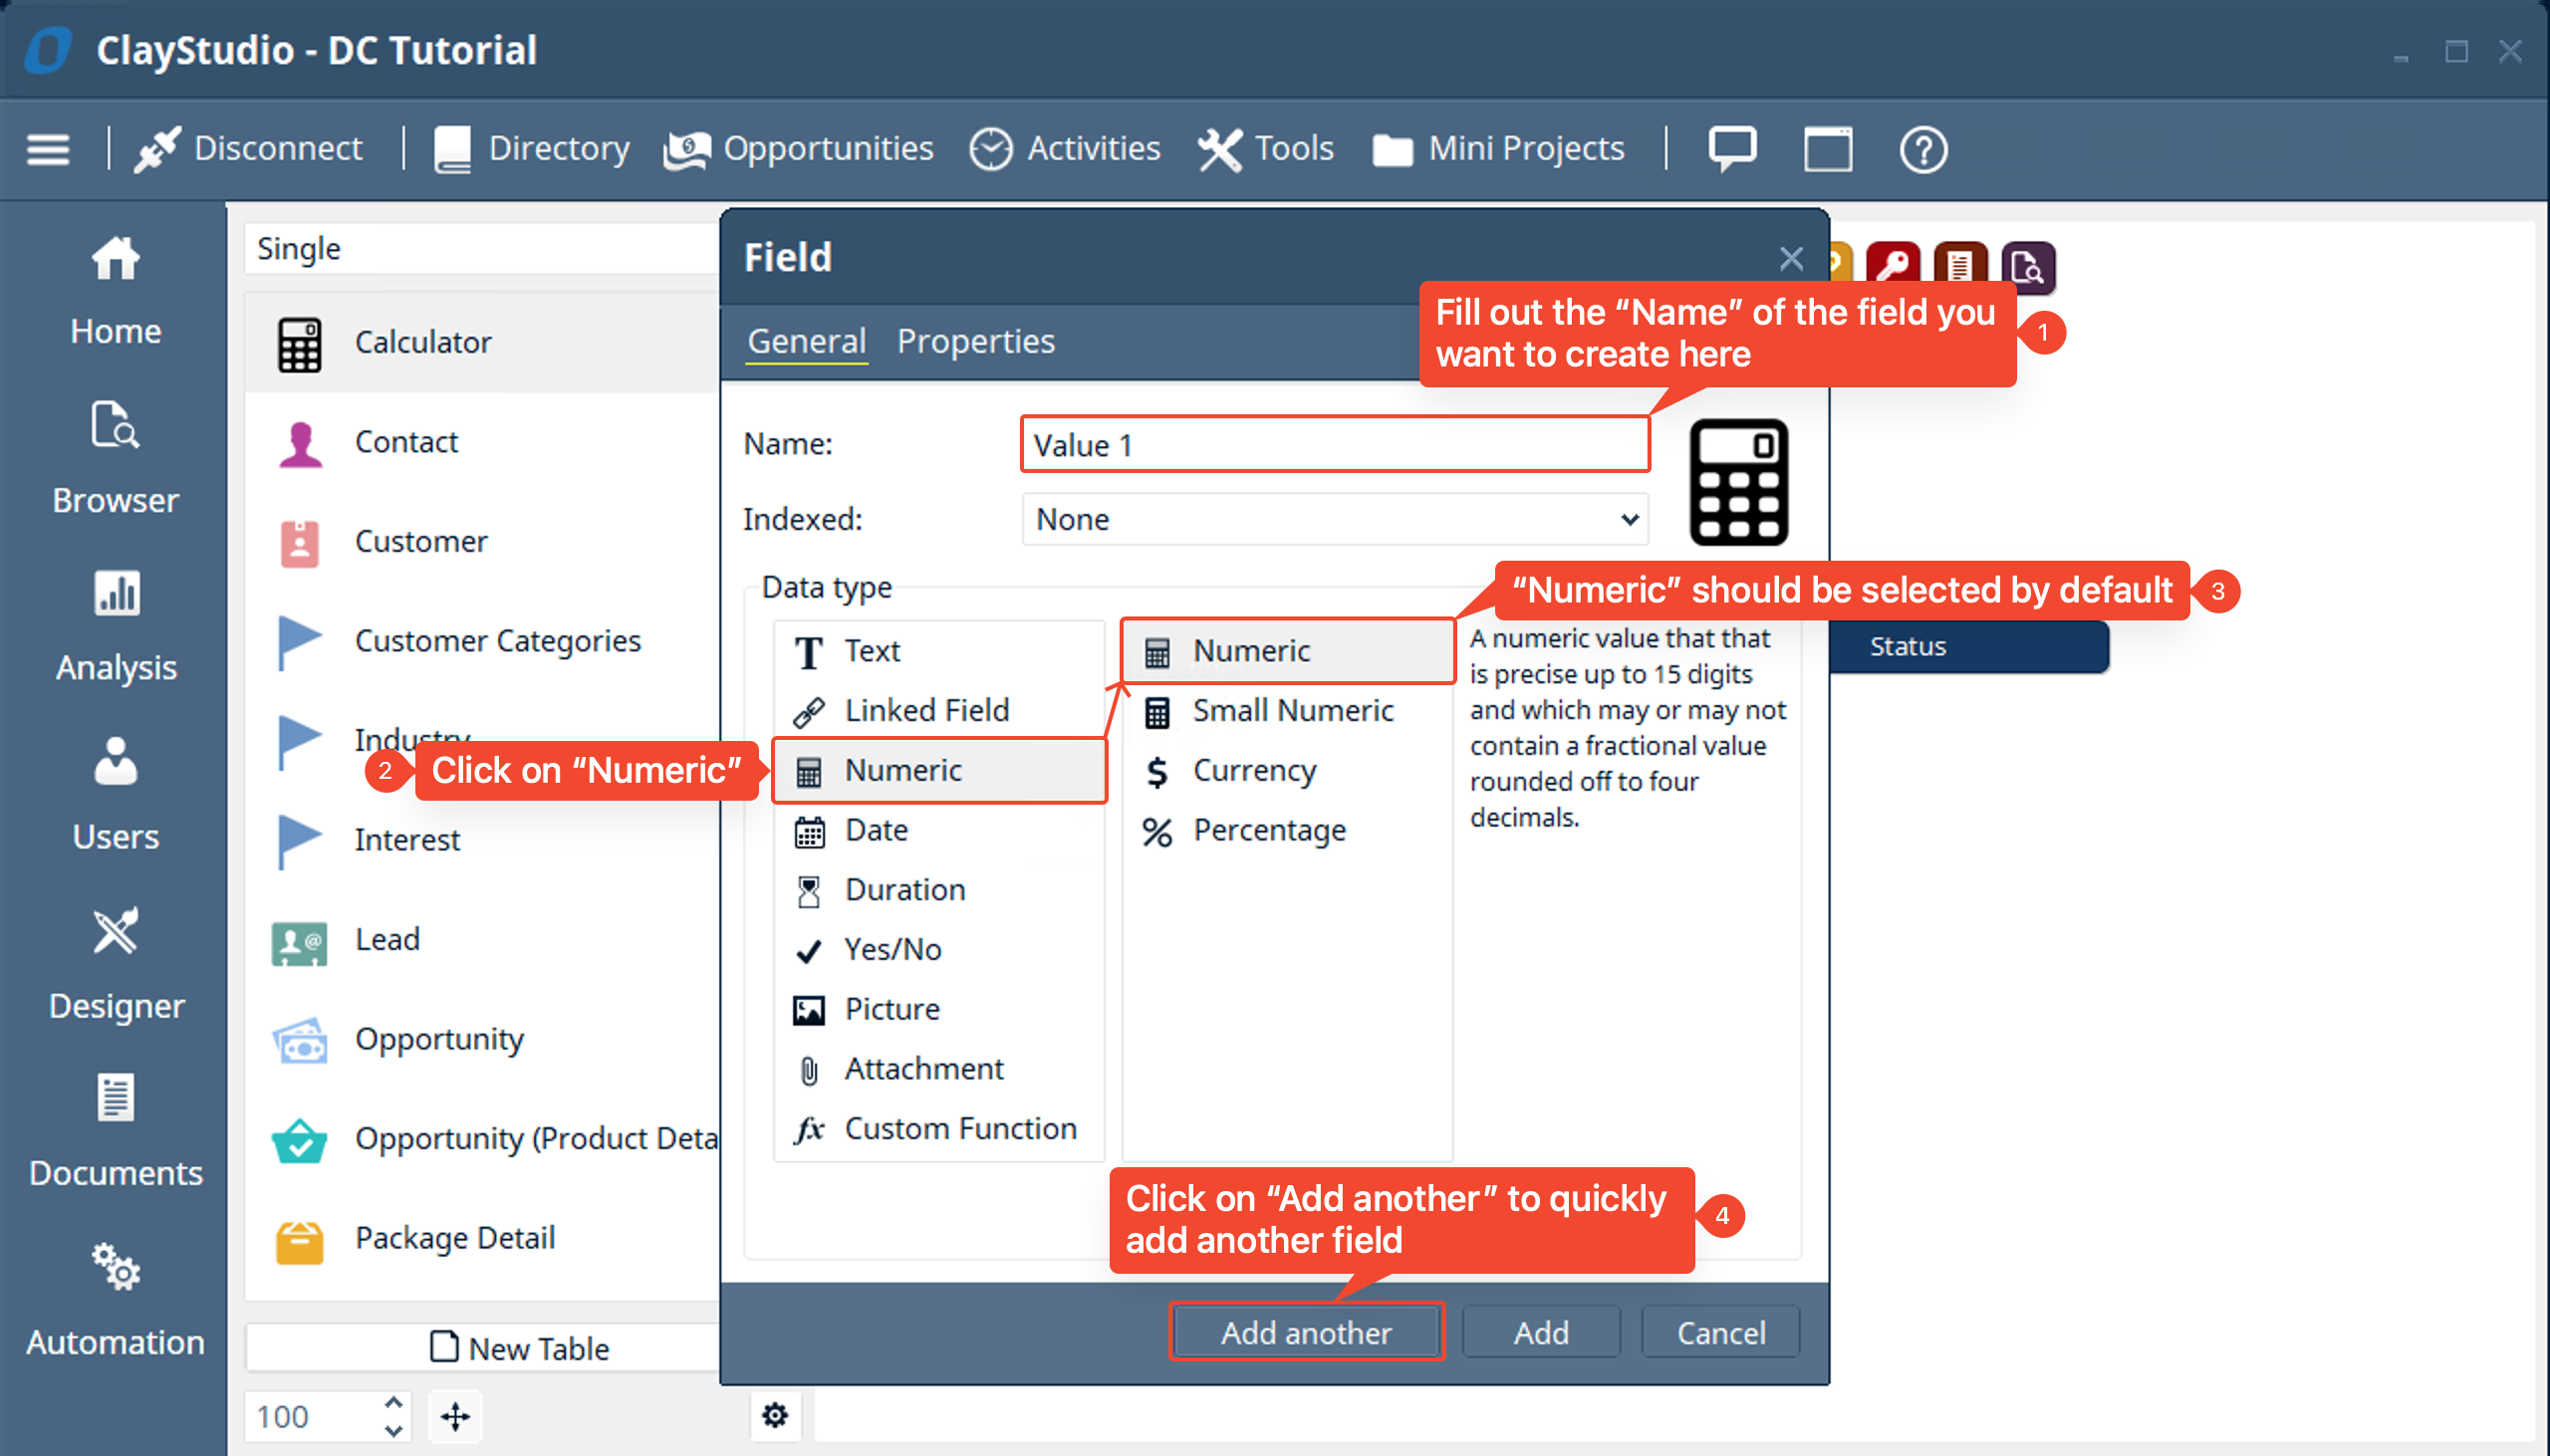
- A new “Field” window pops up where you can give the field a “Name” and choose the data type of the field. We will click the “Numeric” data type since we want to do math on two separate number values. Then we will specify the “Numeric” data type to be just a general “Numeric” field. (as you can see there are a few types of “Numeric” fields)
- So why not choose a text field and just put a number inside that field? In short while it is possible use the “Text” field type as an input for our mathematical calculations it would add an extra level of complexity as we would have to convert the type of that “Text” field to a “Numeric” field data type with function in our “Custom Function” tool. So to keep things more simple we will specify that the field is indeed a “Numeric” type field to keep the custom functions as simple as possible to be able to learn from.
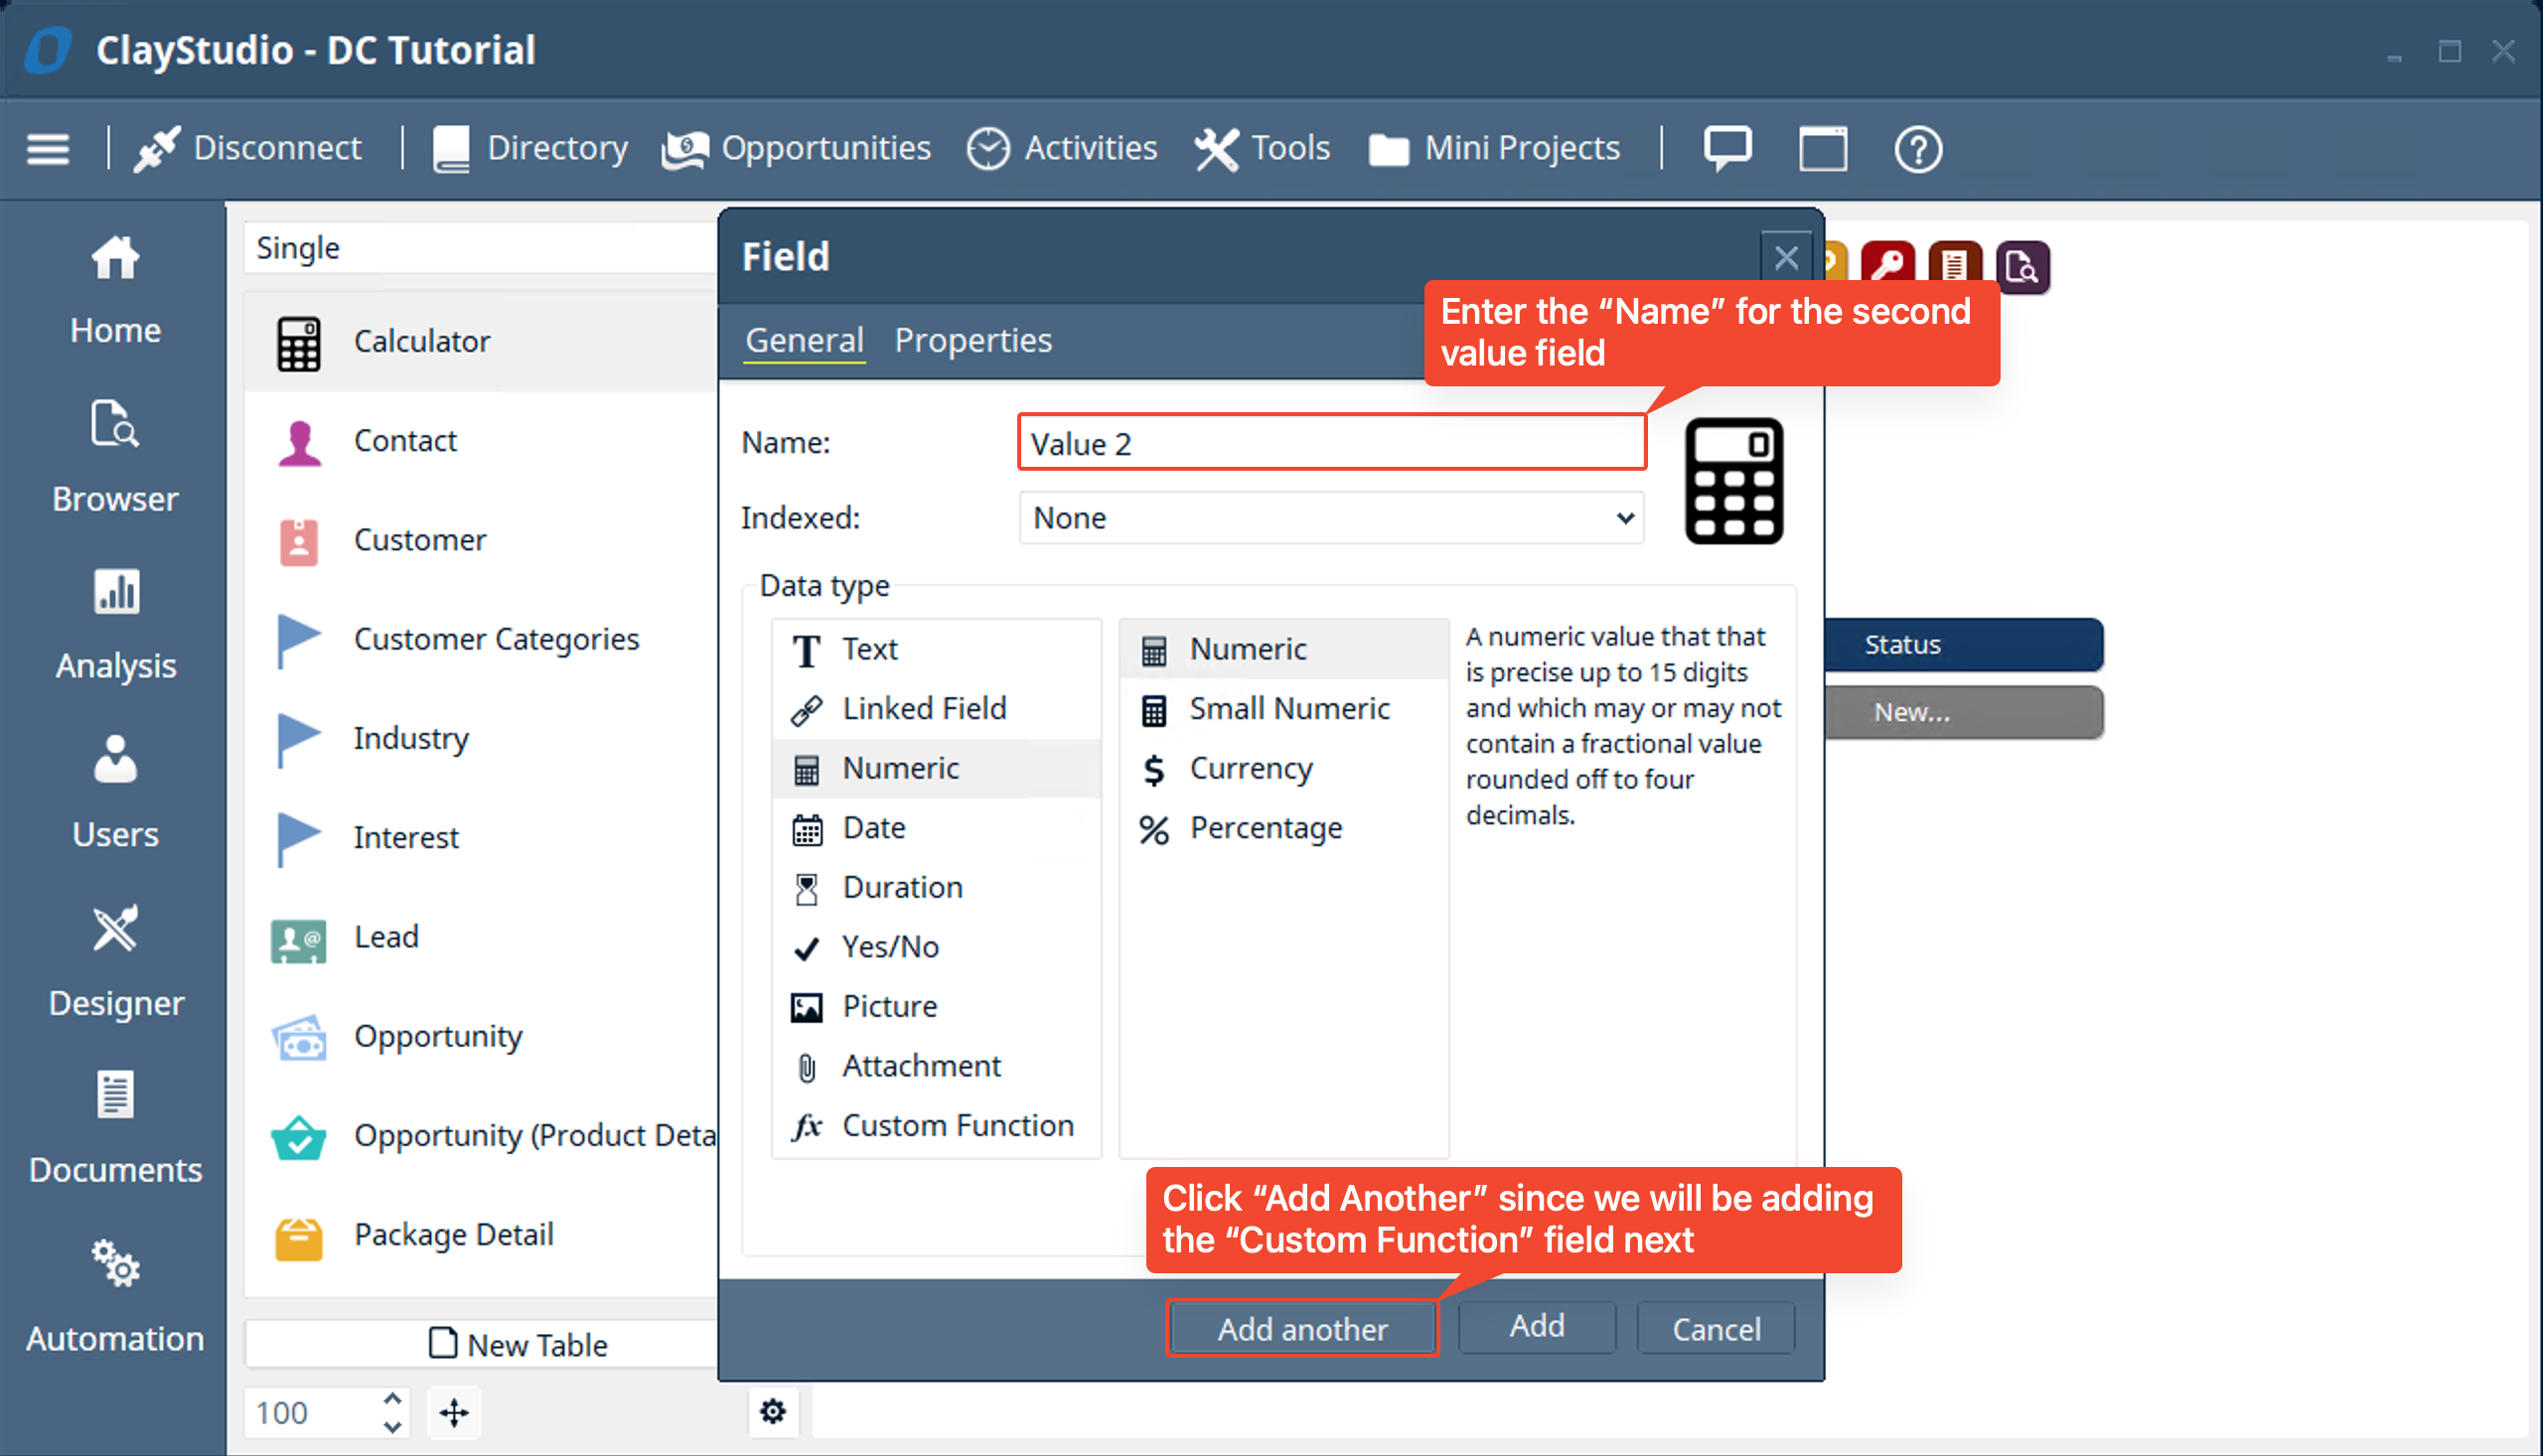
- You will notice after clicking on “Add Another” that the “Value 1” field will get added to your table and you can quickly fill out the name to add the “Value 2” field with the same data type information we selected for the first field. Filling out the “Name” and clicking on “Add Another” we will go on to add our “Custom Function” fields
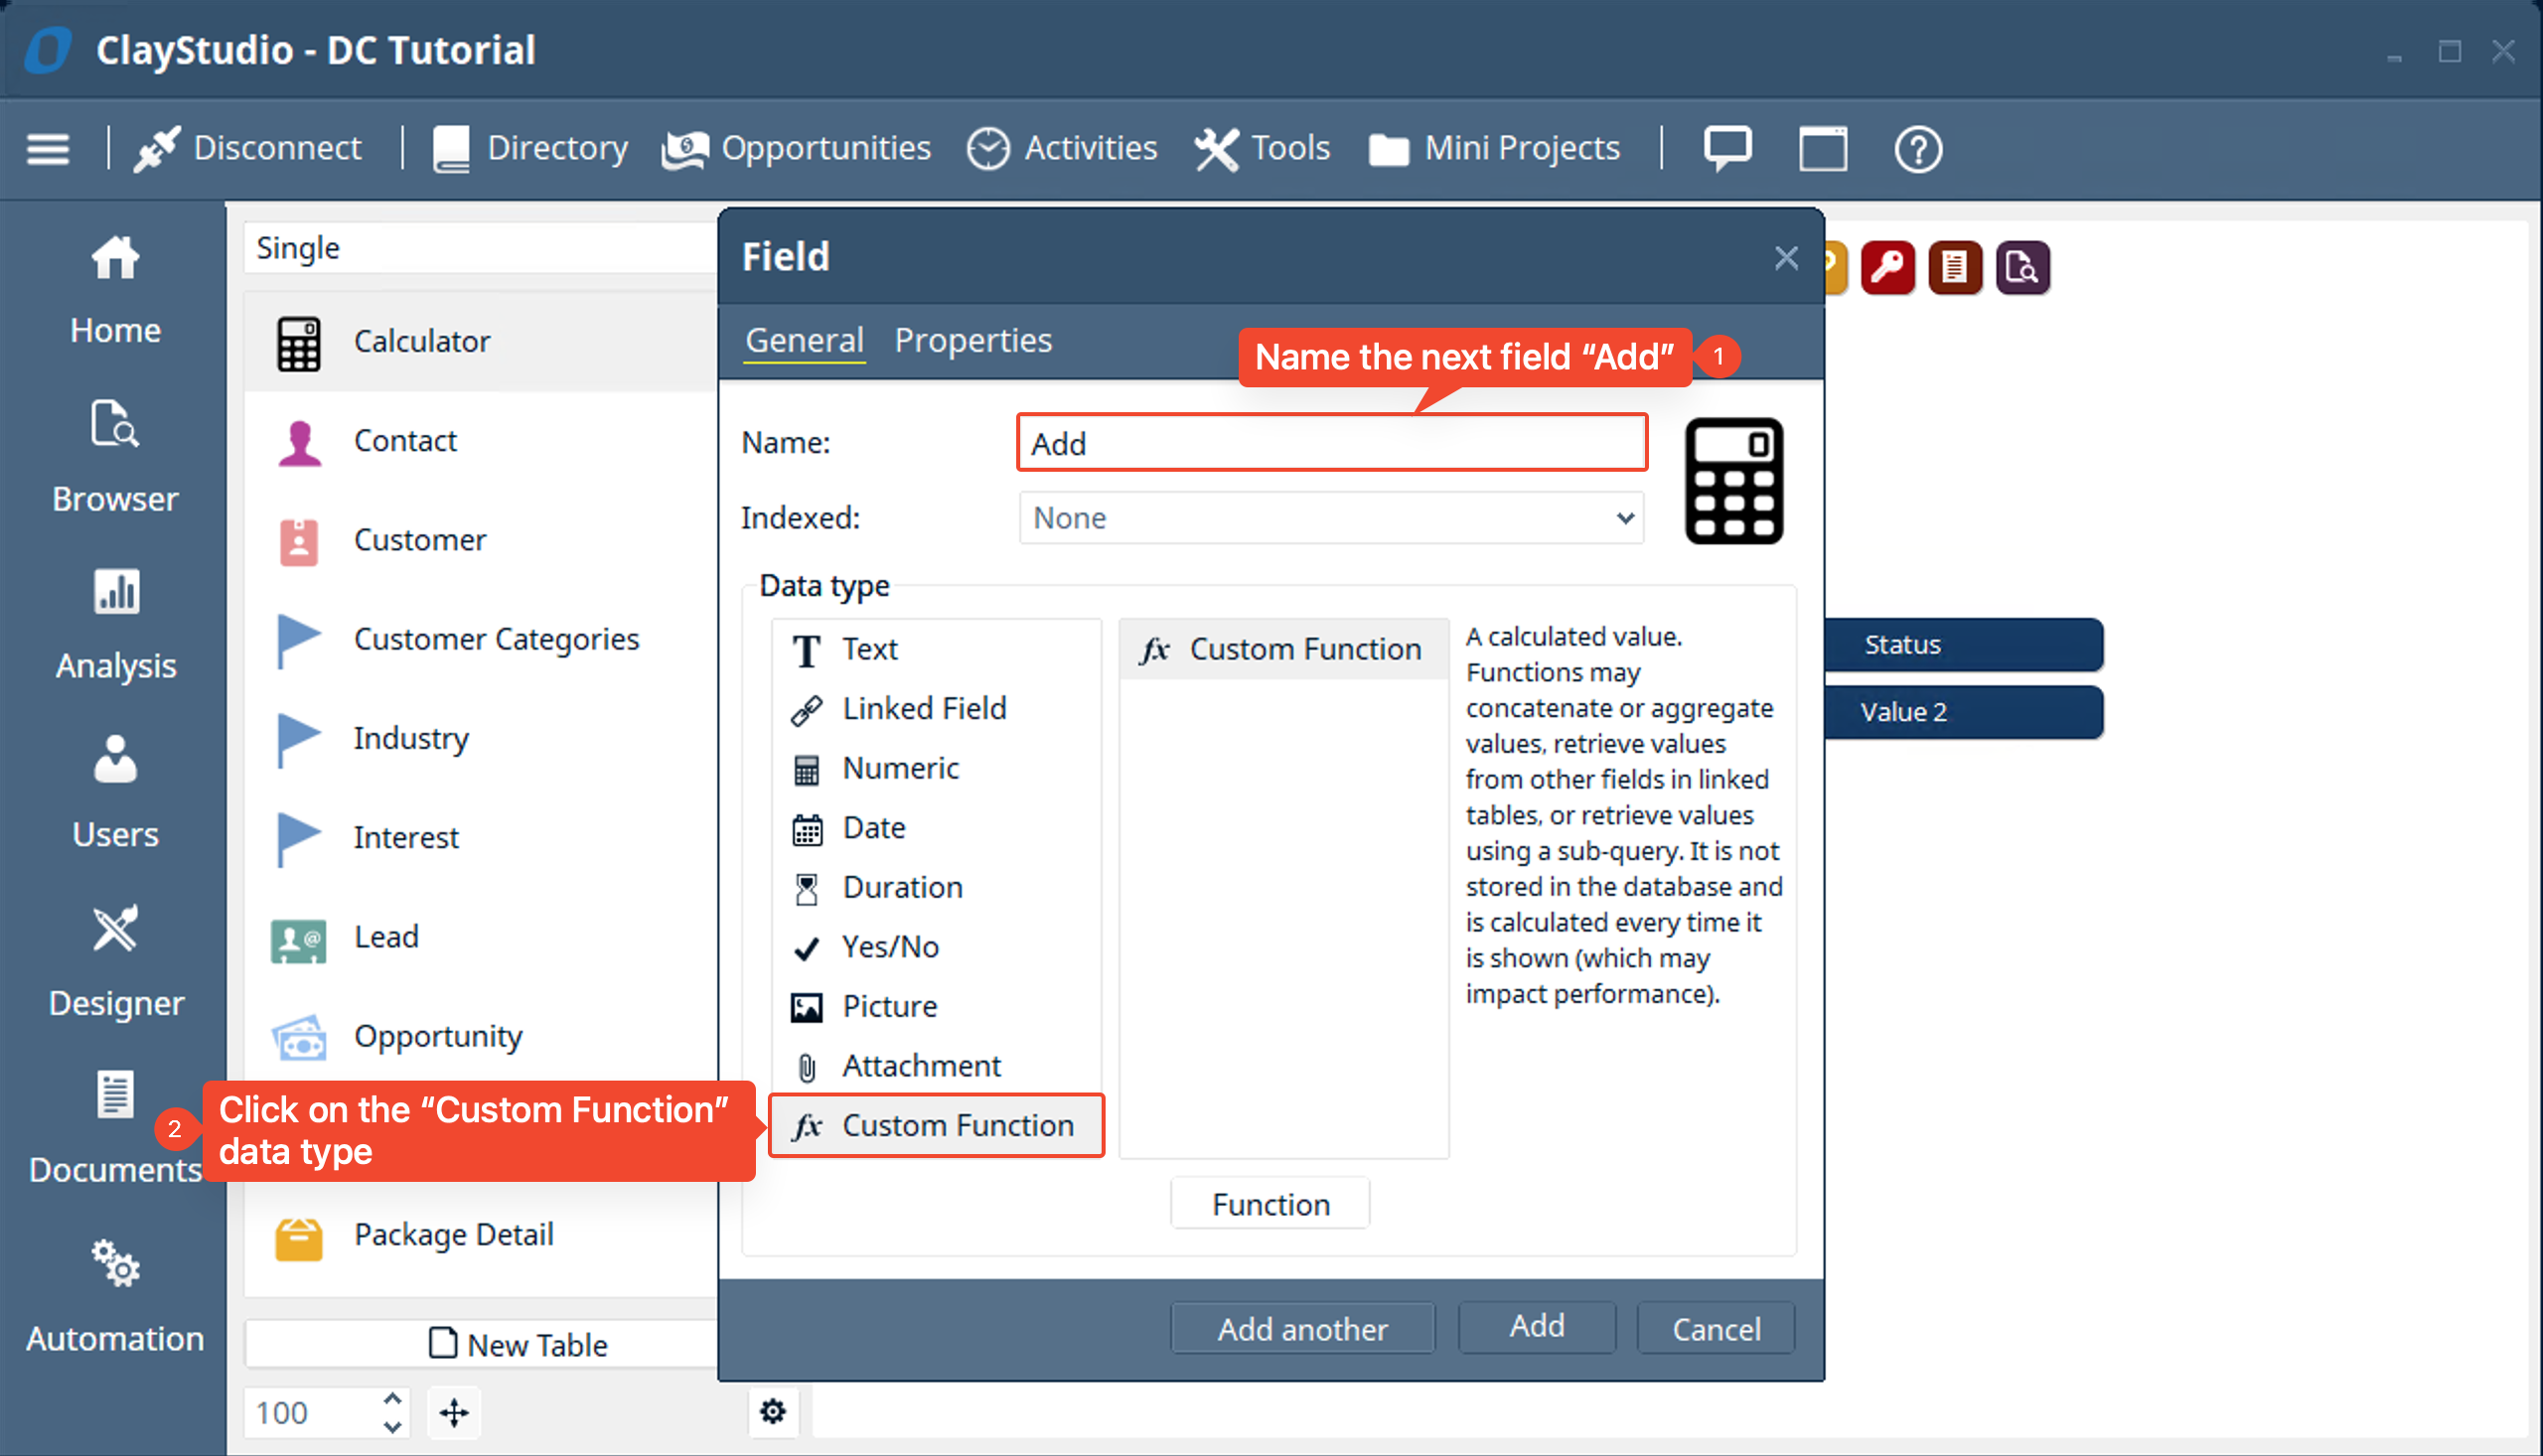
- We will name the next field “Add” this will be the custom function field that preforms addition for us. Then we will click on the “Custom Function” data type
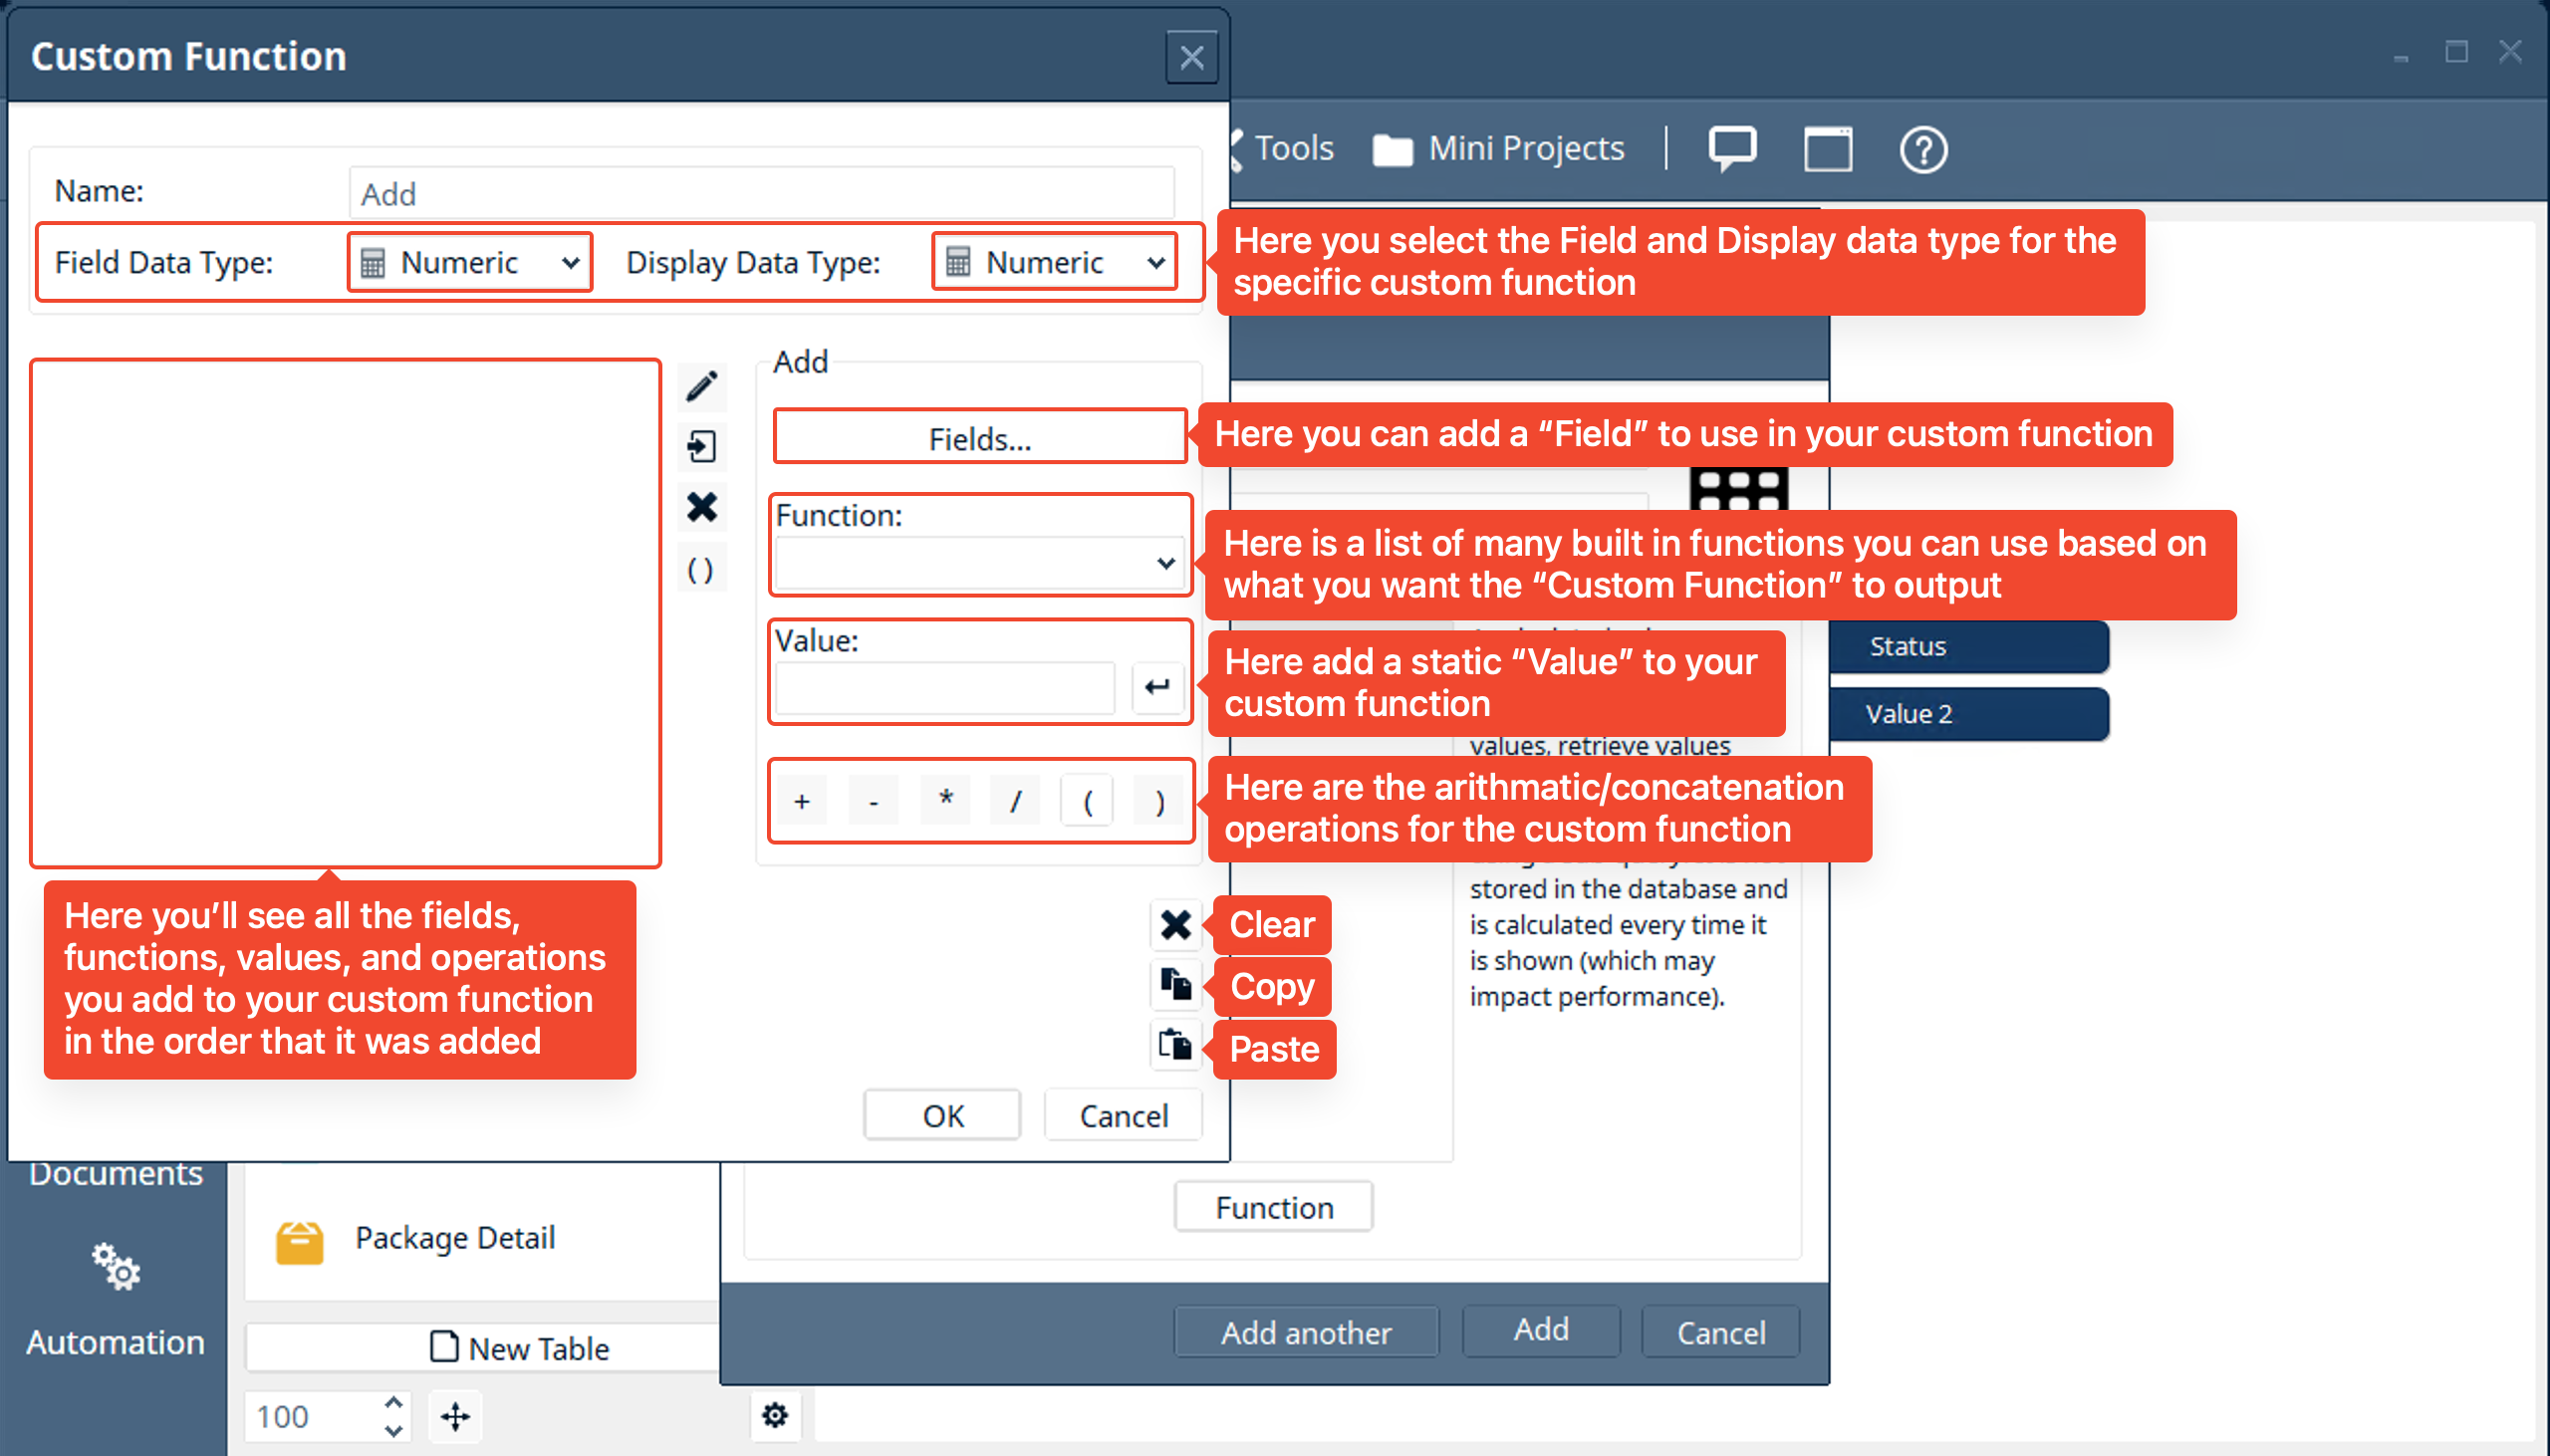
- A custom function window comes into view. We see there are many different options and selections to make on this window. View the screenshot to see a short description of each option.
- Note: depending on the “Field Data Type” option you select for your custom function will change the “Fields”, “Functions”, “Values” and “Operations” you can use in this function. For example: if we select the “Field Data Type” of this custom function to be “Numeric” then we will not see any “Text” type fields to add to this custom function. There are also certain Built In Functions that will only show for specific field data types
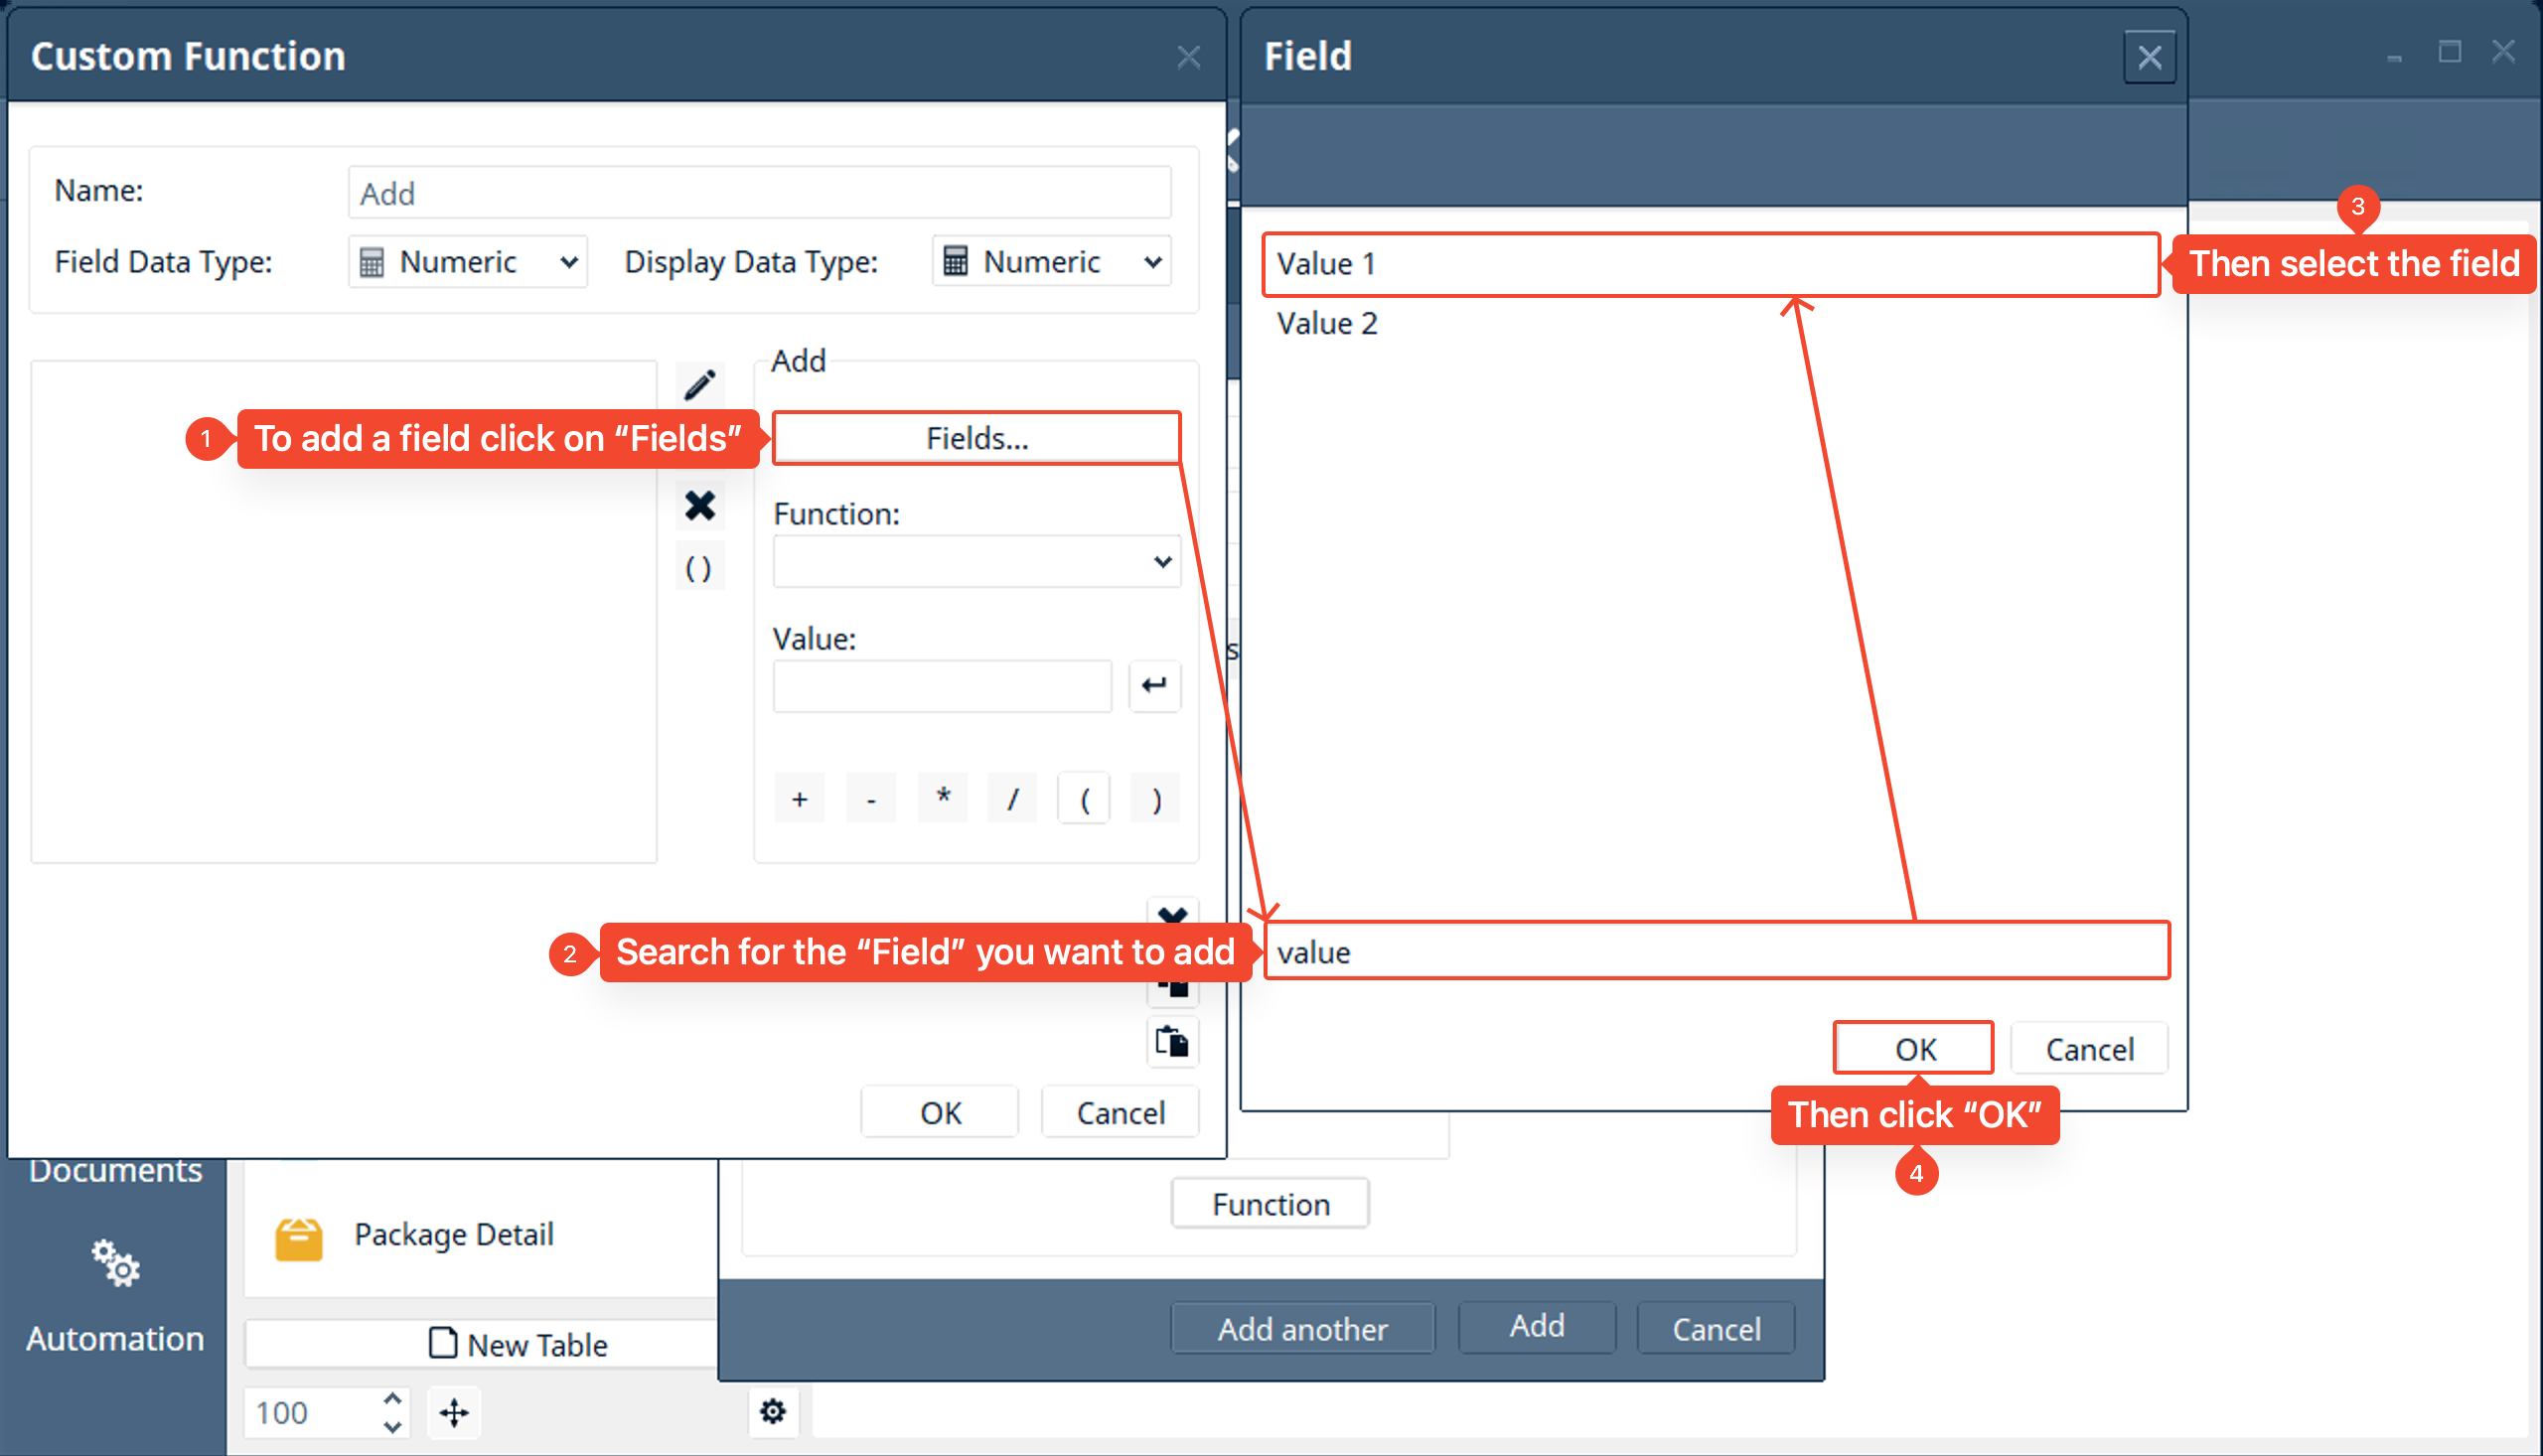
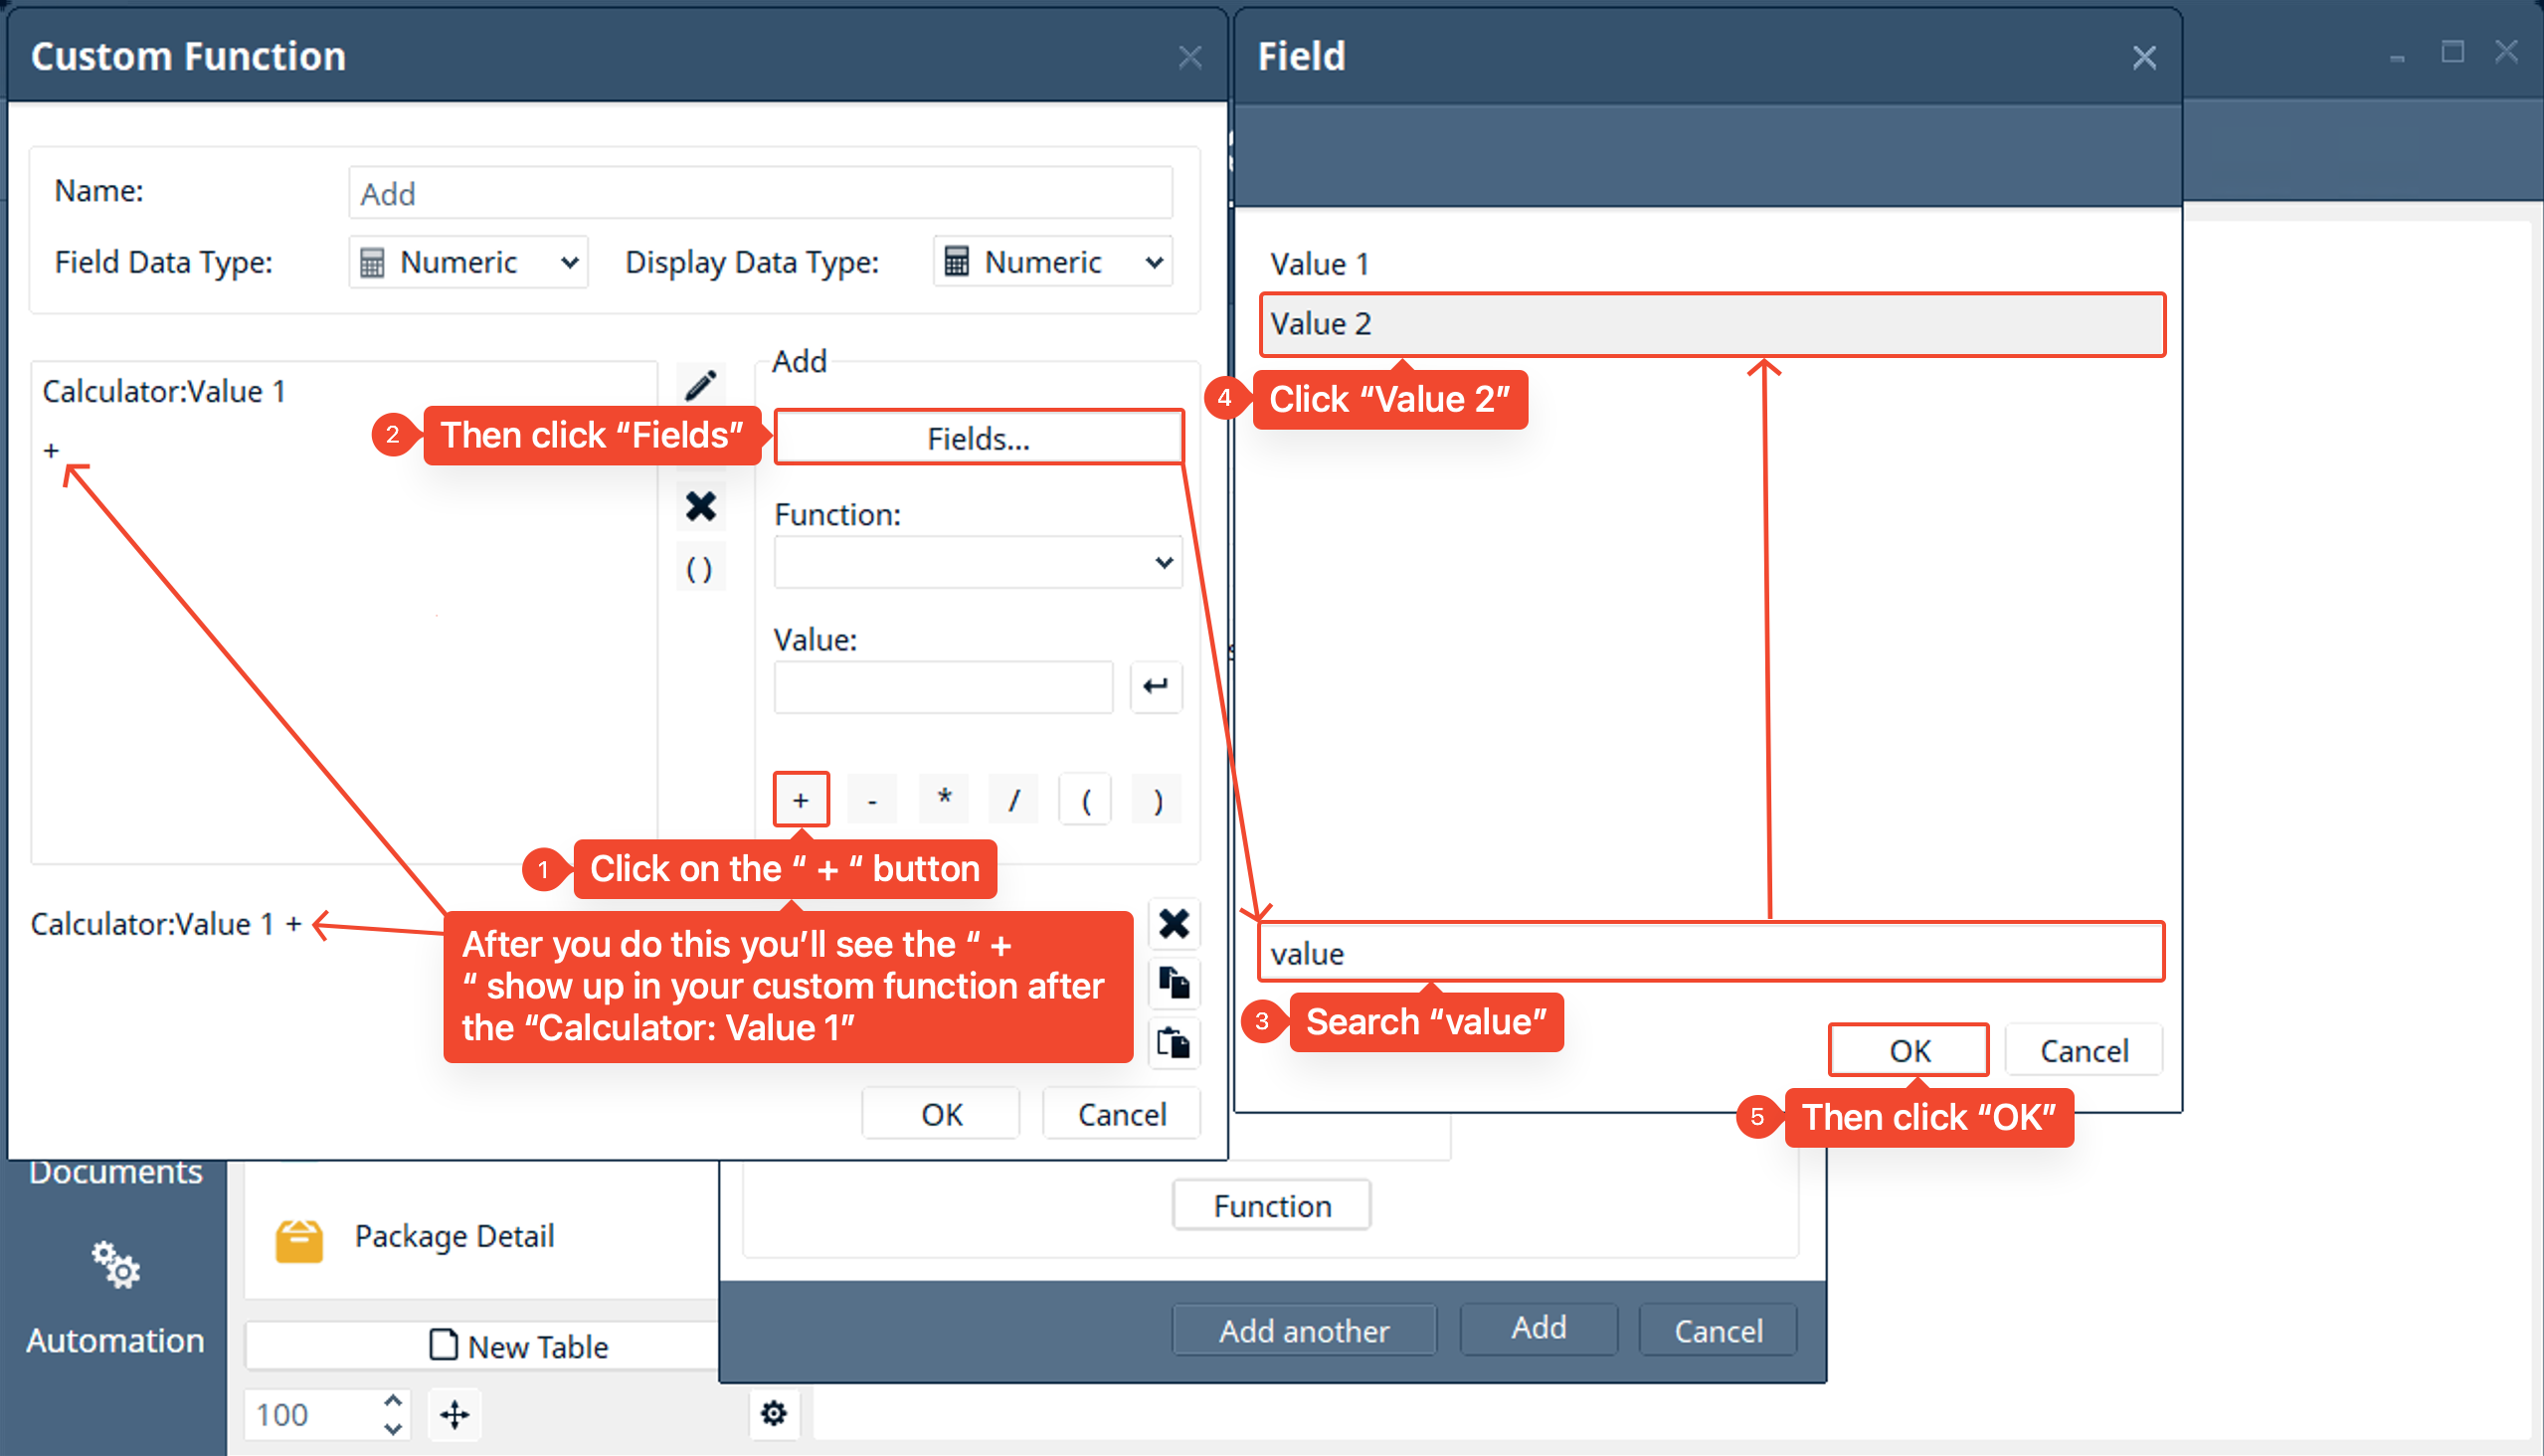
- We will add our first field to the custom function. Since we want to add “Value 1” and “Value 2” together. The first field we will add to this function is the “Value 1” field. To do this we will click on “Fields…” (1) in the “Add” box → use the search box to search for “value” (2) → select “Value 1” (3) and then click “OK” (4)
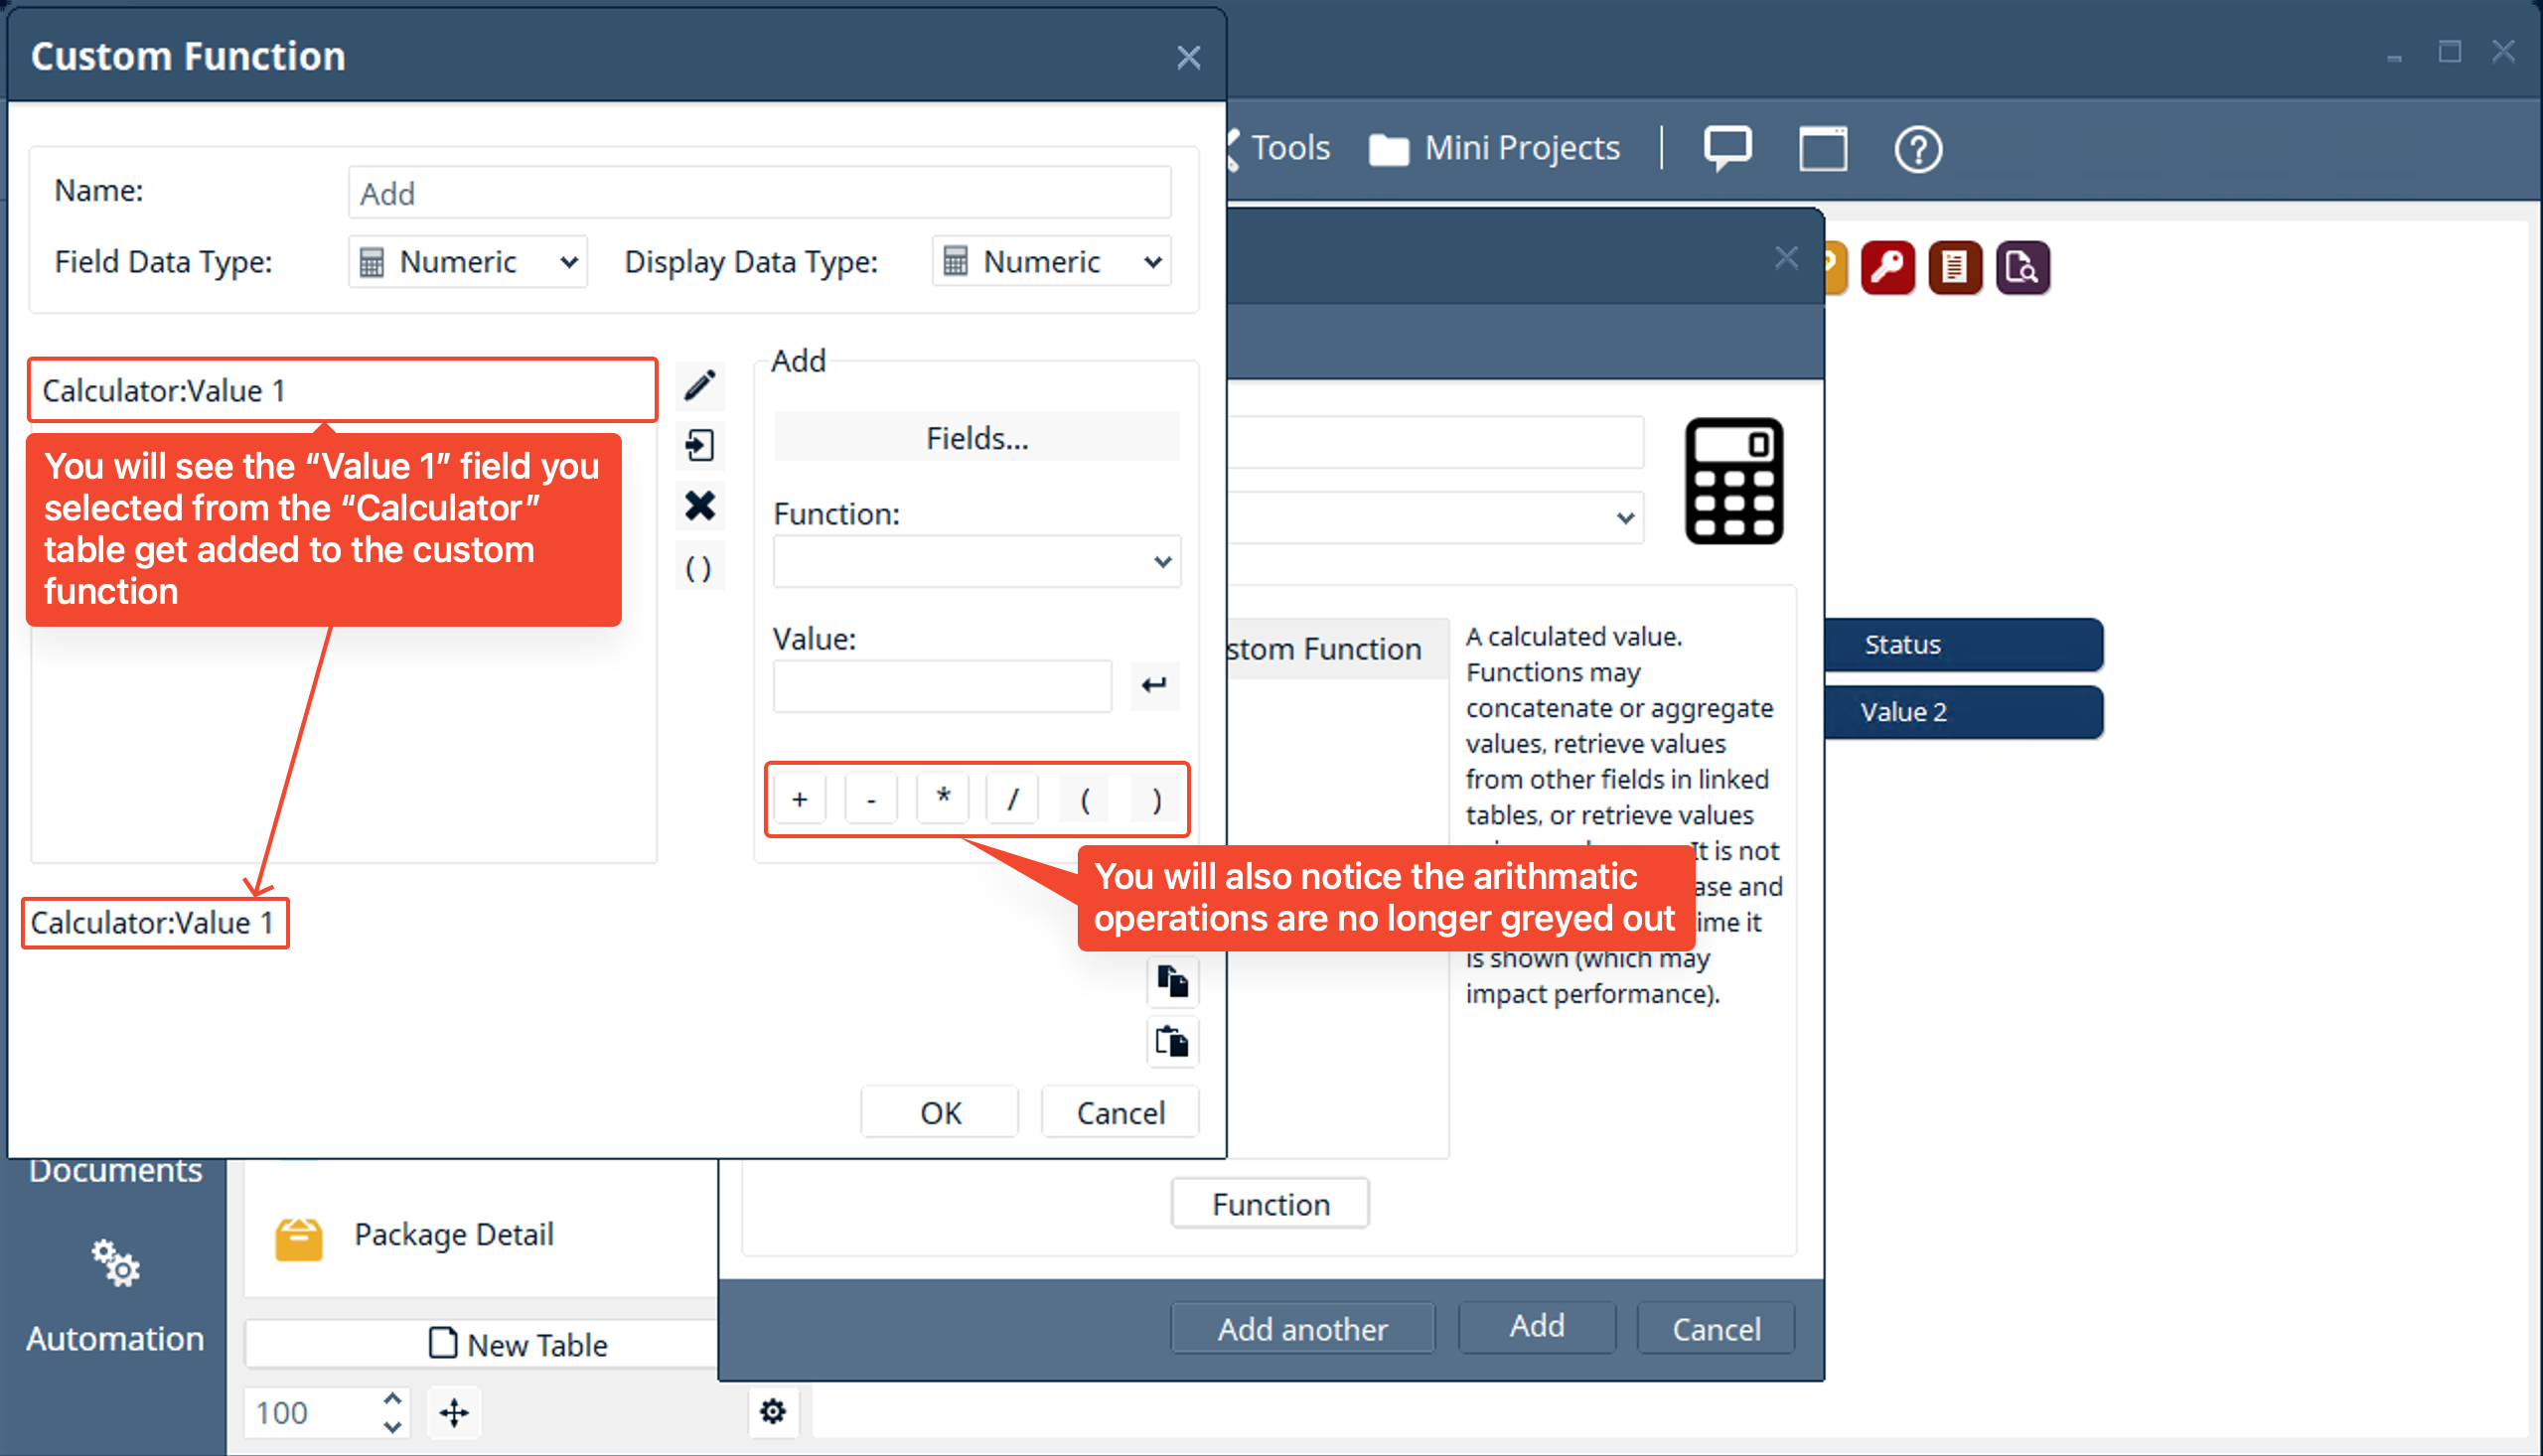
- You will see the “Calculator:Value 1” get added to the custom function and the arithmetic operations are no longer greyed out and can be used in the custom function.
- We will follow the same steps we used to add the “Value 1” field to the custom function to add the “Value 2”. But first we need to add the “Add” operation
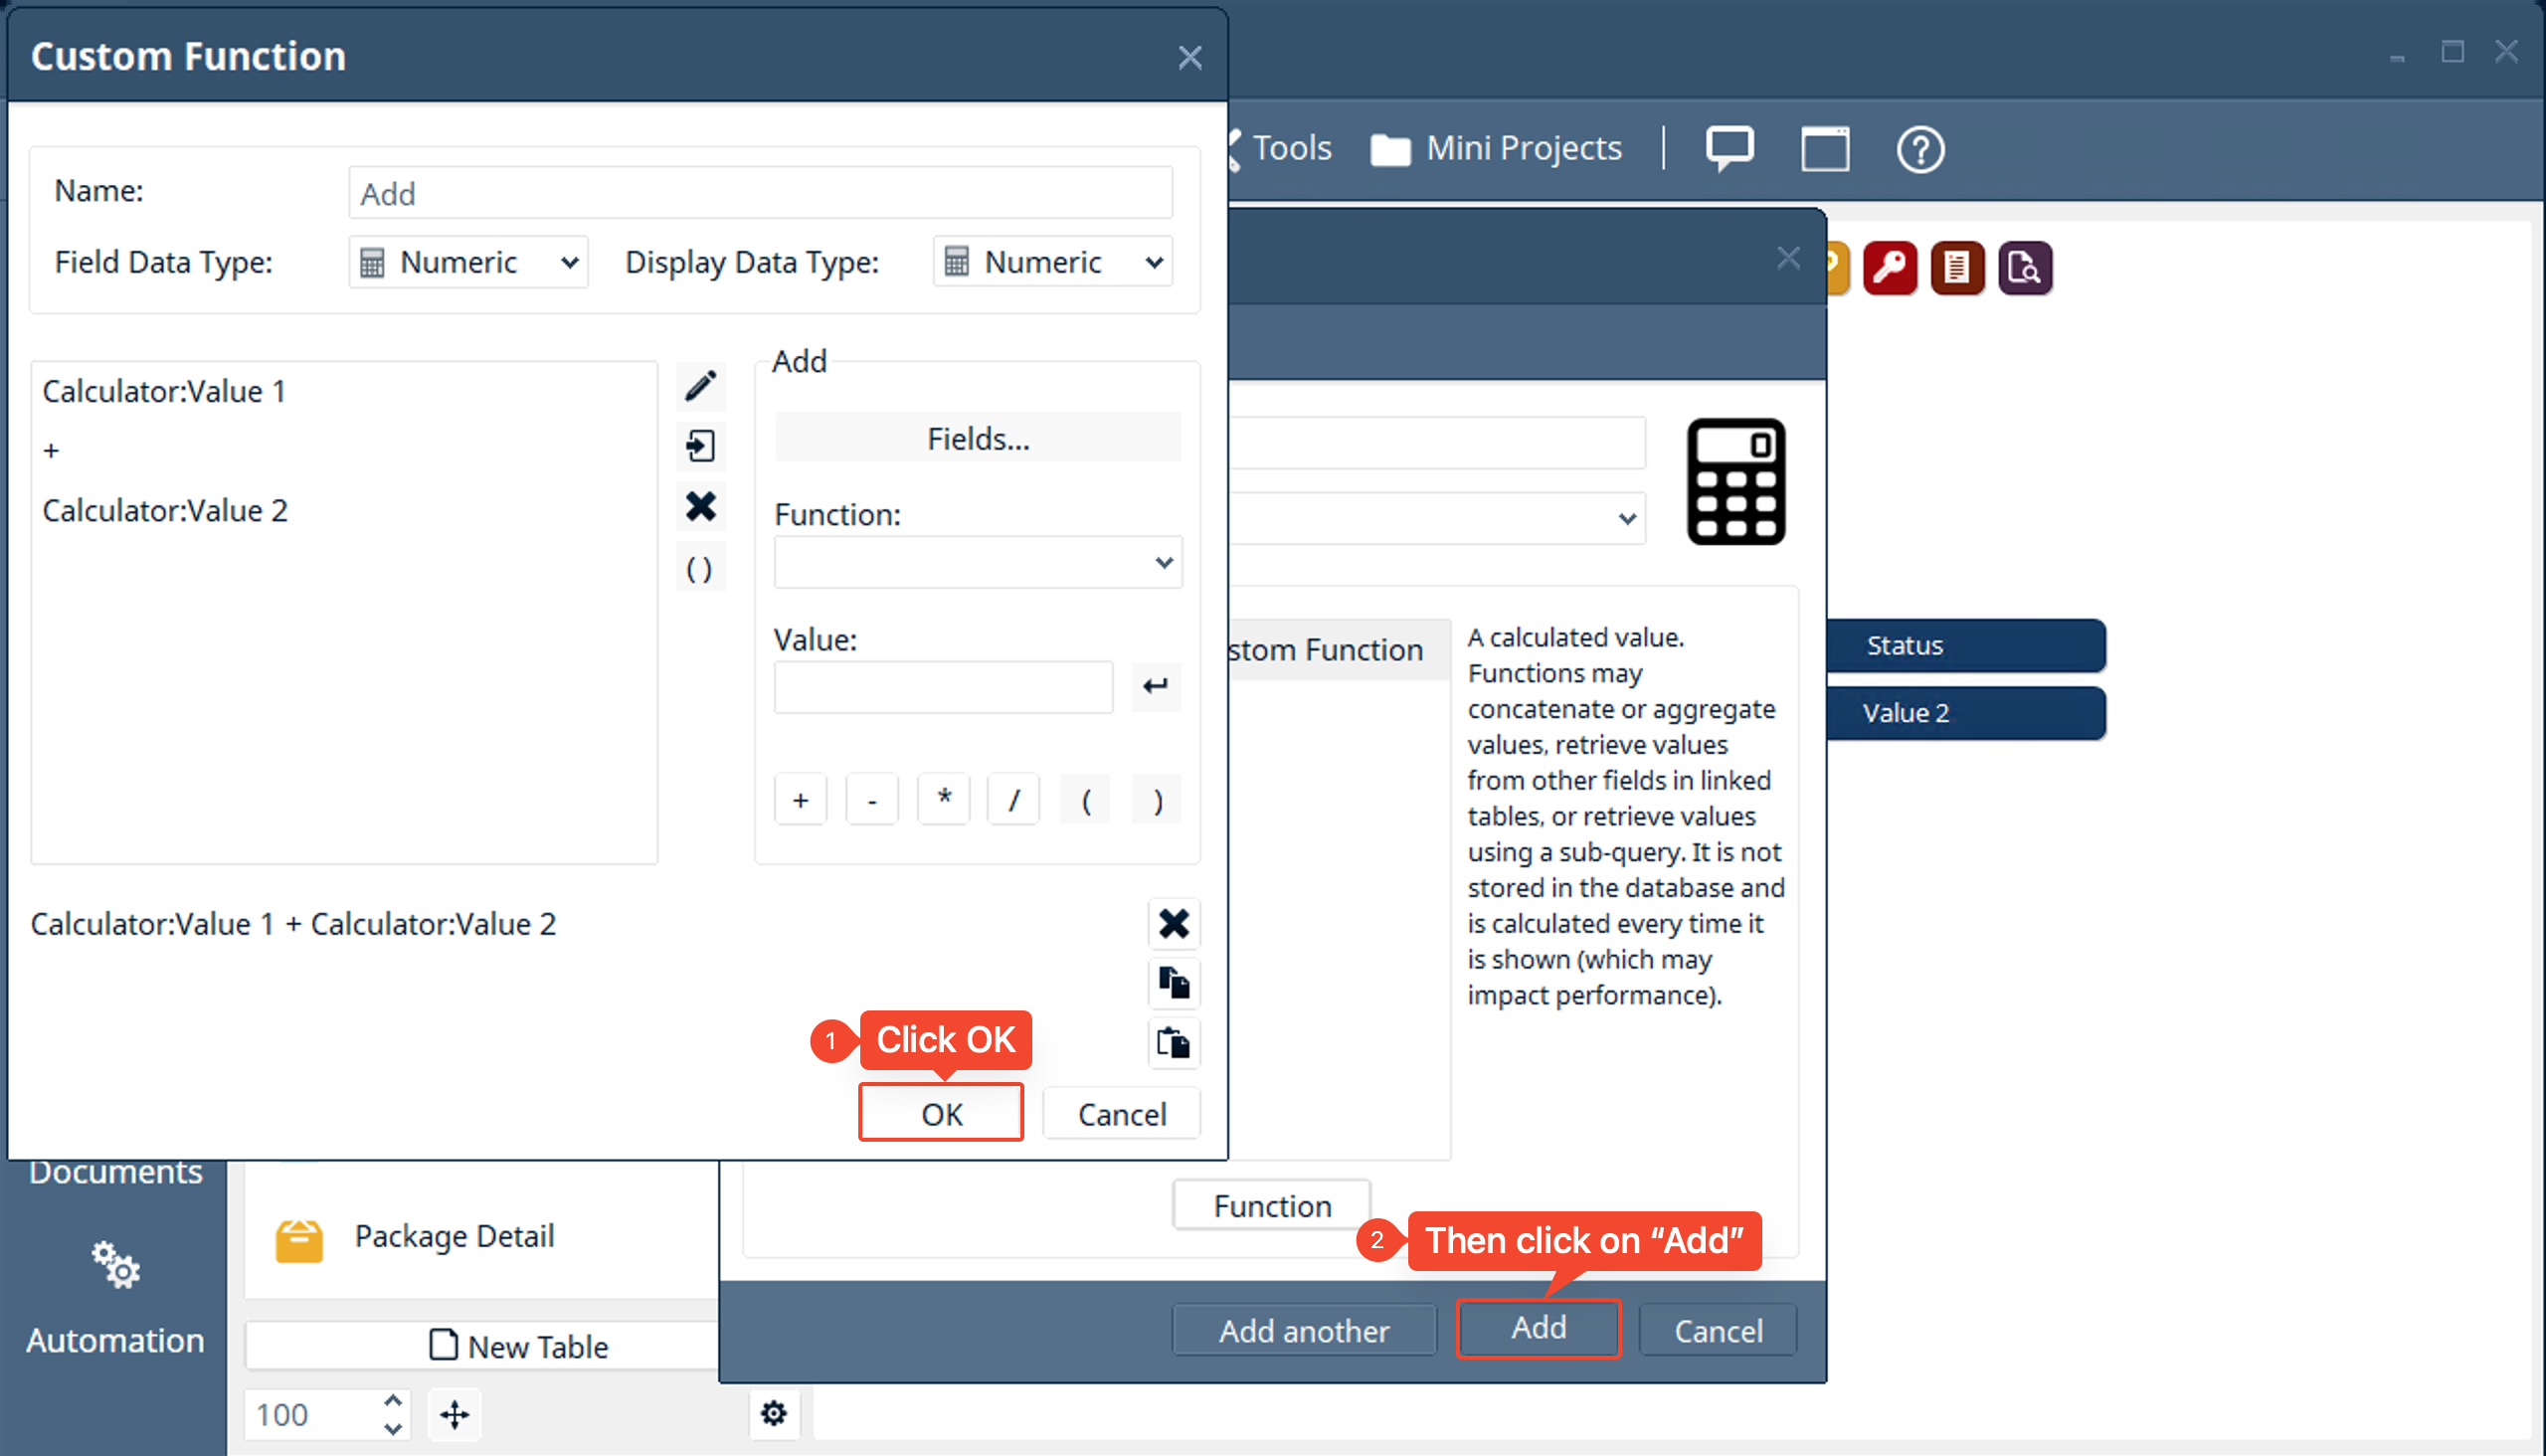
- You will see your custom function for adding “Value 1” and “Value 2” is now complete. Click OK to finish the custom function and “Add”
- You have successfully created a simple calculator that can add two separate values together.
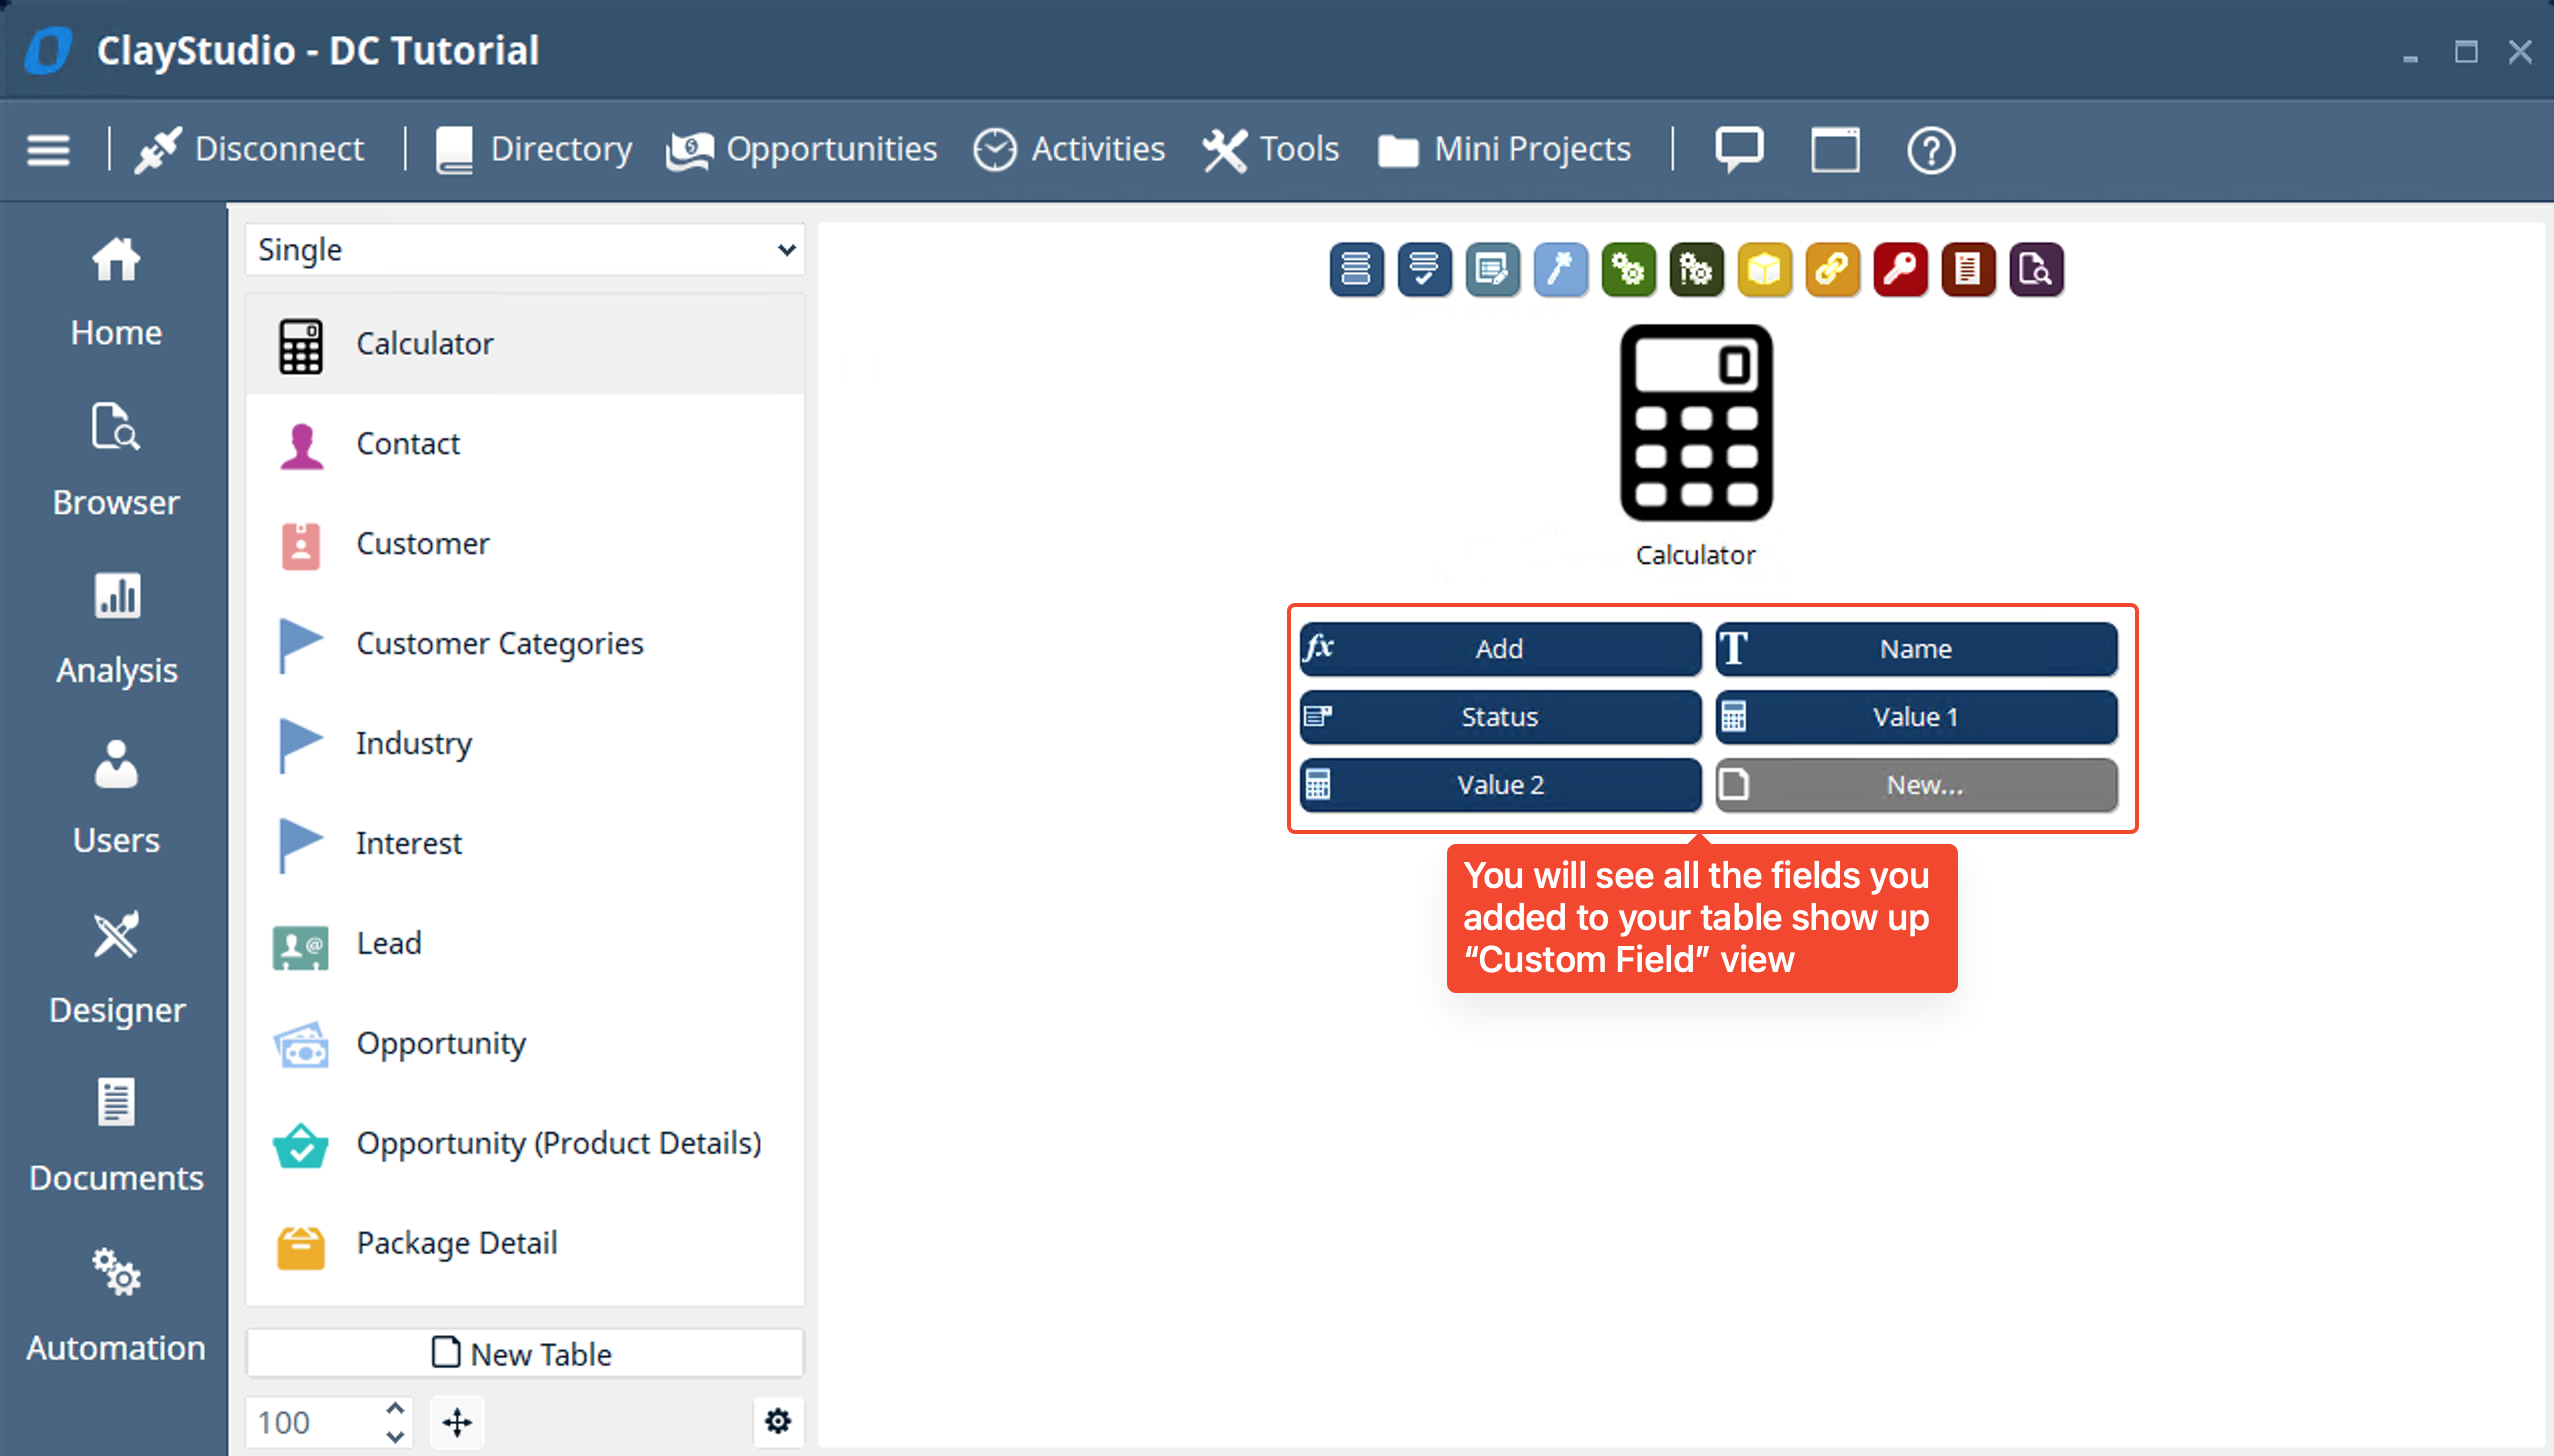
- Now let’s see how this custom function works
- To quickly create a new item in Clay Studio for a newly created table you can easily: Right Click on the table icon → Click on “New Item”
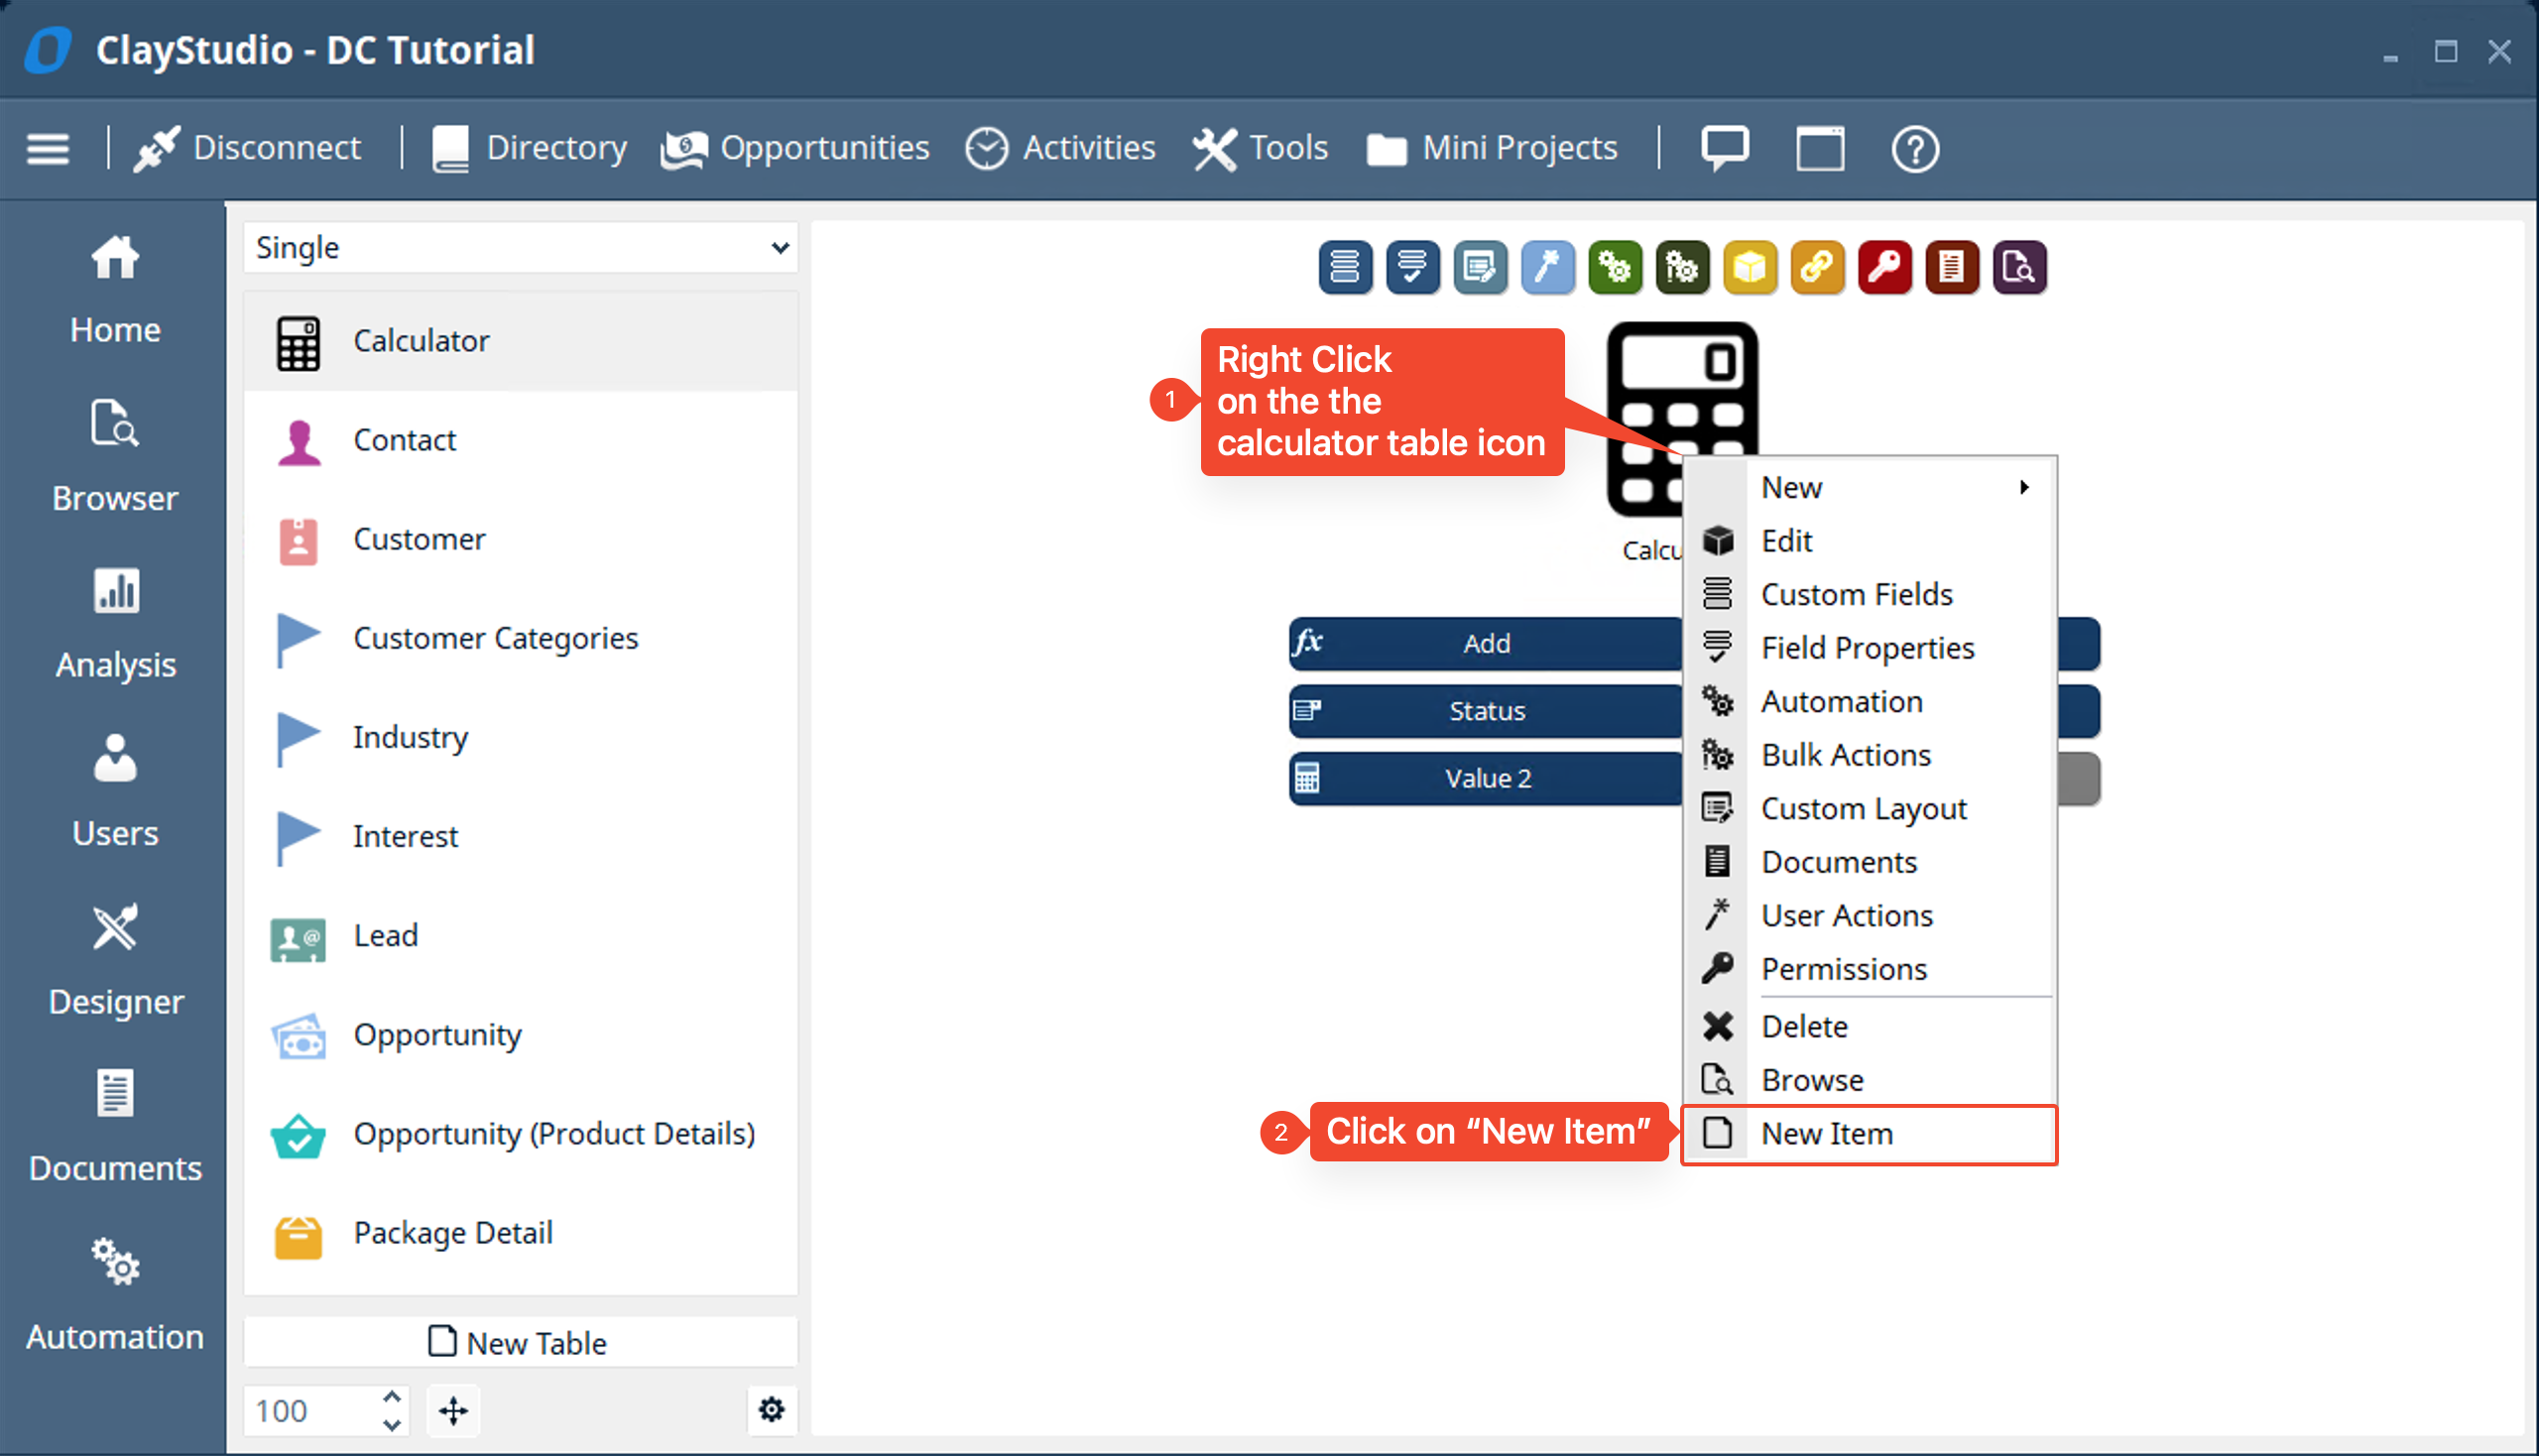
- A window labeled “Calculator” will pop up with the fields: Name, Value 1, Value 2, and Add.
- By default Digital-Clay creates a general layout with the fields you add to your table. This layout can be customized based on your specifications and we will cover customizing layouts for tables in a different mini project (LINK THE OTHER MINI PROJECT***)
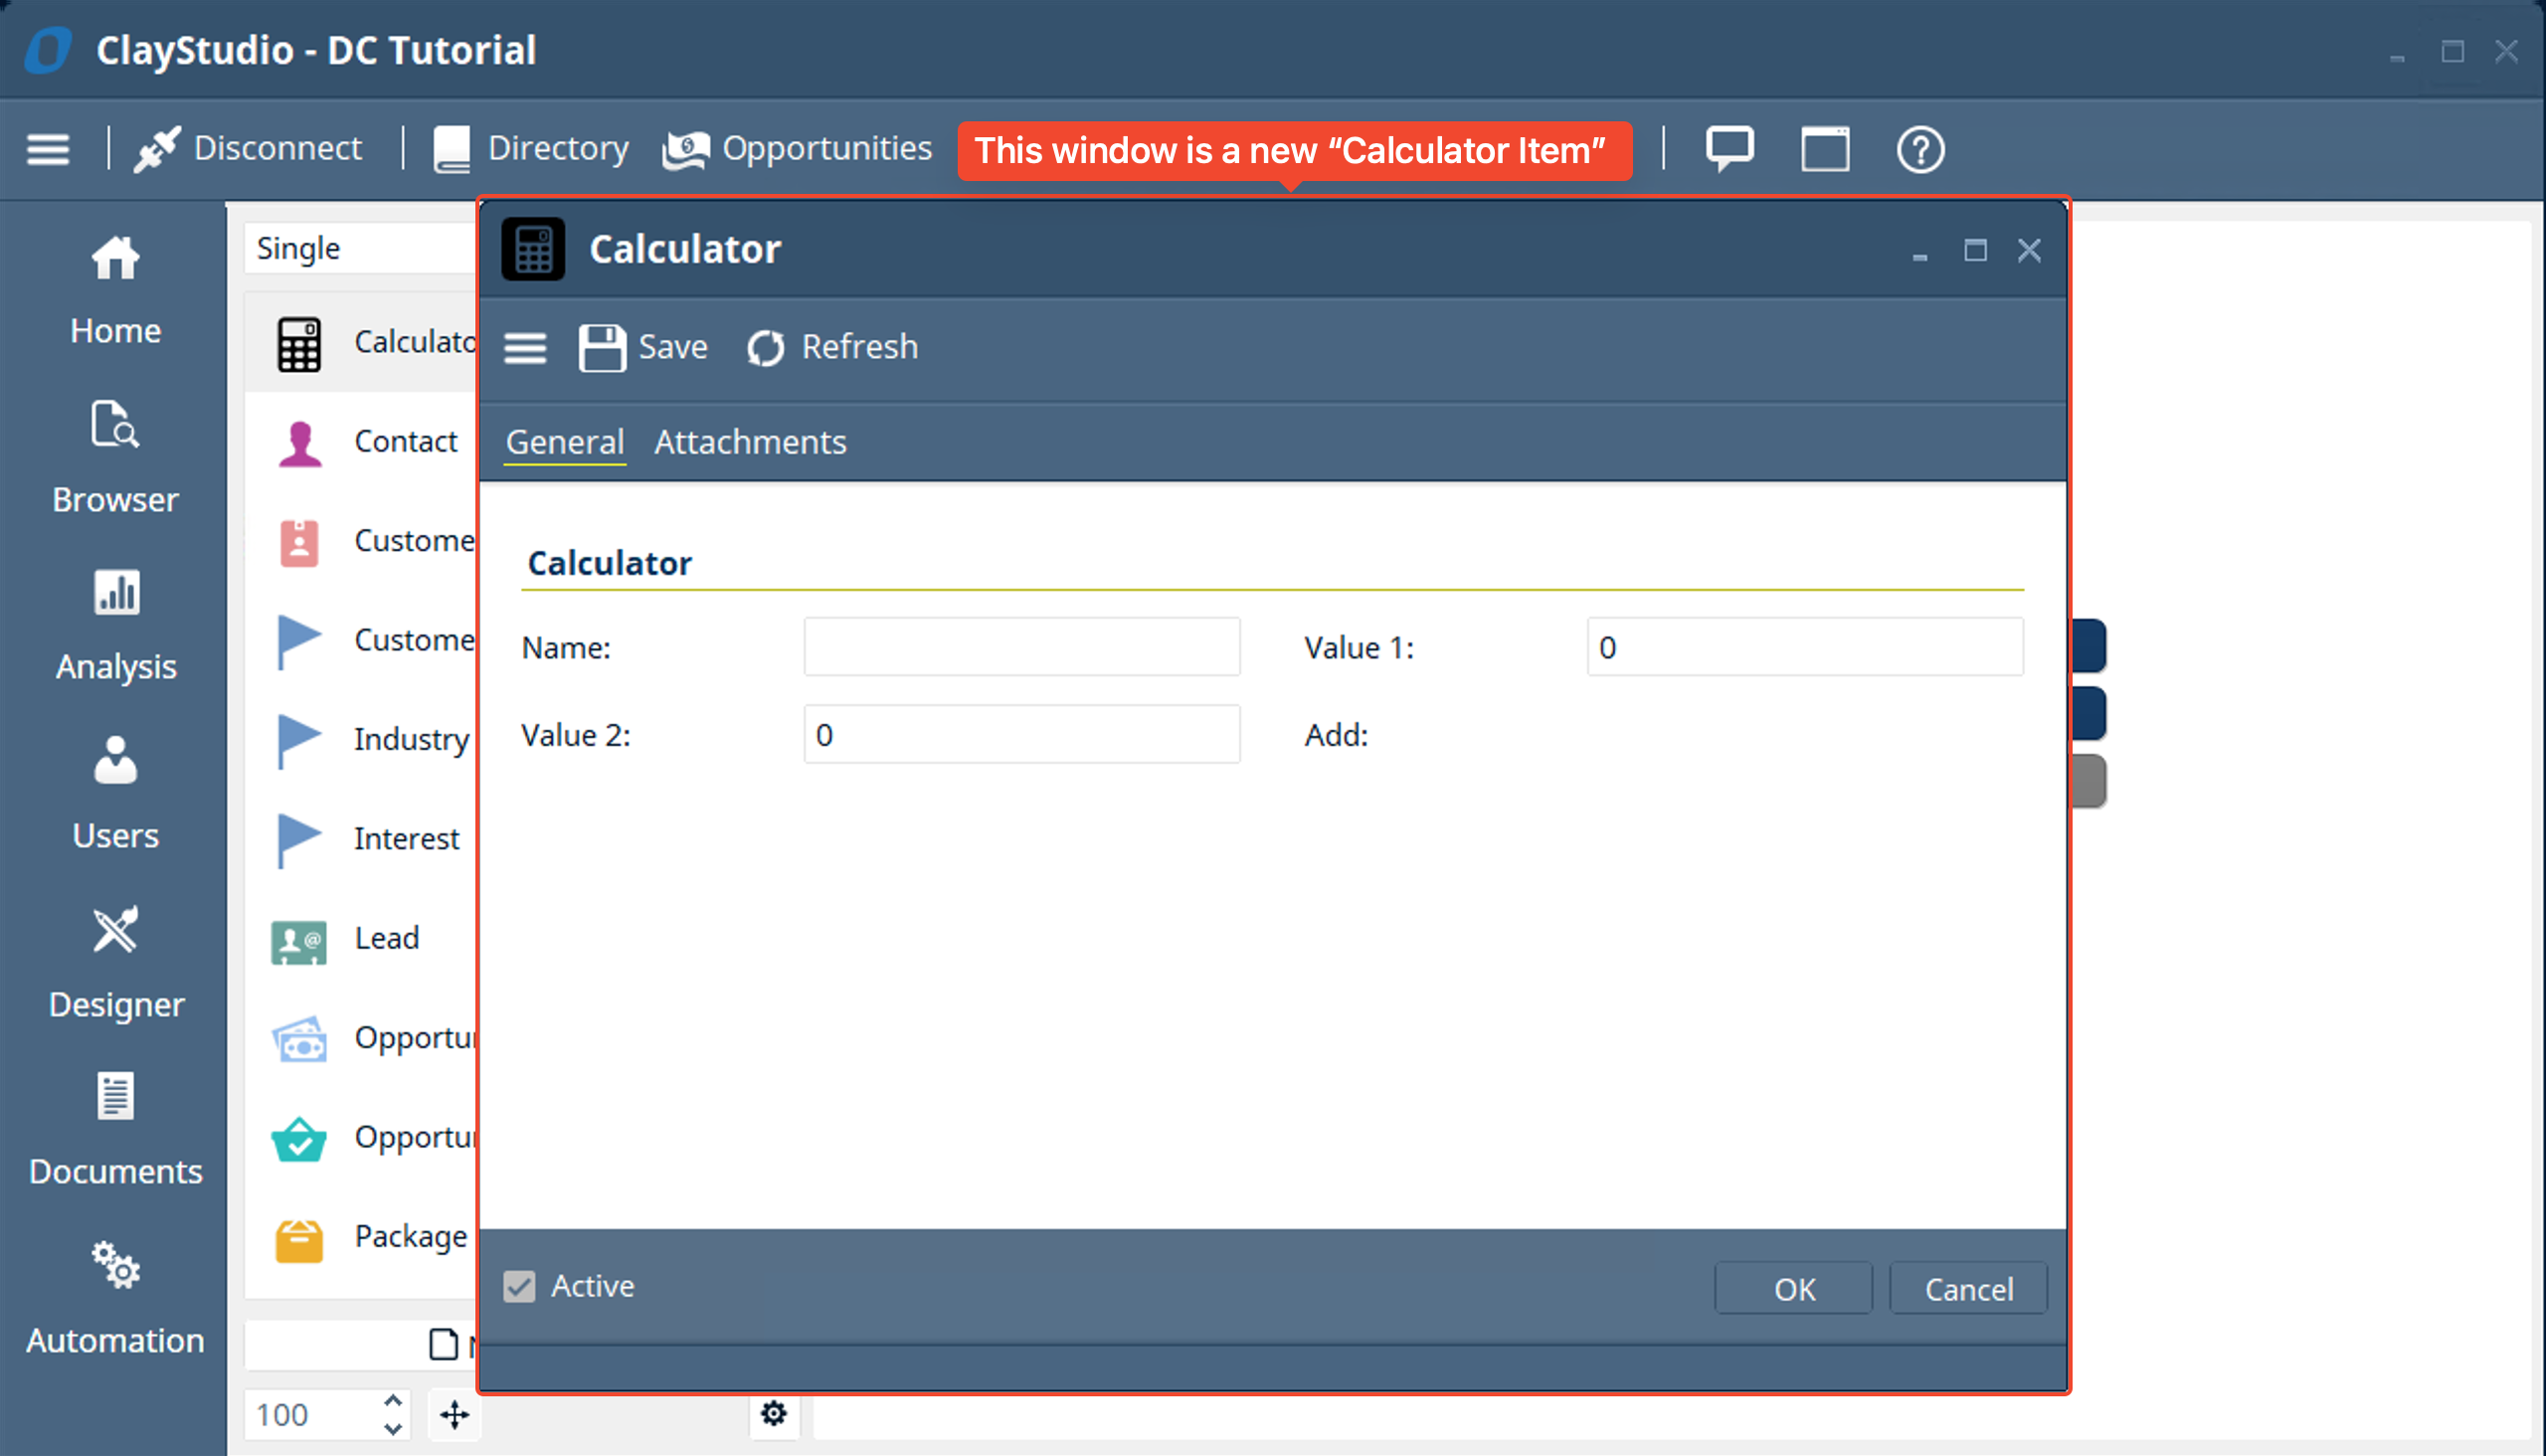
- In this window you can fill out the information you want to calculate. Fill out the fields: Name, Value 1, and Value 2 as shown in the screenshot below. Once filled out click the “Save” button in the toolbar
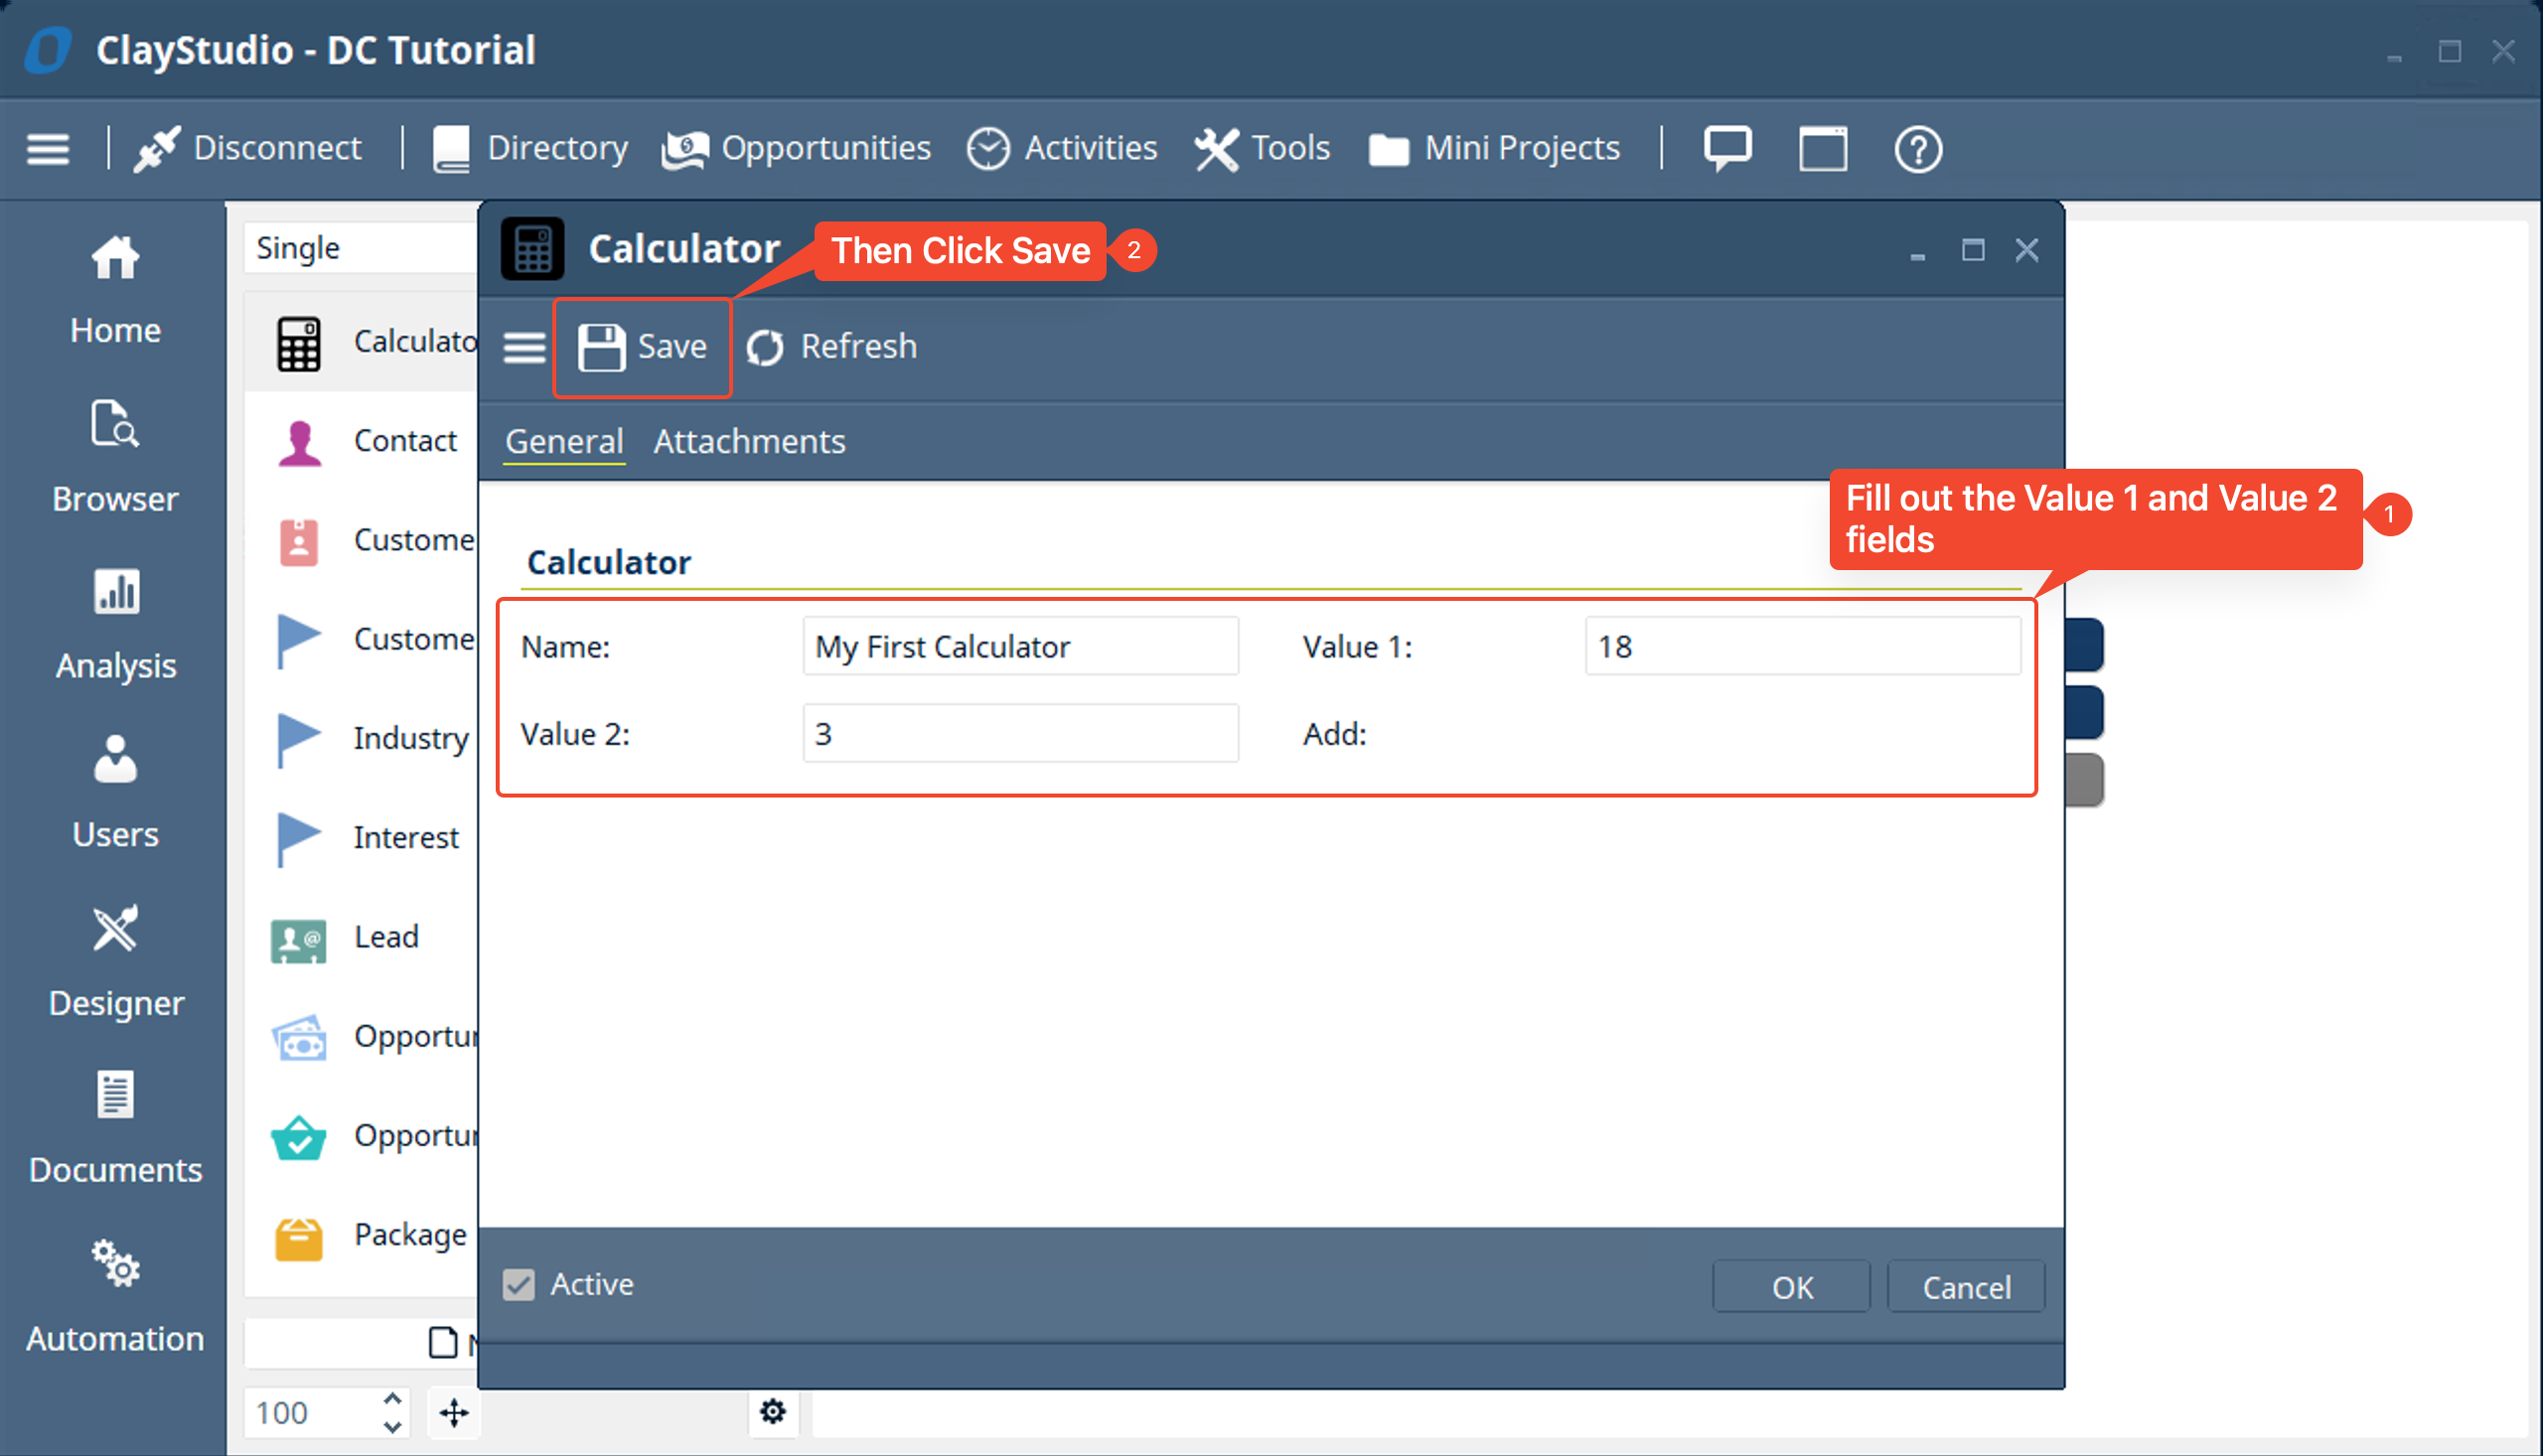
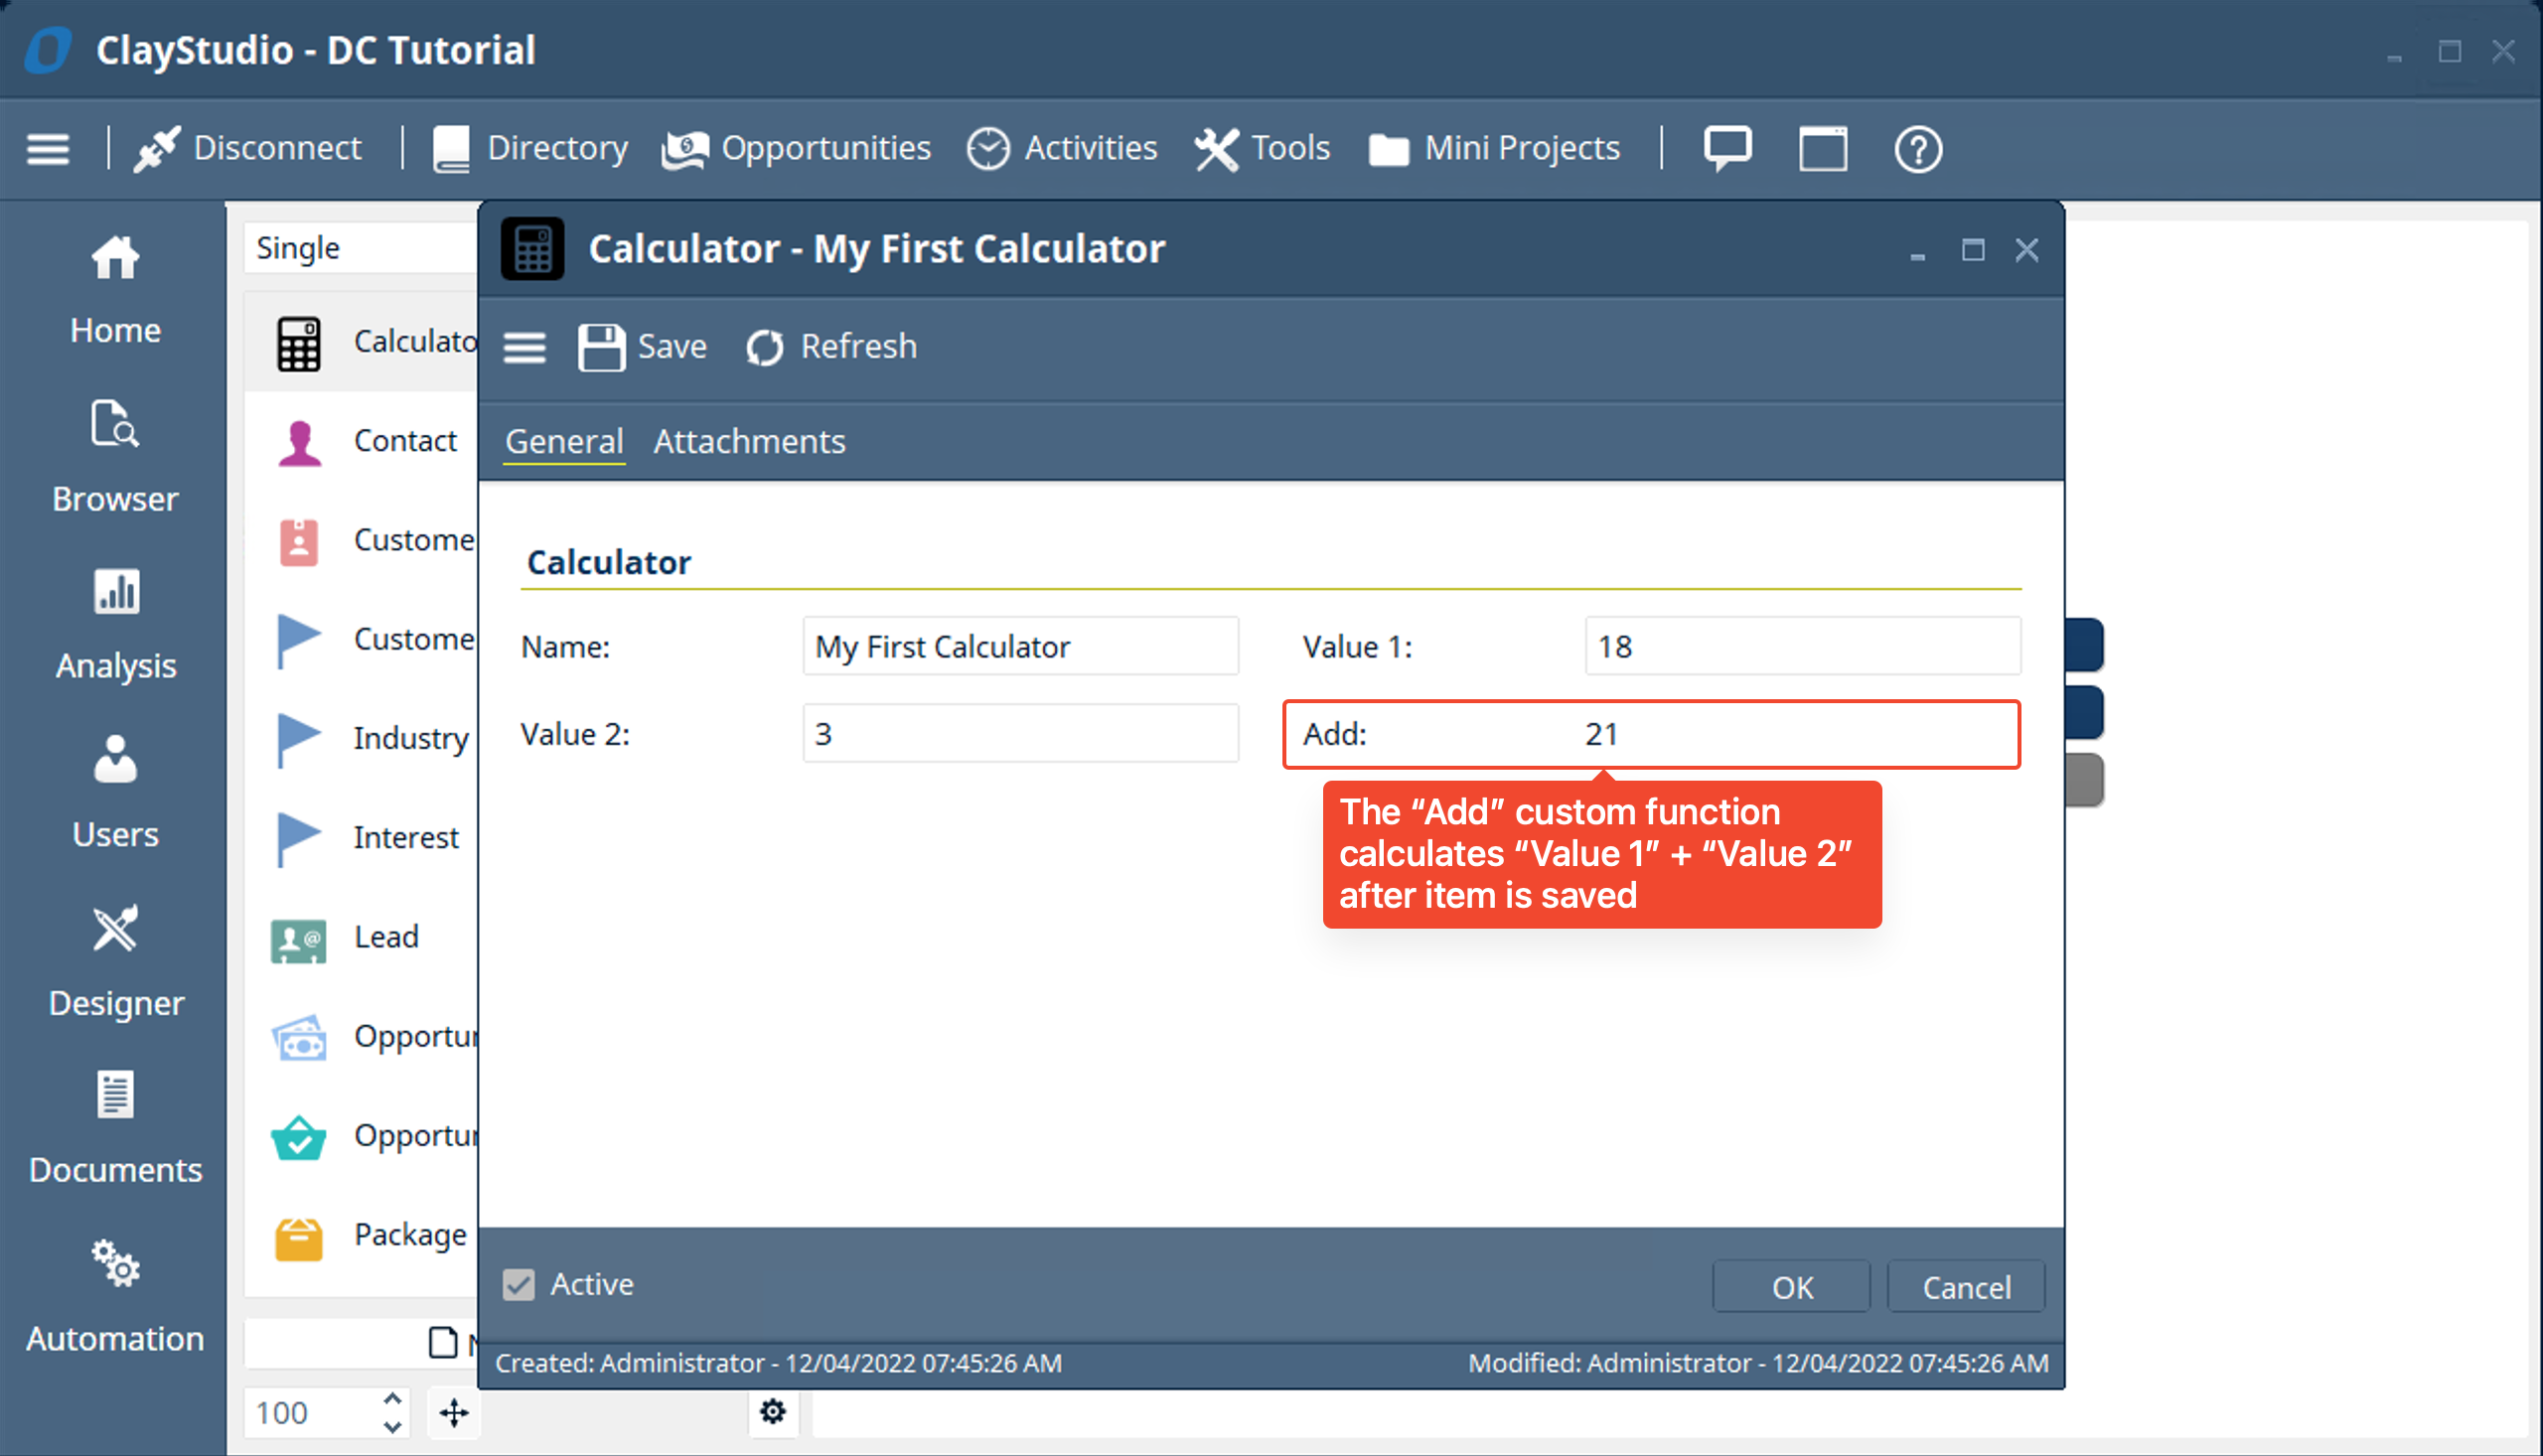
- You’ll notice after you clicked save the “Add” custom field you created calculates the addition of “Value 1” and “Value 2”
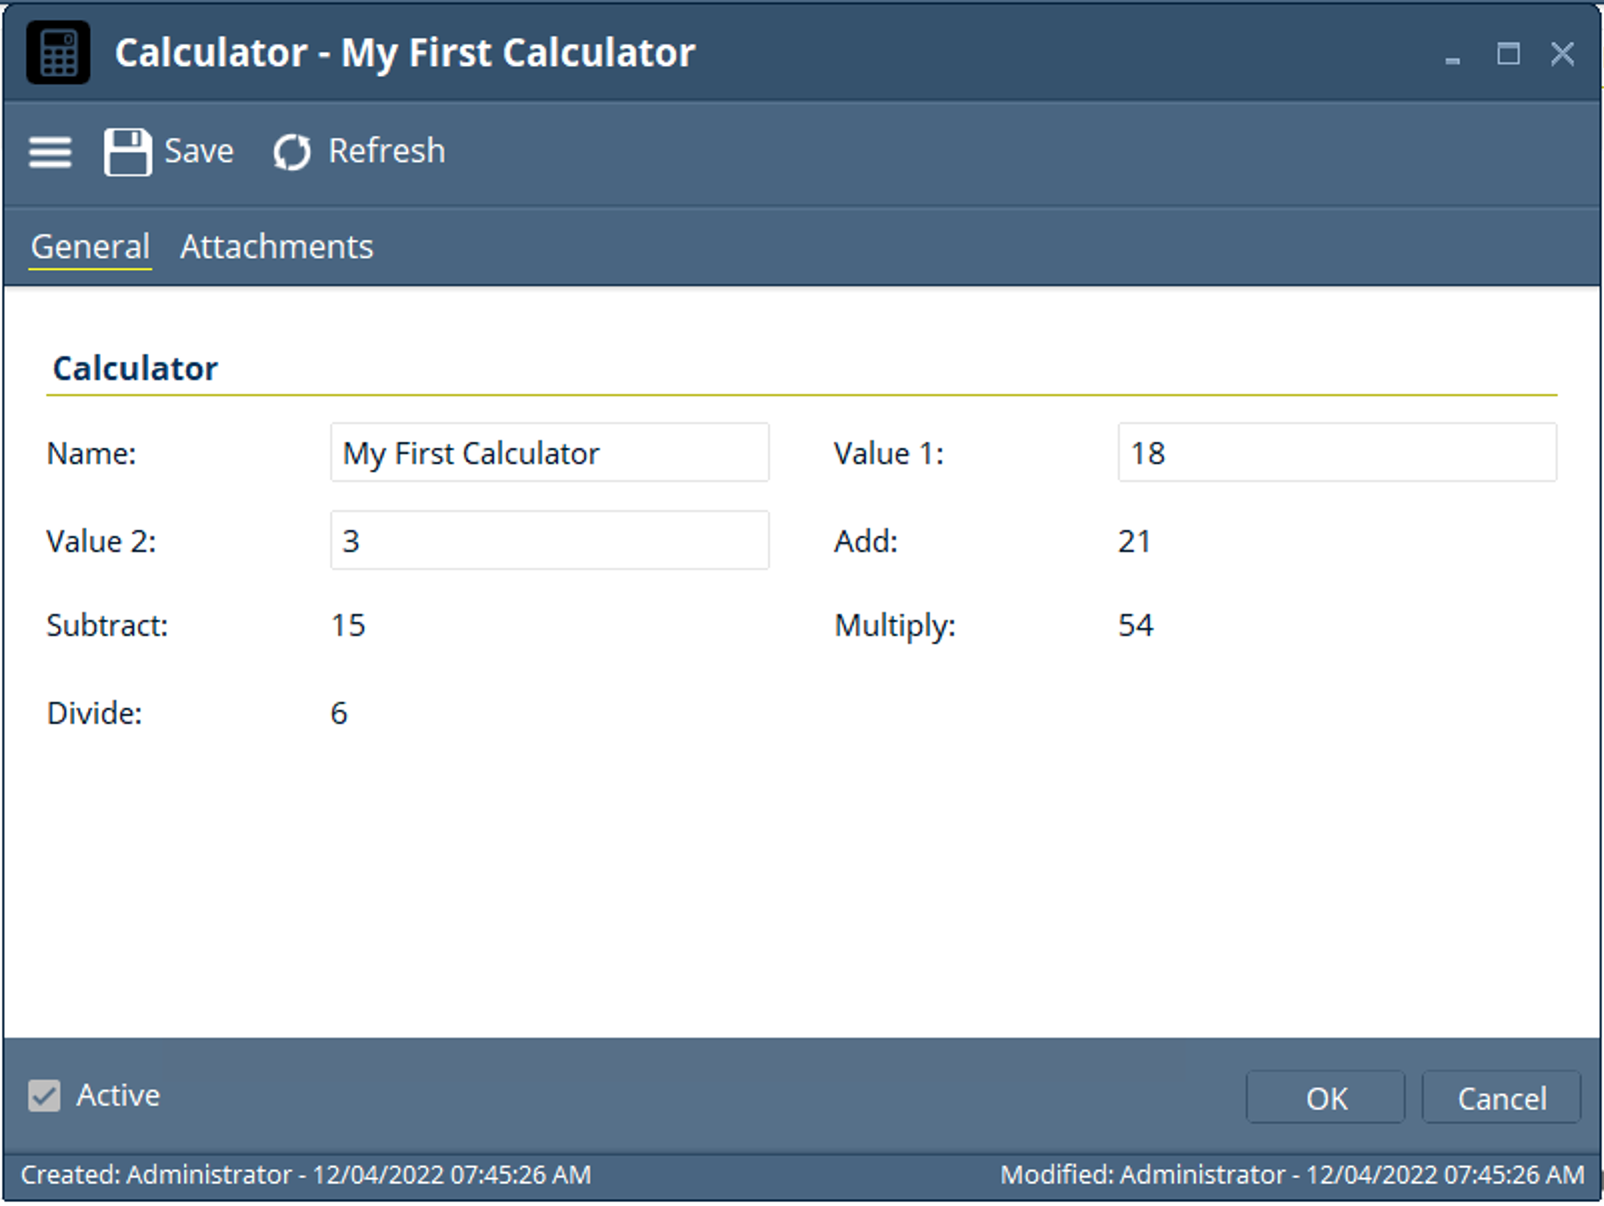
- Congratulations! You have completed your first calculator app. You should now understand some basic functionality of: creating a table, adding some fields, and using a custom function to do some basic math. I challenge you to create the: subtract, multiply, and divide custom functions. If you need help completing the challenge then check the hint in the challenge section below.
Challenge
Using what you learned in the steps above, try to create the:
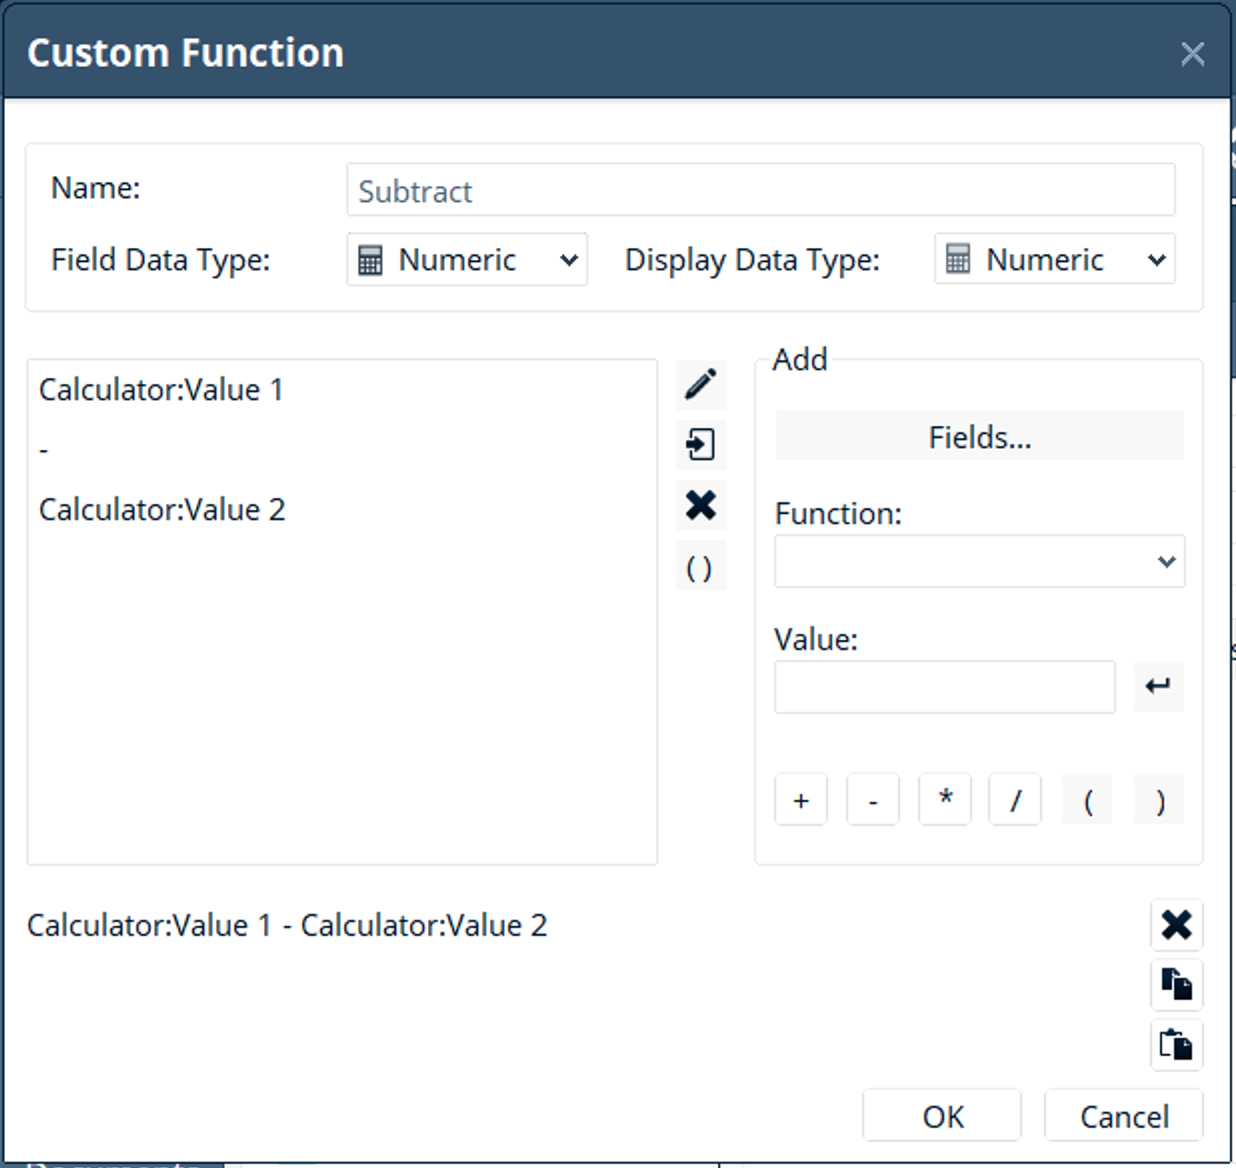
- Subtract ( - )
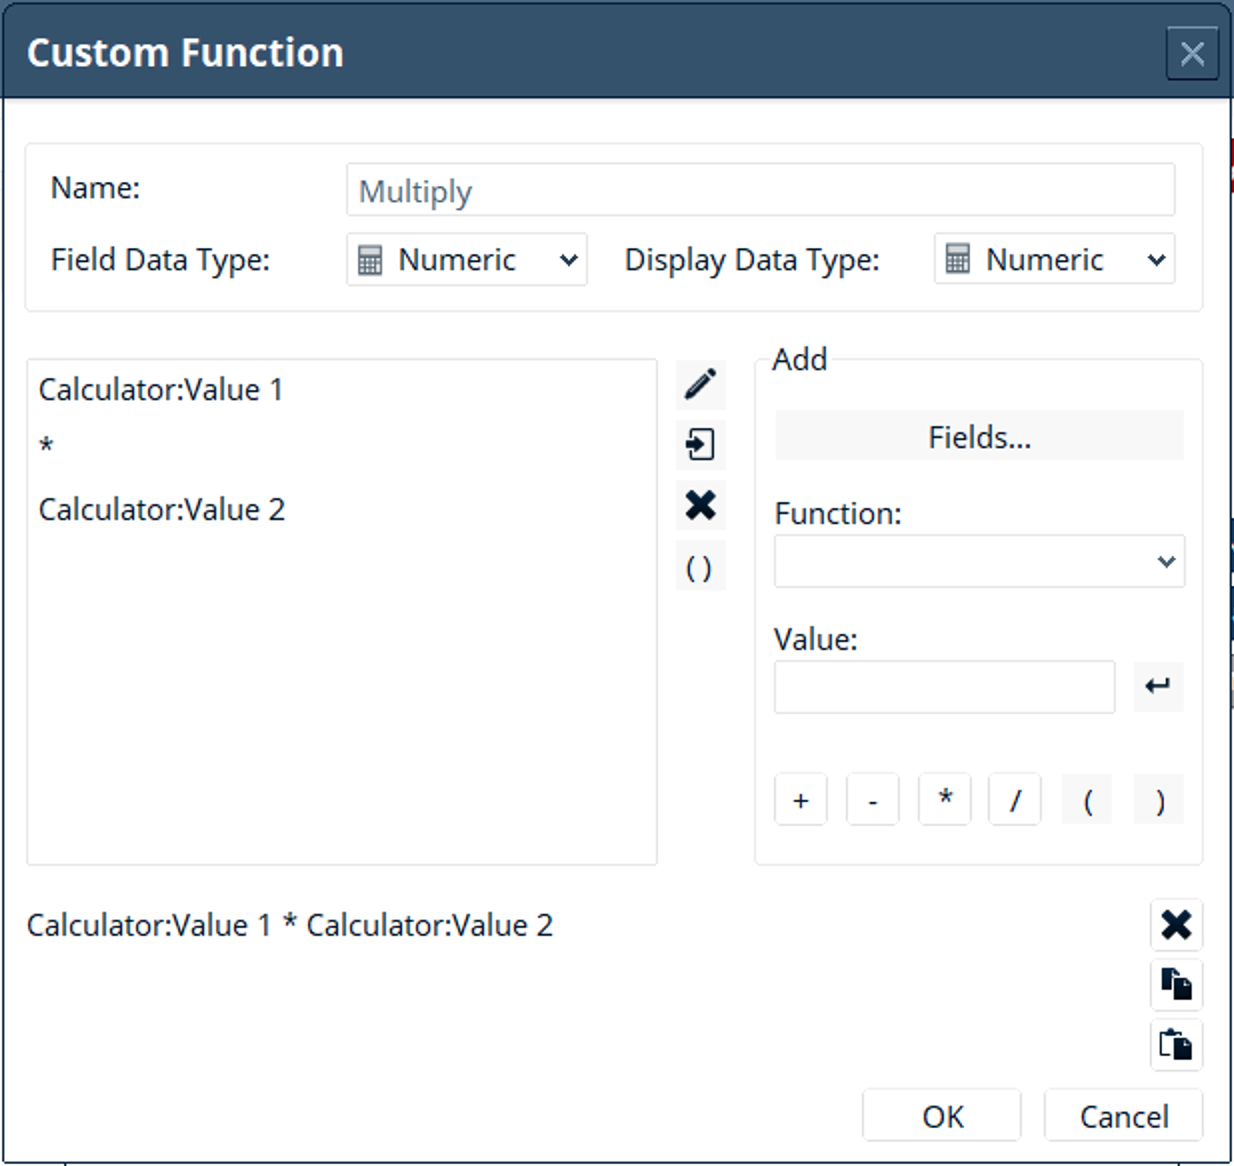
- Multiply ( * )
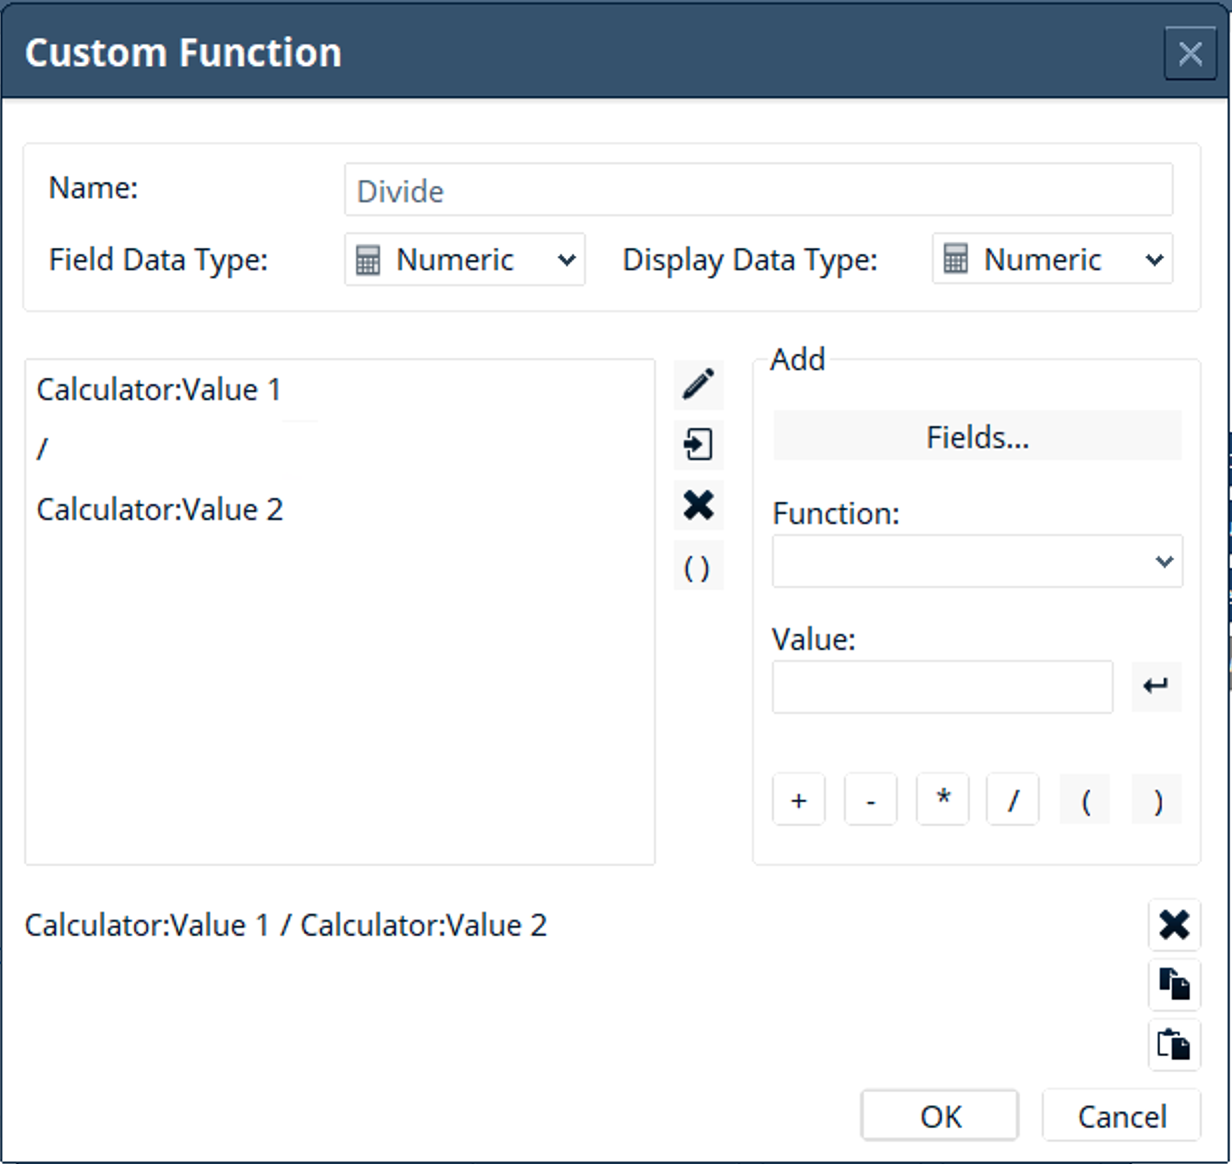
- Divide ( / )
custom functions for the calculator. If you get stuck check the hint below, it should help you with what you need to do to complete the challenge
EXTRA CHALLENGE: Implement the random function in your custom function
Hint:
Subtract hint
Multiply hint
Divide hint